
The mechanics of a perfect scribe line
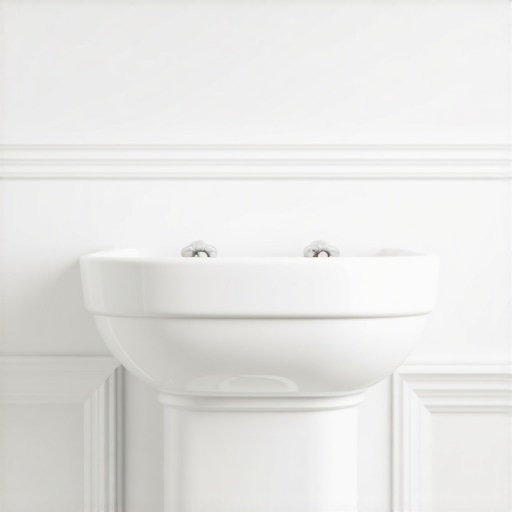
Scribing baseboards around a pedestal sink involves using a compass or scriber to transfer the irregular profile of the porcelain onto the wood, ensuring a zero-tolerance fit that accounts for subfloor deflection. This process requires a steady hand and an understanding of how light interacts with the transition between ceramic and timber. Most amateurs try to eyeball the curve. They end up with a mess. I once spent three days grinding concrete on a job last month just so the floor wouldn’t click like a castanet, and that same level of obsession applies here. If your subfloor is off by even an eighth of an inch, your pedestal sink will sit at an angle, making the scribe line a moving target. I have seen guys try to fill a half-inch gap with cheap caulk. It looks like a marshmallow exploded in the bathroom. A master knows that the scribe is not just about the cut. It is about the preparation of the surface. You are working with a rigid porcelain body and a dynamic wooden or composite board. These two materials do not want to live together. You have to force them into a structural marriage through precise geometry.
Why your bathroom subfloor is lying to you
Subfloor levelness is the foundation of every successful baseboard installation because any dip in the plywood or slab will cause the pedestal to tilt and the baseboard to gap. When you are dealing with showers and moisture, the subfloor often hides rot or slight swelling from old leaks. I have pulled up enough tile to know that what looks flat is often a topographic map of disappointment. You need to use a ten foot straight edge. If you find a valley, you fill it. If you find a hump, you grind it. The pedestal sink is a heavy, concentrated load. It exerts significant pressure on a small footprint. If the subfloor has any deflection, the sink will rock. This movement will eventually crack the grout or the seal at the baseboard. You must ensure the substrate is rigid. The TCNA (Tile Council of North America) has strict rules for deflection. Follow them. Use a high-quality self-leveling compound if you are over concrete. If you are over wood, ensure the joist spacing meets the requirements for a heavy porcelain fixture. This is the structural engineering of flooring. It is not a hobby. It is a science. You are managing the physics of weight distribution across a surface that is often less than perfect.
“A floor is only as good as the subfloor beneath it; deflection is the enemy of every joint.” – Master Flooring Axiom
The chemistry of moisture resistant materials
Selecting the right material for bathroom baseboards depends on the humidity levels and the likelihood of direct water contact from showers or sink overflow. In a swampy environment like Houston, using solid wood baseboards is a recipe for disaster. The high humidity will cause the wood fibers to expand. The paint will crack. The wood will cup. You are better off with a high-quality PVC or a moisture-resistant MDF. However, if you want the look of chic baseboard designs, you must seal every single edge. This includes the back of the board and the freshly cut scribe line. I use a primer that is specifically rated for high-moisture environments. Think about the molecular structure of the board. Wood is a series of straws. It sucks up water from the bottom. If your bathroom floor gets wet, those straws will pull the water up. This leads to mold. It leads to the baseboard pulling away from the wall. You need to create a chemical barrier. Use a 100 percent silicone sealant at the bottom edge. Do not use cheap acrylic. It will shrink. It will fail. You want a bond that remains flexible while blocking every molecule of liquid water from entering the substrate.
| Material Type | Moisture Resistance | Scribe Ease | Expansion Rate |
|---|---|---|---|
| Solid Oak | Low | Moderate | High |
| PVC Composite | Maximum | Easy | Low |
| MDF (Standard) | Very Low | Easy | High |
| HDPP (Poly) | Maximum | Difficult | Zero |
The ghost in the expansion gap
The expansion gap is the invisible space required around the perimeter of a floor to allow for the natural movement of materials due to temperature and humidity changes. Many people think they can jam the baseboard tight against the floor. They are wrong. You need a small gap. But when you are scribing around a pedestal sink, that gap becomes a visual problem. You have to hide it. This is where the magic of the back-bevel comes in. When you cut your scribe line, do not cut it at a 90 degree angle. Cut it at a 45 degree angle toward the back of the board. This creates a sharp point that touches the porcelain while the rest of the board stays back. It allows for a bit of movement without showing a massive gap. It is a trick I learned after years of watching baseboard makeover ideas fail because the installer didn’t account for the house settling. You also have to think about the grout lines if the floor is tiled. A pedestal sink sitting on tile is a nightmare if the tile isn’t perfectly flat. Your scribe line will have to account for every single grout joint dip. It is tedious. It is frustrating. But it is the difference between a professional job and a weekend warrior mistake.
Tools of the master flooring architect
Precision tools like a profile gauge, a high-tension compass, and a coping saw are essential for transferring the complex curves of a pedestal base to a rigid board. You cannot do this with a jigsaw. A jigsaw is too aggressive. It vibrates the board. It chips the finish. You need a hand-operated coping saw with a fine-tooth blade. I prefer a blade with at least 24 teeth per inch. This allows for a clean cut through the wood fibers. You should also have a set of rasps and files. Once the initial cut is made, you will need to fine-tune the edge. The porcelain of a pedestal sink is never perfectly symmetrical. It is fired in a kiln. It warps slightly. One side will be different from the other. You must scribe both sides independently. Do not assume you can mirror the cut. Here is a checklist of what you need on your bench.
- Pro-grade scribe compass with a locking nut
- Hardened graphite pencil (2H or harder)
- Fine-tooth coping saw with extra blades
- Half-round wood rasp for aggressive shaping
- 80-grit and 120-grit sandpaper for final fitting
- High-quality silicone caulk that matches the porcelain
Regional humidity and the porcelain bond
The climate of your region dictates how much room you must leave for material expansion and the type of adhesive required for a lasting bond. In the dry heat of Phoenix, your wood baseboards will shrink. If you scribe them tight in the summer, you will see gaps in the winter. In a humid coastal area, the opposite happens. You must acclimate your materials. I tell people to leave the baseboards in the room for at least 72 hours. Do not skip this. I have seen $15,000 floors cup because the installer was in a hurry. When you are working near showers, the local building codes might require specific vapor barriers. Always check. The bond between the baseboard and the wall should be mechanical and chemical. Use finish nails into the studs. Use a high-tack construction adhesive on the back. But do not glue the board to the pedestal sink itself. The sink needs to be able to move slightly. The house will breathe. The floor will shift. If you glue the board to the sink, something will crack. Usually, it is the baseboard. Sometimes, it is the porcelain. Use a flexible sealant at the transition. This allows for the micro-movements of the structure without breaking the visual seal. This is the structural engineering approach to finishing a bathroom. It ensures that your work lasts for decades, not just until the next season change.
“Precision in the scribe reflects the soul of the installer; a tight fit is a silent testament to mastery.” – Flooring Architect Handbook
In the end, scribing around a pedestal sink is about patience. It is about understanding that the material has a mind of its own. You are the conductor. You are making the wood and the porcelain play the same song. Take your time. Check your marks. Cut slow. If you do it right, the baseboard will look like it grew out of the side of the sink. That is the goal. That is why we do this. For the one person who notices the 1/8 inch gap and appreciates that it isn’t there. Your bathroom deserves that level of care. Whether you are looking at modern designs for 2025 or a classic restoration, the scribe is the king of the finish. It is the final touch that separates a house from a home.