
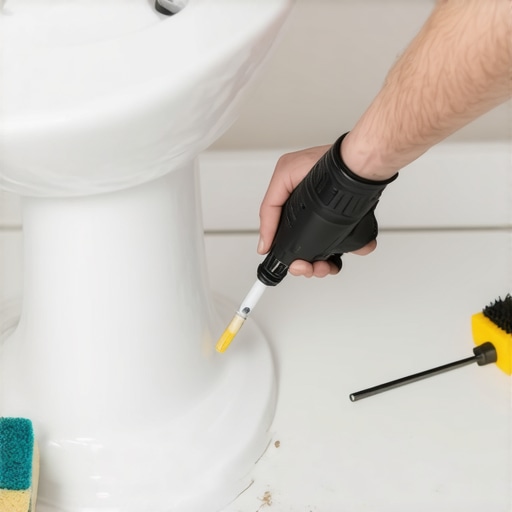
Mastering the physics of the pedestal sink seal
Most guys skip the leveling compound. They think the underlayment will hide the dip. It won’t. I spent three days grinding concrete on a job last month just so the floor wouldn’t click like a castanet, and that same level of obsession is what you need when you approach a pedestal sink. A sink is not just a ceramic bowl sitting on a stick. It is a heavy mechanical assembly that exerts specific pressure points on your tile. If the floor is not dead level, that pedestal will rock. When it rocks, the caulk joint fails. When the joint fails, moisture seeps under the vitreous china and begins to rot the subfloor or degrade the thinset bond. I have seen thousand dollar bathrooms ruined because an installer treated the base like a decorative piece of trim rather than a structural transition.
The structural foundation of a stable sink
A stable pedestal sink installation depends entirely on the flatness of the floor and the rigidity of the subfloor underneath the tile. Before you ever touch a tube of sealant, you must ensure the pedestal base makes full contact with the tile surface to prevent mechanical shear stress on the bead. If there is a gap, you do not fill it with caulk. You shim it with stainless steel or plastic shims until the unit is rock solid. The National Wood Flooring Association and Tile Council of North America both emphasize that deflection is the enemy of any joint. When you step near the sink, the floor should not move. If the subfloor has too much bounce, the movement will snap the chemical bond of even the best 100 percent silicone. I always check the floor with a 10 foot straightedge. Any variation over an eighth of an inch within ten feet is a recipe for disaster. This is why grout restoration secrets for long-lasting results often start with fixing the substrate, not just the surface.
“A floor is only as good as the subfloor beneath it; deflection is the enemy of every joint.” – Master Flooring Axiom
Selecting the right chemical bond for the job
Choosing between acetoxy cure silicone, neutral cure silicone, and siliconized acrylic determines the lifespan and flexibility of the sink base seal. For a pedestal sink on tile, a 100 percent silicone sealant is the only professional choice due to its high elongation and waterproof properties. You have to understand the chemistry. Acetoxy silicone releases acetic acid (it smells like vinegar) as it cures. It is great for glass and ceramic, but it can sometimes react with natural stone. Neutral cure silicone is better for stone floors but takes longer to set. Never use cheap painter’s caulk here. It lacks the Shore A hardness required to withstand the weight and vibration of a bathroom. I have seen people try to use grout at the base, which is a massive mistake. Grout is rigid. It will crack the second the house settles. If your grout is already failing, you might look at how to refresh grout without replacing it, but never use it as a substitute for a flexible movement joint at the floor-to-fixture transition.
| Sealant Type | Elongation Capacity | Best Use Case | Cure Time |
|---|---|---|---|
| 100% Silicone | 500% | Vitreous China to Tile | 24 Hours |
| Siliconized Acrylic | 25% | Baseboards to Drywall | 4 Hours |
| Polyurethane | 35% | Exterior Concrete Joints | 72 Hours |
Mechanical preparation of the tile surface
Surface preparation is the most overlooked step in the caulking process and involves removing all traces of dust, old adhesive, and moisture. You must use denatured alcohol or a high-strength solvent to strip the oils from the floor and the ceramic base to ensure a molecular bond. If you just wipe it with a wet rag, you are leaving a film of minerals that will prevent the silicone from sticking. This is especially true in bathrooms where hairspray or soap scum has accumulated. I spend more time cleaning the floor than I do pulling the trigger on the gun. If the tile is textured, you need to use a stiff brush to get the dust out of the valleys of the grain. This is similar to how you would prepare for tile cleaning tips for a sparkling bathroom in 2025, where the goal is deep pore extraction rather than just surface wiping.
The physics of the perfect bead application
The trick to a perfect radius on a round pedestal base is the double-tape method which creates a defined channel for the sealant. By placing painters tape on the floor and the sink base with a sixteenth of an inch gap on either side, you control the width and depth of the bead. Pull the trigger with consistent pressure. You want a steady flow, not a series of globs. Once the bead is down, tool it with a finger dipped in a mixture of water and concentrated dish soap. This reduces surface tension and allows your finger to glide over the silicone without dragging it. The goal is a concave profile that sheds water away from the base. A common error is applying too much material. You are not trying to fill a canyon. You are creating a water-tight bridge. If you have done your job right, the bead should be almost invisible. This level of detail is what separates a master from a handyman. It is the same precision needed when installing chic baseboard designs that transform rooms in 2025, where every mitre and every caulk line matters for the final look.
- Ensure the sink is bolted to the wall and floor shims are tight.
- Vacuum the joint to remove microscopic grit.
- Apply blue painter’s tape to the floor following the curve precisely.
- Apply tape to the sink base exactly parallel to the floor tape.
- Cut the caulk nozzle at a 45 degree angle for a smooth bead.
- Tool the joint immediately before the silicone skins over.
- Remove the tape while the silicone is still wet to get a crisp edge.
The silent killer of bathroom floors
While a sealed base looks clean, an airtight seal all the way around can actually trap water if the internal plumbing develops a slow leak. A contrarian but vital professional tip is to leave a small two inch gap in the caulk at the very back of the pedestal base. This acts as a weep hole. If the wax ring or the p-trap starts dripping, the water will run out onto the floor where you can see it, rather than soaking into the subfloor for six months and rotting out the joists. I have pulled up floors where the plywood was like oatmeal because the installer did too good of a job sealing the base. This is the same logic we use in showers that wow modern designs for 2025, where managing water flow is more important than just blocking it. You have to think like water. Water always wins. Your job is to give it a path of least resistance that doesn’t involve your structural framing.
“Waterproof does not mean maintenance-free; the integrity of a floor depends on the management of its boundaries.” – TCNA Technical Bulletin
Transitions between sinks and baseboards
The visual flow of the bathroom depends on how the pedestal base interacts with the surrounding baseboards and grout lines. When the sink is close to a wall, the caulk joint of the sink should meet the caulk joint of the baseboard with a clean, overlapping transition. If your baseboards are poorly installed, the sink will look crooked even if it is perfectly level. I always suggest looking at baseboards makeover ideas to elevate your space to ensure your trim matches the quality of your plumbing fixtures. If you are working with an eco-friendly floor, you might check eco-friendly tile solutions for sustainable homes in 2025 to see how different materials react to moisture and sealant types. The chemistry of the bond is different on cork than it is on porcelain. Always test a small area first. If the sealant discolors the tile or the baseboard, you have the wrong product. You want a finish that looks like it grew there, not something slapped on as an afterthought. Use a high-quality light and a mirror to check the back of the sink. Just because you can’t see it doesn’t mean it isn’t a potential failure point. A professional finishes the parts that nobody looks at with the same care as the front of the house.”,