
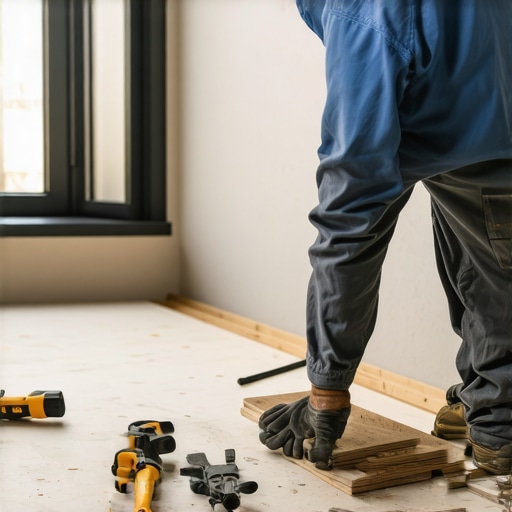
The subfloor secret behind every successful radius install
Installing baseboards on a curved wall requires managing the structural tension of wood fibers and the mechanical bond of the subfloor to ensure the trim stays flush. Most guys skip the leveling compound and think the underlayment will hide the dip, but it won’t. I spent three days grinding concrete on a job last month just so the floor wouldn’t click like a castanet. Most guys skip the leveling compound. They think the underlayment will hide the dip. It won’t. I spent three days grinding concrete on a job last month just so the floor wouldn’t click like a castanet. If that concrete slab isn’t within three sixteenths of an inch over a ten foot span, your baseboards are going to show gaps the size of the Grand Canyon when you try to wrap them around a radius. You have to understand that wood is a collection of cellulose tubes held together by lignin. When you force those tubes to bend, you are engaging in a battle with the physics of tension and compression. The outside of the curve is under massive tensile stress while the inside is being crushed. If your subfloor is uneven, that stress will pull the baseboard right off the wall or snap your miter joints. I have seen fifteen thousand dollar wide plank floors cup like potato chips because someone ignored the crawlspace humidity, and the same logic applies to your trim. If the wall isn’t flat and the floor isn’t level, the curve will never look right. You need to verify the moisture content of your materials with a pin-style meter before you even think about cutting. In my twenty five years on my knees, I have learned that the humidity in the room must be stabilized between thirty and fifty percent for at least seventy two hours before installation. This prevents the baseboard from shrinking and pulling away from the arc. To get a better sense of how trim fits into a whole room aesthetic, you might look at baseboards makeover ideas to elevate your space which helps set the stage for these advanced techniques.
The mechanical reality of wood grain resistance
Wood grain resistance determines the minimum radius a specific species can handle before the cellular structure fails and the board snaps. Solid oak has a high Janka rating and a stiff internal structure, making it difficult to bend without steam or relief cuts. Engineered options offer more flexibility but less structural integrity. When you are dealing with a curved wall, you are fighting the natural memory of the wood. Wood wants to be a tree. It wants to stay straight. To make it follow a curve, you have to break its will. The Janka Hardness Scale gives us a baseline for how much resistance we are going to face. A piece of white oak is going to fight you a lot harder than a piece of pine. If you are working with a tight radius, say anything under a four foot diameter, you cannot simply push the wood into place. You will either snap the board or pull the drywall anchors right through the gypsum.
“A floor is only as good as the subfloor beneath it; deflection is the enemy of every joint.” – Master Flooring Axiom
This axiom applies to the vertical plane as well. If the wall studs are not perfectly aligned, your curve will have flat spots. I always take a straight edge and check the verticality of the studs. If one is recessed, I shim it before the drywall goes on. If I am coming in after the fact, I have to use the kerf cutting method or switch to a flexible polymer. For those interested in the visual impact of high end trim, check out chic baseboard designs that transform rooms in 2025 to see how different profiles react to lighting and shadows along a curve.
Kerf cutting as a mathematical necessity
Kerf cutting involves making a series of vertical saw kerfs on the backside of the baseboard to reduce its thickness and allow for flexible manipulation. The spacing of these cuts is determined by the radius of the wall and the thickness of the material remaining at the face. This is where the chemistry of the wood meets the geometry of the room. You need to set your miter saw depth stop so that you leave only about an eighth of an inch of material at the face of the board. If you go too thin, the wood will telegraph the cuts and look like a series of flats rather than a smooth curve. If you leave it too thick, it won’t bend. I usually space my kerfs about a half inch apart for a gentle curve. For a tight radius, I go down to a quarter inch. You are essentially turning a solid piece of lumber into a flexible veneer. The structural integrity is gone, so you have to rely on high quality adhesives. I use a polyurethane based construction adhesive because it has a high solids content and won’t shrink as it cures. If you use a cheap water based glue, the evaporation will cause the glue line to pull, potentially distorting your curve. Here is a breakdown of how material thickness relates to the radius of the curve.
| Material Type | Max Radius (No Kerf) | Min Radius (Kerf Spacing 1/4 inch) | Janka Rating |
|---|---|---|---|
| Solid Red Oak | 12 Feet | 18 Inches | 1290 |
| MDF (Medium Density Fiberboard) | 8 Feet | 12 Inches | 600 |
| Flexible Polyurethane | 6 Inches | 2 Inches | N/A |
The chemistry of adhesives in high tension zones
Adhesive chemistry is the primary factor in long term stability for radius baseboards where mechanical fasteners like nails lack sufficient holding power. Polyurethane adhesives create a cross linked chemical bond that resists the constant spring back force exerted by curved wood. When you bend a board, it is under constant tension. It wants to pop off the wall. Nails are great for shear strength, but they have poor withdrawal resistance in drywall. That is why the glue does the heavy lifting. I prefer a moisture cure polyurethane. These adhesives react with the humidity in the air and the moisture in the wood to create a bond that is actually stronger than the wood itself. You have to be careful with the application. Too much glue and it will squeeze out the top and ruin your finish. Too little and you will hear the baseboard pop off the wall in the middle of the night. This is especially important in bathrooms where the humidity fluctuates. If you are working near a shower, you need to ensure the grout and tile are fully cured and sealed. For more on maintaining those areas, see tile cleaning tips for a sparkling bathroom in 2025. The interaction between the moisture in the air and the adhesive is a delicate balance. If the room is too dry, the glue won’t cure properly. If it is too wet, the wood will swell and break the bond before it even sets.
Why your subfloor is lying to you
Subfloor irregularities are magnified by curved walls because the baseboard must follow both the horizontal arc and any vertical fluctuations simultaneously. A dip in the floor will create a visible gap that cannot be hidden by standard caulking techniques. I have spent hundreds of hours with a floor grinder. Most people think they can just slap some trim down and it will look fine. It won’t. If there is a hump in the concrete, the baseboard will pivot on that point. If there is a dip, the bottom edge will be suspended in mid air. This is why I always use a self leveling underlayment before I even start my layout.
“Deflection is the silent killer of the perfect mitre; if the floor moves, the joint fails.” – Master Flooring Axiom
You have to check the deflection rating of your joists if you are on a wood subfloor. If the floor bounces when you walk on it, that movement will eventually crack the caulk or the grout where the baseboard meets the floor. In wet areas like showers, this is a disaster because it allows moisture to seep into the subfloor. If you are dealing with aged grout issues during this process, look into grout restoration secrets for long lasting results to ensure the entire base of the wall is protected and looks professional.
The ghost in the expansion gap
Expansion gaps are mandatory for all flooring and trim installations to accommodate the natural hygroscopic movement of wood fibers throughout the changing seasons. Neglecting the expansion gap on a curved wall leads to buckling and structural failure as the material has no room to move. Wood is alive. It breathes. It expands and contracts with every change in the weather. In the summer when the humidity is high, the wood cells take on water and swell. In the winter, they dry out and shrink. If you have pinned your baseboard tight against a curved wall without any room for movement, it will buckle. I always leave a consistent quarter inch gap. This is especially true if you are installing over a tile floor in a bathroom. You need to account for the movement of the tile, the thinset, and the baseboard. If you are designing a modern bathroom, check out showers with a style trendy ideas for small bathrooms to see how to integrate these functional gaps into a sleek design. The trick is to hide the gap with a shoe molding or a bead of high quality flexible sealant that can handle at least twenty five percent movement.
The 1/8 inch that ruins everything
Precision measurements on a radius must be taken along the outer circumference of the material to ensure that miter cuts align without gaps. A discrepancy of even one eighth of an inch will result in a joint that cannot be closed without heavy sanding or wood filler. When I am measuring for a curve, I use a flexible steel tape. I press it tight against the wall. You have to account for the thickness of the baseboard itself. If your wall radius is forty eight inches, the outside of a three quarter inch baseboard is actually forty eight and three quarters inches. If you cut it at forty eight, you are going to be short. It sounds simple, but I see guys mess this up all the time. They cut the board, try to bend it, and realize they are an eighth of an inch shy. Now they have a gap. You can’t just stretch wood. Use this checklist to ensure your installation is precise:
- Verify subfloor levelness with a 10-foot straight edge.
- Check wall stud verticality and shim as necessary.
- Measure the radius using a template or flexible tape.
- Calculate the arc length based on the outside diameter.
- Set saw depth for kerf cuts to leave 1/8 inch of face material.
- Apply polyurethane adhesive in a serpentine pattern.
- Secure with 18-gauge brads into studs only.
- Allow adhesive to cure for 24 hours before caulking.
Following these steps ensures that the tension is distributed evenly across the entire arc rather than concentrating at the joints.
The sanding process for invisible joints
Sanding a curved baseboard joint requires a progressive grit sequence to remove the flat spots created by the kerfing process and create a continuous radius. Starting with sixty grit and moving to one hundred twenty grit ensures the profile remains consistent with the straight sections of the wall. Once the board is glued and nailed, you are going to see some flat spots. It is inevitable when you are bending wood. You have to sand those out. I use a flexible sanding block. Don’t use a power sander unless you have a very steady hand, because you can easily sand a flat spot right into the face of the board. You are looking for a smooth transition from the curve to the straight. If you are working in a bathroom with modern fixtures, you want the trim to be as perfect as the tile. See showers that wow modern designs for 2025 for examples of how clean lines enhance the space. After sanding, I apply a thin coat of wood filler to any tiny cracks in the grain that may have opened up during the bending process. This seals the fibers and prevents moisture from getting in and causing the wood to swell unevenly.
The environmental impact of material choice
Selecting sustainable materials for radius work involves balancing the flexibility of the product with its long term environmental footprint and indoor air quality impact. Low VOC adhesives and sustainably harvested woods are the gold standard for modern architectural installations. I have seen a shift in the industry toward more eco friendly options. Many homeowners now demand materials that don’t off gas harmful chemicals into their homes. This is why I am careful about the adhesives and the pre finished trim I use. If you are interested in this approach, read about eco friendly tile solutions for sustainable homes in 2025. The same principles of sustainability apply to your baseboards. Using a fast growing species like poplar for your kerfed trim is often better than using old growth oak. It bends easier and has a lower carbon footprint. Just make sure you seal it well, especially in high moisture areas like kitchens or bathrooms where the baseboard might come into contact with water during cleaning. If you ever need to touch up the areas where the trim meets the floor, you can find help on how to refresh grout without replacing it which is a common task when updating old baseboards.