
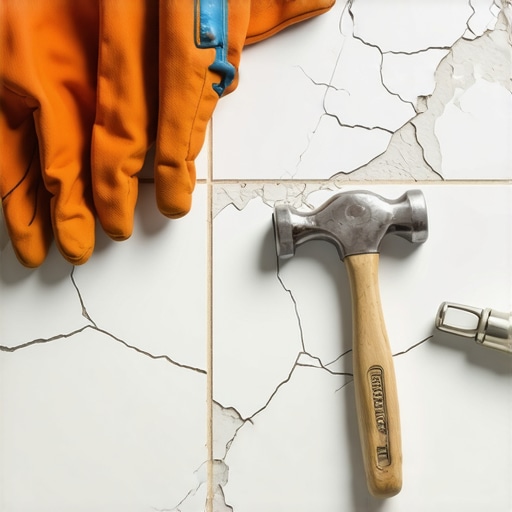
Stopping the Fracture Why Your Porcelain Tile Is Chipping at the Edges
Most guys skip the leveling compound. They think the underlayment will hide the dip. It won’t. I spent three days grinding concrete on a job last month just so the floor wouldn’t click like a castanet. When you see a porcelain tile chipping at the edges, it is rarely a defect in the material. It is almost always a failure of the installation system. Porcelain is a dense, vitrified material that is fired at temperatures exceeding 2,200 degrees Fahrenheit, making it incredibly hard but also extremely brittle at its narrowest points. When a tile is not fully supported by a high quality mortar bed, any point load, like a heavy chair leg or a dropped pot, creates a cantilever effect that snaps the edge. I have seen fifteen thousand dollar floors ruined because the installer was lazy with a trowel.
The myth of porcelain invincibility
Porcelain tile chipping occurs when the material density meets improper structural support or edge exposure. While porcelain is harder than ceramic, its crystalline structure makes it prone to edge fractures if the substrate has any deflection or if the tiles are installed with excessive lippage that leaves edges vulnerable to impact. You need to understand that porcelain is essentially a sheet of glass made of clay and minerals. It does not bend. If the floor beneath it moves even a fraction of an inch, the tile has to give somewhere. Usually, that somewhere is the edge where the grout meets the tile. If you are looking to integrate this into a modern bathroom, check out showers that wow modern designs for 2025 to see how professional edge management looks in practice.
“A floor is only as good as the subfloor beneath it; deflection is the enemy of every joint.” – Master Flooring Axiom
The physics of a chip start with the manufacturing process. Rectified tiles, which are ground to precise dimensions after firing, have a 90 degree edge that is incredibly sharp and fragile. Unlike pressed tiles that have a slight cushion or rounded edge, rectified porcelain leaves the microscopic edge exposed to every passing foot. When a tile is higher than its neighbor, a condition we call lippage, that edge becomes a speed bump for every vacuum cleaner and heavy boot. Over time, these micro impacts fatigue the porcelain until a flake pops off. This is why proper leveling is not a luxury, it is a requirement for the survival of the product.
Why your subfloor is lying to you
Subfloor deflection and lack of flatness are the primary drivers of porcelain edge failure in residential settings. The industry standard for large format tile is a maximum variation of one eighth of an inch over ten feet, yet I rarely see a house that meets this without significant intervention from a grinder or self leveling underlayment. When the floor dips, the tile bridges the gap. This creates a hollow spot. When you step on that spot, the tile flexes, but the grout stays rigid. This tension translates directly to the edge of the tile. If you want a floor that lasts, you have to treat the subfloor like a surgical table. I have spent years explaining to homeowners that their baseboards look fine, but their subfloor is a disaster. If you are planning a room refresh, you might also look at baseboards makeover ideas to elevate your space to match your new level floor.
| Material Type | Mohs Hardness | Edge Fragility | Recommended Grout Joint |
|---|---|---|---|
| Standard Ceramic | 5 | Moderate | 3/16 inch |
| Pressed Porcelain | 7 | Low | 1/8 inch |
| Rectified Porcelain | 8 | High | 1/16 inch |
| Natural Granite | 6-7 | High | 1/16 inch |
The chemistry of the adhesive also plays a part. You cannot use a standard mastic for porcelain. You need a polymer modified thin set that can form a chemical bond with the nearly non porous surface of the tile. Standard mortars rely on mechanical bonds, where the wet cement grows crystals into the pores of the tile. Porcelain has almost no pores, so it needs those polymers to act like a structural glue. If the bond fails, the tile becomes loose, and a loose tile is a chipping tile. This is particularly vital in wet areas. If you are working on a bathroom, ensure you follow tile cleaning tips for a sparkling bathroom in 2025 to keep that bond from degrading over time due to harsh chemicals.
The ghost in the expansion gap
Expansion joints are mandatory per TCNA EJ171 standards to prevent the compression forces that lead to edge tenting and chipping. Every material in your house expands and contracts with changes in temperature and humidity, including your concrete slab and your porcelain tile. If you butt the tile tight against a wall or a transition, the floor has nowhere to go when it expands. It will push against itself, creating massive pressure at the tile edges. This pressure eventually forces the edges to crush each other. I always leave a quarter inch gap at the perimeter, hidden by chic baseboard designs that transform rooms in 2025, to give the floor room to breathe.
“Movement joints are not optional; they are a fundamental component of a stable ceramic or stone tile installation.” – TCNA Handbook
Many homeowners complain that the gap looks ugly. That is what baseboards and shoe moldings are for. You are not just decorating, you are engineering a floating system that can move without self destructing. If your grout is already starting to crack or pop out due to this movement, you should look into grout restoration secrets for long lasting results before the damage reaches the tile itself. Using a high quality 100 percent silicone sealant in corner joints instead of hard grout can save you a world of hurt down the road because silicone can compress while grout just shatters.
The 1/8 inch that ruins everything
Lippage occurs when one tile edge sits higher than the adjacent tile, creating a physical lip that catches objects and chips easily. This is the most common reason for chipping in modern homes where large format tiles are popular. A 12 by 24 inch tile or a 24 by 48 inch plank often has a slight bow from the kiln. If you offset these tiles by fifty percent, the highest part of one tile sits next to the lowest part of another. This creates a vertical edge that is begging to be hit. Professionals use lippage control systems, essentially plastic clips and wedges, to pull the tiles into a flat plane while the mortar cures. Without these, you are just guessing, and guessing leads to chipped edges. [IMAGE_PLACEHOLDER]
- Check subfloor for L/360 deflection limits before starting.
- Use a 1/2 inch by 1/2 inch square notched trowel for large tiles.
- Back butter every single tile to ensure 95 percent mortar coverage.
- Maintain a minimum grout joint of 1/16 inch for rectified edges.
- Install expansion joints every 20 to 25 feet in large rooms.
If you are trying to fix an existing floor, you can sometimes hide small chips with a color matched epoxy resin. However, this is a bandage on a bullet wound. If the chipping is widespread, you have a structural problem. Often, the grout has become brittle and is no longer protecting the edge. In these cases, learning how to refresh grout without replacing it can provide a temporary reprieve, but if the tiles are loose, they must be pulled and reset. For those concerned about the environment, switching to eco friendly tile solutions for sustainable homes in 2025 often introduces more durable, flexible materials that handle stress better than old school ceramics. If you are doing a small space, consider showers with a style trendy ideas for small bathrooms where less square footage allows for a higher budget on prep work. Always remember that a level subfloor and the right adhesive are the only things standing between you and a ruined investment. Don’t be the person who spends five thousand on tile and fifty dollars on the guy who installs it. You will regret it every time you look down at a chipped corner.