
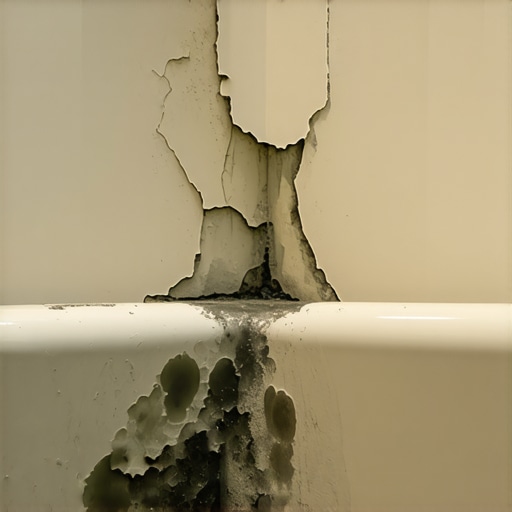
I spent three days grinding concrete on a job last month just so the floor would not click like a castanet. Most guys skip the leveling compound. They think the underlayment will hide the dip. It will not. Caulking is exactly the same game. I once walked into a luxury bathroom where the homeowner spent forty thousand dollars on custom marble. Six months later, the base of the shower looked like a science experiment. The installer had simply layered a fresh bead of white silicone over the old, yellowing stuff to save an hour of labor. Underneath that new layer, a black sludge of mold was eating through the drywall and the subfloor. It is a total disaster when you try to take shortcuts with chemistry. You cannot just cover up a failure and expect it to vanish. In this trade, you either do the prep work or you pay the price in rot and remediation. This is why I refuse to put my name on a patch job. If the old silicone stays, the new silicone will fail. Every single time.
The chemical impossibility of silicone bonding to itself
Silicone will not bond to cured silicone because the material has extremely low surface energy and a non-polar chemical structure. Once silicone is fully cured, it forms a chemically inert surface that prevents new adhesives from creating a molecular bond, leaving a microscopic gap for water and mold. This lack of adhesion is the primary reason why professional installers insist on total removal. When you apply a new bead over an old one, you are essentially laying a piece of plastic on top of another piece of plastic without any glue. There is no chemical cross-linking happening between the two layers. In the world of high-performance flooring and wet area installations, we talk about mechanical versus chemical bonds. A chemical bond is where molecules actually interlock. Silicone is designed to be repellent. It repels water, it repels dirt, and it absolutely repels its own kind once it has set. This chemical property makes it great for sealing, but it makes it a nightmare for maintenance if you are lazy. You are not creating a seal. You are creating a decorative cover for a future leak.
The mold sandwich and the biology of shower failure
The mold sandwich occurs when moisture is trapped between an old layer of sealant and a new layer of silicone, creating a dark and airless environment. Organic debris like soap scum and skin cells provide the food, while the trapped humidity allows fungal spores to colonize the gap. This biological trap is nearly impossible to clean once it starts. Because the top layer of silicone looks clean for the first few weeks, homeowners think the problem is solved. Meanwhile, the mold is migrating behind the tile and into the grout lines. I have seen mold travel up the back of baseboards and into the wall studs because a simple bead of caulk failed. If you want to avoid this, you should look at how to refresh grout without replacing it properly. Mold is not just an aesthetic issue. It is a structural threat. It breaks down the binders in thin-set and can cause tiles to pop off the wall. By the time you see the black spots peeking through the edges of your new caulk, the infestation is likely already deep within the assembly.
“A floor is only as good as the subfloor beneath it; deflection is the enemy of every joint.” – Master Flooring Axiom
Technical comparison of sealant performance in high moisture zones
Choosing the right sealant requires understanding the difference between acetoxy and neutral cure silicones as well as their adhesion profiles. Proper sealants must withstand constant expansion and contraction without pulling away from the substrate, which is why a clean surface is the only way to ensure a watertight fit. You need a material that can handle the movement of the building. Houses breathe. They shift. If your sealant is just sitting on top of an old layer, it cannot stretch. It just peels. This is particularly important around baseboards and transitions. For those interested in the aesthetic side of these transitions, checking out chic baseboard designs that transform rooms in 2025 can provide some context on how these elements should integrate. Below is a breakdown of why surface prep matters for different materials.
| Sealant Property | Cured Silicone Surface | Raw Tile or Stone | Mechanical Result |
|---|---|---|---|
| Surface Energy | Very Low | High | Bond Failure vs. Success |
| Chemical Affinity | None | High | Peeling vs. Adhesion |
| Flexibility | Zero Bond | Full Elasticity | Leakage vs. Protection |
| Mold Resistance | Traps Spores | Resists Growth | Biohazard vs. Cleanliness |
The physics of mechanical adhesion in wet areas
Mechanical adhesion relies on the sealant physically grabbing onto the microscopic pores of a surface like tile, stone, or metal. When old silicone is present, it fills these pores and creates a smooth barrier that prevents the new material from anchoring itself, leading to immediate water infiltration. If you do not strip the old material, you are relying on gravity to hold your shower together. That is a losing bet. Water is a persistent force. It will find a way through the smallest void. Once it gets behind that bead, it starts the slow process of rot. I have replaced entire subfloors because a five-dollar tube of caulk was applied incorrectly. You have to think like an engineer. You need a clean substrate. You need the right temperature. You need a dry surface. If any of these are missing, your installation is a ticking time bomb. This is especially true in showers that wow because the more complex the design, the more places water can hide.
The ten step protocol for permanent silicone replacement
The only way to ensure a mold-free seal is to follow a strict removal and decontamination protocol that eliminates every trace of old silicone. This process involves mechanical scraping, chemical softening, and a final solvent wipe to create a pristine surface ready for a new chemical bond. You cannot rush this. If you leave even a thin film of the old stuff, the new bead will peel off like a sunburn within months. Use a plastic scraper to avoid scratching your tile or tub. Follow up with a dedicated silicone remover to melt the residue. Finally, hit it with denatured alcohol. This ensures the surface is stripped of all oils and contaminants.
- Remove the bulk of the old caulk with a sharp utility knife or specialized scraper tool.
- Apply a silicone solvent to the remaining residue and let it sit for the manufacturer-recommended time.
- Scrub the joint with a stiff nylon brush to dislodge softened particles.
- Wipe the area with a clean rag soaked in denatured alcohol or isopropyl alcohol.
- Vacuum the joints to ensure no dust or debris is trapped in the corners.
- Inspect for any remaining thin films of silicone which appear as a slight sheen on the tile.
- Dry the area completely using a heat gun or hairdryer to remove all deep-seated moisture.
- Tape off the edges to ensure a clean and professional aesthetic line.
- Apply a high-grade 100 percent silicone sealant specifically rated for bathroom use.
- Tool the bead with a jointing tool or a gloved finger to force the material into the gap.
Why your subfloor is lying to you about moisture
Subfloors often hide moisture deep within their layers even if the surface feels dry to the touch, leading to premature failure of floor coverings and sealants. Using a moisture meter is the only way to verify that the environment is stable enough for a permanent installation. If you are caulking baseboards or tile transitions, the moisture level in the wall and floor matters. If the wood is damp, the silicone will not stick. If the grout is wet, the silicone will trap that water. You should read about tile cleaning tips for a sparkling bathroom in 2025 to understand how to maintain these surfaces after you have achieved a proper seal. A floor is a system. The tile, the grout, the caulk, and the subfloor all work together. If one part of that system is holding water, the whole thing will eventually rot from the inside out. I have seen oak floors cup and tile grout crack just because someone did not wait for the subfloor to dry after a minor leak.
“A floor is only as good as the subfloor beneath it; deflection is the enemy of every joint.” – Master Flooring Axiom
The ghost in the expansion gap
Expansion gaps are designed to allow for the natural movement of building materials but they often become the entry point for water if they are not sealed correctly. Filling these gaps with layers of old and new silicone creates a brittle joint that cracks under the pressure of thermal expansion. When the house settles or the temperature changes, those materials move. A solid bead of fresh silicone on a clean surface can stretch and compress. A double layer of silicone cannot. It acts like a wedge. It pulls away from the wall and leaves a gap that you might not even see. This is where the mold starts. It is a silent killer of bathrooms. You think you are protected, but the ghost of the old installation is still there, undermining your work. Do the job right. Strip it back to the beginning. Your house and your health will thank you. If you are ever in doubt, the standards set by the Tile Council of North America are there for a reason. They do not suggest removing the old stuff for fun. They suggest it because it is the only way to prevent failure.