
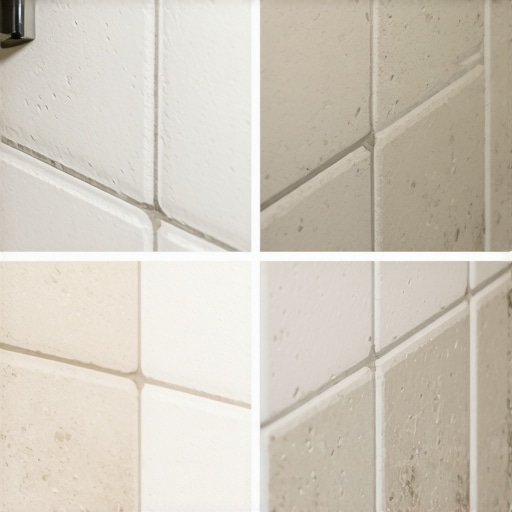
I spent three days grinding concrete on a job last month just so the floor wouldn’t click like a castanet, and that same level of obsession applies to the vertical joints in a shower. Most guys skip the leveling compound and most guys also reach for a tube of cheap siliconized acrylic when they hit a corner. They think the underlayment or a bit of goop will hide the dip or the gap. It won’t. I once walked into a luxury master suite in the humid heart of Houston where a thirty thousand dollar travertine shower was literally weeping. The homeowner thought the pan was leaking, but the culprit was a four dollar tube of standard painter’s caulk used in the change of plane. This mistake creates a capillary bridge that pulls soap scum and grey water deep into the wall assembly. When you are dealing with natural stone like marble, slate, or travertine, the physics of moisture and movement do not care about your budget or your timeline. Stone is a living material that breathes, expands, and contracts. Standard caulk is a rigid, water-based mistake that has no place in a high-performance wet environment. If you want a shower that lasts twenty years instead of twenty months, you have to understand the chemistry of what happens at the ninety-degree junction where two walls meet.
The movement joint that ruins everything
Movement joints in stone showers are essential flexible gaps designed to accommodate the structural shifting of a building without cracking the tile or grout. These joints must be filled with 100 percent silicone sealant rather than standard caulk or grout to maintain a waterproof seal during thermal expansion. Buildings are constantly in motion due to settling, humidity changes, and temperature fluctuations. In a shower, the temperature can swing forty degrees in ten minutes. If those corners are filled with rigid grout or cheap acrylic, they will crack. This is the first law of shower architecture. You can see more about the visual side of this in showers that wow, but the beauty starts with the structural integrity of the seal.
“A floor is only as good as the subfloor beneath it; deflection is the enemy of every joint.” – Master Flooring Axiom
Why acrylic fails the shower test
Standard siliconized acrylic caulk fails in stone showers because it is a water-based product that shrinks during the curing process and lacks the elongation properties needed for stone. While it is easy to apply and clean up, it becomes brittle over time and loses its bond to the porous surface of the stone. Acrylic sealants are essentially liquid plastics that dry out. Once the water evaporates from the bead, the mass reduces, pulling away from the edges of the marble or slate. This creates microscopic gaps. In a place like Phoenix, the dry heat accelerates this brittleness. In a place like Miami, the humidity prevents it from ever truly curing, leading to a gummy mess that attracts black mold. If you are looking to fix old mistakes, check out grout restoration secrets for long-lasting results to see how to prep these areas properly.
The chemistry of 100 percent silicone bond
The chemical bond of 100 percent silicone is a non-polar covalent bond that remains flexible across a wide range of temperatures and is completely waterproof. Unlike acrylic, silicone does not shrink and is naturally resistant to the growth of mold and mildew which is vital for stone surfaces. When you apply silicone to a clean stone edge, it creates a gasket. It does not just sit on top of the stone, it anchors into the microscopic pores. This is why I always tell people that the thickness of the bead matters less than the cleanliness of the stone. You have to wipe those joints with denatured alcohol or acetone first. If there is even a hint of dust or soap film, the silicone will fail. We are talking about molecular adhesion here. A high-quality silicone can stretch up to 25 percent of its original width without tearing. That is the difference between a dry wall and a rot-fest behind your baseboards.
| Property | Standard Acrylic Caulk | 100% Silicone Sealant | Siliconized Acrylic |
|---|---|---|---|
| Shrinkage Rate | High (25-30%) | Zero | Moderate (10-15%) |
| Flexibility | Low/Brittle | High/Permanent | Medium |
| Water Resistance | Temporary | Permanent | Moderate |
| Adhesion to Stone | Poor | Excellent | Fair |
| Life Expectancy | 1-3 Years | 20+ Years | 3-5 Years |
The three sided bond failure
A three sided bond occurs when sealant attaches to the back of the joint and both sides of the tile, causing the sealant to tear when the walls move. To prevent this, professional installers use a backer rod or bond breaker tape to ensure the silicone only sticks to the two opposing tile edges. This is a technical nuance that most DIYers and even some bad contractors miss. If the silicone is stuck to the thin-set or the waterproofing membrane in the very back of the corner, it cannot stretch. It is like trying to pull a rubber band that is glued to a table. It will snap every single time. By using a foam backer rod, you create a “dog bone” shape in the silicone bead. This shape is the gold standard for expansion joints. It allows the bead to thin out in the middle and stretch like a true gasket. This is how you protect your investment, especially when using eco-friendly tile solutions for sustainable homes in 2025.
“Expansion joints are not optional; they are structural requirements for every installation exceeding twenty-five feet.” – TCNA Handbook
The ghost in the expansion gap
The ghost in the expansion gap refers to the inevitable cracking that appears when grout is used in a change of plane instead of a flexible sealant. This occurs because the two planes of the wall move independently and grout has zero tensile strength to handle that shear force. I have seen guys try to match the grout color exactly by using grout-caulk. Be careful with that stuff. Most of it is just colored acrylic. You need to find a manufacturer that makes a 100 percent silicone that is color-matched to your grout. If you see a crack in your corner, you are already too late. Water is getting back there. It is wicking into the cement board and starting to rot the studs. This is especially dangerous in showers with a style where the tile goes all the way to the ceiling. The taller the wall, the more movement you have.
- Always clean the stone with acetone before applying silicone to remove oils.
- Use blue painter’s tape on both sides of the joint to get a crisp, professional line.
- Never spit on your finger to smooth silicone; the bacteria in your saliva promotes mold growth.
- Use a dedicated smoothing tool and a mist of denatured alcohol or soapy water.
- Check the expiration date on the silicone tube; old silicone will never cure properly.
Why your subfloor is lying to you
Your subfloor and wall substrate may look stable, but they are subject to constant deflection and hygroscopic expansion that will stress every corner joint. Even if you used the best backer board, the wood studs behind them will swell in the summer and shrink in the winter. This is why we never hard-grout the corners. If you are curious about maintaining the rest of your tile, look at tile cleaning tips for a sparkling bathroom in 2025. But remember, no amount of cleaning can fix a failed structural joint. The contrarian truth is that the thickest bead of caulk is often the weakest. A thin, well-bonded bead of silicone is far superior to a massive glob of acrylic. Too much material creates a structural lever. As it pulls, it can actually chip the edges of delicate stones like marble. You want just enough to bridge the gap and create a concave seal. This prevents water from pooling on top of the joint, which is the primary cause of yellowing in white silicones. If you have questions about specific stone types, you should contact us for expert advice. Protecting the transition between the tile and the chic baseboard designs outside the shower is also a part of this moisture management strategy. If the shower corner leaks, the first place you will see it is the baseboard rotting on the other side of the wall. That is a hard lesson many homeowners learn far too late.