
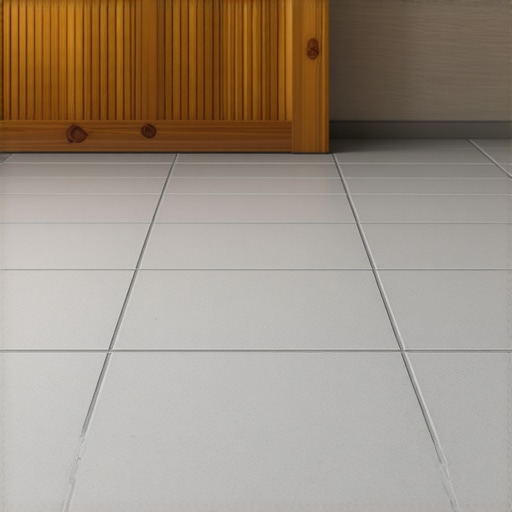
I spent three days grinding concrete on a job last month just so the floor wouldn’t click like a castanet. Most guys skip the leveling compound because they think the underlayment will hide the dip. It won’t. I was in a high-end condo downtown, the kind where the windows cost more than my truck, and the homeowner had picked out this beautiful large-format grey porcelain. But the slab was a mess, wavy like the Atlantic in November. If I had just slapped that tile down and nailed the baseboards on top, the gaps would have been big enough to swallow a pencil. You cannot hide bad prep with expensive trim. A floor is only as good as the subfloor beneath it, and deflection is the enemy of every joint. When you are matching wood to tile, you are not just looking at colors, you are managing the meeting of two entirely different physical worlds.
The subfloor secret that ruins everything
To match wood baseboards to a grey tile floor, you must first ensure the substrate is perfectly flat to within 1/8 inch over a 10 foot span. This structural foundation prevents unsightly gaps between the rigid tile surface and the linear wood trim. Without a flat floor, even the most expensive walnut or oak baseboard will highlight every imperfection in your masonry work. The physics of this are simple. Tile is a non-yielding ceramic body. Wood is a hygroscopic material that moves with humidity. If the tile sits on a hump, the baseboard will hover over the valleys. I see this mistake on every budget job. Use a self-leveling underlayment with a high compressive strength, usually over 3,000 PSI, to create the plane. This is the only way to get that tight, professional look where the wood meets the grout line without a massive bead of caulk to hide the shame.
The color temperature conflict in grey flooring
Grey tile comes in two primary temperature profiles, cool blue-based greys and warm brown-based greys, which dictate your wood species selection. Selecting a wood with high yellow tannins, like natural southern yellow pine, to sit against a cool slate grey tile creates a jarring visual clash. You want to match the undertones of the wood to the undertones of the tile. Cool greys work best with woods that have been treated with a reactive stain to neutralize reds and yellows. Think of white oak with a weathered or grey-wash finish. If your tile is a warm greige, you can lean into the natural warmth of walnut or a clear-grade maple. The light reflecting off the floor will bounce onto the vertical surface of the baseboard. If those wavelengths do not align, the wood will look dirty or the tile will look like cold concrete. You are balancing the Kelvin scale of your room. Look at the pigments in your grout restoration secrets for long lasting results to see if there are traces of iron oxide or carbon black. That tells you which way the color leans.
“A floor is only as good as the subfloor beneath it; deflection is the enemy of every joint.” – Master Flooring Axiom
Why your grout line dictates your baseboard height
The height of your baseboard should be proportional to the tile size and the width of the grout joints to maintain visual balance. Large format 24 by 48 inch tiles demand a taller baseboard, typically 5.25 inches or higher, to keep the scale from feeling bottom-heavy. If you use a tiny 3 inch builder-grade baseboard against massive grey tiles, the room looks unfinished. Furthermore, the grout joint acts as a shadow line. If you are using a dark grey grout with a lighter grey tile, a dark wood baseboard like mahogany or stained oak will pull that dark line upward, creating a framed effect. This is a common technique in chic baseboard designs that transform rooms in 2025. It is about creating a hierarchy of lines. The wood grain provides a soft organic texture that breaks up the mechanical grid of the tile. If the baseboard is too short, that grid overwhelms the room. If it is too tall, it can make the ceiling feel lower than it actually is. It is a game of millimeters.
The mechanical reality of expansion gaps
Every tile floor requires a perimeter expansion gap of at least 1/4 inch to allow for the natural movement of the building envelope. The wood baseboard is not just a decorative element, it is a functional bridge that covers this void. Most homeowners want the baseboard to sit tight against the tile, but you have to leave room for the house to breathe. In regions with high humidity like Houston, that wood baseboard is going to expand as it absorbs ambient moisture. If you nail it too tight against the tile without a tiny gap, or if you don’t seal the bottom edge, the wood will wick moisture from the floor during cleaning. This is especially true near showers that wow modern designs for 2025 where standing water is a constant threat. I always back-prime my wood baseboards. I apply a coat of sealer to the side that faces the wall and the bottom edge that touches the floor. This creates a moisture barrier that prevents the wood from cupping. I have seen solid oak baseboards twist like a pretzel because the installer forgot to seal the back. It is a rookie move that costs thousands in repairs later.
Wood species selection and the Janka scale
Selecting the right wood species involves analyzing the Janka hardness rating and the dimensional stability of the lumber. For high-traffic areas with grey tile, you want a hardwood that can withstand the occasional impact from a vacuum cleaner or a stray toy. Softwoods like pine or cedar will dent the first week. White oak is the industry standard for a reason. It has a Janka rating of 1,360 and contains high levels of tannic acid, which makes it resistant to rot. It also takes grey stains better than almost any other wood because of its open grain structure. The pigments in the stain can settle deep into the pores, creating a layered look that mimics the depth of the tile. Maple is harder, but it has a closed grain. Staining maple grey often results in a blotchy mess. If you want a smooth, painted look, you might go with Poplar or MDF, but be careful with MDF in wet areas. It is basically a sponge made of sawdust and glue. One leak and it will swell to twice its size. If you are doing a baseboards makeover ideas to elevate your space, stick to real wood for the longevity.
| Wood Species | Janka Hardness | Stability Rating | Best Grey Match |
|---|---|---|---|
| White Oak | 1360 | Excellent | Cool and Neutral Greys |
| Hard Maple | 1450 | Average | Warm Greige |
| Black Walnut | 1010 | High | Dark Charcoal Tile |
| Douglas Fir | 660 | Poor | Rustic Grey Slate |
The 1/8 inch that ruins everything
Precision cutting and coping are the only ways to ensure a wood baseboard looks integrated with a grey tile floor. I never miter my inside corners. Miters open up when the house settles. I cope them. Coping involves cutting the profile of one board into the end of another so they overlap. It takes more time, but it stays tight for decades. When the wood baseboard meets the tile, you should use a fine-tooth blade to prevent splintering the grain. I also use a sacrificial piece of wood behind the baseboard on the miter saw to ensure a clean exit for the blade. If you have a slight gap between the wood and the tile because of a dip in the floor, do not just fill it with caulk. Use a scribe tool to trace the contour of the tile onto the wood, then plane the wood down to fit the floor. It is a surgical process. Most guys are too lazy for it. They just want to fire their nail gun and go home. But if you want a floor that looks like an architect designed it, you have to do the scribe work. This is the level of detail that separates a pro from a handyman.
“Wood moves in the direction of its grain; the installer must be the one to guide its path.” – Master Flooring Axiom
Moisture barriers and chemical bonds
The interaction between the alkalinity of the concrete slab and the acidic nature of wood can lead to premature finish failure. If you are installing grey tile over a new slab, that concrete is off-gassing and releasing moisture for months. Even after it is dry enough for tile, it can still affect wood baseboards. I always use a moisture meter. I want to see the subfloor at less than 4 percent moisture content before I even bring the wood into the house. Then I let the wood acclimate for at least a week. I have seen guys bring wood from a freezing truck into a warm house and start nailing. By the next morning, every joint has opened up because the wood shrank in the dry heat. You have to respect the material. The chemistry of the adhesive used for the tile also matters. If you used a high-polymer modified thin-set, make sure it is fully cured. The moisture released during the hydration process of the cement can be absorbed by the bottom of your baseboards. This is why many people are looking for eco-friendly tile solutions for sustainable homes in 2025 that use low-VOC adhesives and more stable substrates.
- Check subfloor flatness to 1/8 inch over 10 feet before tiling.
- Verify tile grout is fully cured for 72 hours minimum.
- Test wood moisture content to ensure it is within 2 percent of the home baseline.
- Seal the bottom and back edges of all wood baseboards.
- Scribe the baseboard to the tile for a tight fit without heavy caulking.
- Use stainless steel finish nails to prevent rust spots in humid areas.
The ghost in the expansion gap
Airflow behind the baseboard is an overlooked factor in preventing mold and wood rot in tile-to-wood transitions. If you seal the baseboard perfectly to the floor and the wall, you can trap moisture behind it. I like to leave a microscopic gap, maybe the thickness of a business card, between the baseboard and the tile. This allows for a tiny bit of air movement. In a bathroom or a kitchen, this is vital. If water gets under the tile and has no way to evaporate, it will rot your wall studs. I have pulled off baseboards in old houses where the wood looked fine on the outside, but the back was a colony of black mold. This often happens when people try to make their floors waterproof by gobbing silicone into every gap. You are not building a boat. You are building a house. It needs to breathe. If you are worried about the look, use a shoe molding that is finished to match the baseboard. This gives you a second layer of protection and covers any remaining gaps from the scribing process. It is about layers and logic, not just hiding mistakes. If you find your grout is looking rough, you can always learn how to refresh grout without replacing it before you set your new wood trim.