
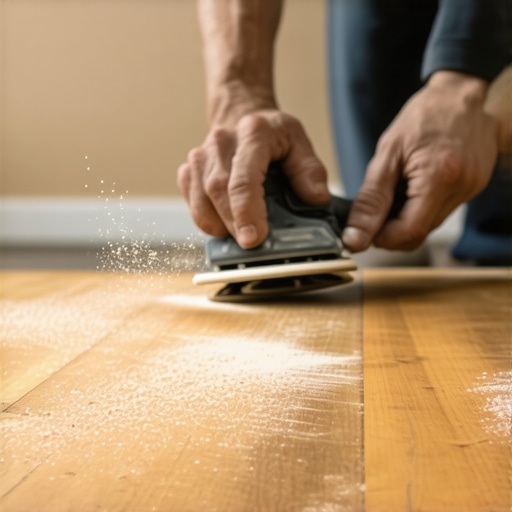
The physics of a perfect finish on modern baseboards
I once spent three days grinding concrete on a job last month just so the floor would not click like a castanet. Most installers think they can hide a poor substrate with a thick underlayment, but they are wrong. The same logic applies to your trim. Most homeowners and even some ‘pro’ painters think that because baseboards come factory primed, they are ready for the final coat of paint. They are not. If you skip the sanding phase, you are building your finish on a foundation of chemical release agents and compressed sawdust. I have seen fifteen thousand dollar hardwood jobs look like garbage because the baseboards were installed with a rough, unsanded texture that caught every speck of dust in the room. You have to treat the trim with the same respect you treat the subfloor. It is a structural element of the room’s aesthetics.
The microscopic profile of factory primed wood
Factory primed baseboards contain chemical sealants and industrial waxes that prevent the final trim coat from forming a permanent mechanical bond. These coatings are applied in a high speed manufacturing environment where speed is the priority over surface profile. If you do not sand these down, your paint is simply sitting on top of a slick film rather than penetrating the fibers of the molding. When we talk about a mechanical bond, we are talking about the physical interlocking of the paint molecules with the wood or MDF fibers. Without this, your paint will eventually flake or peel, especially in high traffic areas where vacuum cleaners and feet constantly strike the surface.
“A floor is only as good as the subfloor beneath it; deflection is the enemy of every joint.” – Master Flooring Axiom
The surface must be free of all contaminants, including waxes, oils, and dust, to ensure a mechanical bond. This is the baseline for any professional installation. If you are looking to elevate your space, you should check out these chic baseboard designs that transform rooms in 2025 to see how the profile affects the final look.
Why a mechanical bond beats a chemical prayer
A mechanical bond created through sanding provides a textured surface area that allows paint to grip the substrate through physical friction. When you run a 220 grit sandpaper over a factory primer, you are creating millions of microscopic valleys. When the wet paint hits those valleys, it fills them. As the paint dries and shrinks, it locks into those grooves. If you rely solely on the chemical properties of the paint to stick to a smooth, waxy primer, you are performing what I call a chemical prayer. It might hold for a month, but as soon as the humidity shifts or the baseboard expands, the paint will release. This is particularly problematic in areas with tile floors and bathrooms where moisture levels fluctuate. You can read more about baseboards makeover ideas to elevate your space to understand the variety of materials available.
The humidity factor in modern wood molding
Wood is a hygroscopic material that expands and contracts based on the ambient relative humidity of the room. When you apply a water based finish to an unsanded baseboard, the moisture in the paint can cause the grain to raise. This creates a phenomenon known as grain hair. These tiny wood fibers stand up and become stiff once the paint dries, leaving you with a surface that feels like sandpaper even though you wanted a smooth finish. By sanding before the final coat, you knock down these potential grain hairs and seal the wood in a way that minimizes future movement. In dry climates like Phoenix, the wood will shrink, and in humid places like Houston, it will swell. If your paint bond is weak because you skipped sanding, the movement of the wood will cause micro cracks at the joints. This is the same reason we worry about grout restoration secrets for long lasting results. The movement of the substrate dictates the longevity of the finish.
Sanding grits and the science of abrasion
Choosing the correct grit of sandpaper is the difference between a smooth finish and a surface marred by visible scratch patterns. For factory primed baseboards, you do not need an aggressive 60 or 80 grit. That will tear the primer off and gouge the wood. You need a 220 grit or a fine sanding sponge. The goal is to scuff the surface, not to remove the primer entirely. You want to turn the sheen of the factory coat into a dull matte finish. This indicates that the waxes have been stripped and the surface is open for a new layer of paint.
| Grit Type | Purpose | Result |
|---|---|---|
| 120 Grit | Heavy Smoothing | Removes factory drips and rough patches |
| 150 Grit | Intermediate Blending | Levels out joints and wood filler |
| 220 Grit | Final Pre-Paint Scuff | Creates the ideal mechanical bond for trim paint |
| 320 Grit | Between Coat Sanding | Removes dust nibs from the first finish coat |
The ghost in the expansion gap
Expansion gaps at the bottom of the baseboard are necessary for the floor to breathe but can trap sanding dust that ruins the final coat. This is where most guys fail. They sand the boards, and then they leave the dust in the gap between the baseboard and the floor. As soon as they start painting, the brush pulls that dust up into the wet film. You end up with a finish that looks like it has pepper in it. You must vacuum the gaps with a HEPA filter and then wipe the boards down with a tack cloth. This is especially true if you are working near showers that wow where steam can settle the dust back onto the walls. Professionalism is found in the cleanup, not just the application.
Why your subfloor is lying to you
A subfloor that appears level can still have micro depressions that cause baseboards to sit at slightly different angles, requiring more sanding at the joints. If the floor has a dip of even one eighth of an inch, the baseboard will follow it. When you butt two pieces of trim together at an inside or outside corner, they will not align perfectly. You will use wood filler to bridge the gap. That wood filler must be sanded flush. If you do not sand the entire board to match the texture of the sanded filler, the paint will reflect light differently in those spots. You will see every joint from across the room. This is the same level of detail required when you refresh grout without replacing it. Consistency across the entire surface is the only way to achieve a high end look.
The 10 step sanding protocol for professional results
- Inspect the baseboards for factory defects and shipping damage.
- Fill all nail holes with a non-shrinking wood filler.
- Apply filler to all mitered joints and scarf joints.
- Wait for the filler to dry completely based on the manufacturer’s spec.
- Use 220 grit sandpaper to level the filler flush with the wood.
- Scuff sand the remaining factory primer until the sheen is removed.
- Vacuum the baseboards and the floor perimeter with a brush attachment.
- Wipe the boards with a damp microfiber cloth or tack cloth.
- Check the moisture content of the wood to ensure it is below 10 percent.
- Apply the first coat of trim paint with a high quality synthetic brush.
The final coat and the leveling of expectations
Applying the final coat of paint without sanding is a shortcut that costs more in the long run through repairs and repainting. I have been doing this for over two decades. I have seen the ‘quick and dirty’ method fail every single time. Whether you are installing eco-friendly tile solutions or traditional hardwood, the trim is the frame for your work. If the frame is ugly, the whole picture is ruined. Sanding creates the smoothness that reflects light evenly. It gives you that furniture grade look that separates a professional job from a DIY attempt. Never let an installer tell you that sanding is unnecessary. It is the most important part of the process. If they want to skip it, they are lazy, and they do not respect the craft. Take the time to do it right. Your floor and your walls deserve the effort. For more information on maintaining your home, you can visit our contact page or review our privacy policy.