
The hidden liquid physics behind your bubbling baseboards
I once walked into a house where a five thousand dollar bathroom remodel was literally rotting from the ground up. The homeowner was proud of the subway tile and the marble vanity, but they missed the puddle forming near the base of the toilet. They thought it was just kids splashing after a bath. I took one look at the baseboards and knew the subfloor was likely a sponge. When Medium Density Fiberboard (MDF) starts to bubble, it is a chemical reaction to moisture that has already won the battle. You are not just seeing a cosmetic flaw; you are seeing the failure of a structural system. I spent three days grinding concrete and replacing rotted plywood on that job because the installer didn’t understand the capillary action of water under a baseboard. It is a messy, expensive lesson that usually starts with a single faulty wax ring or a micro-crack in the grout lines.
The deceptive nature of moisture in cellulose fibers
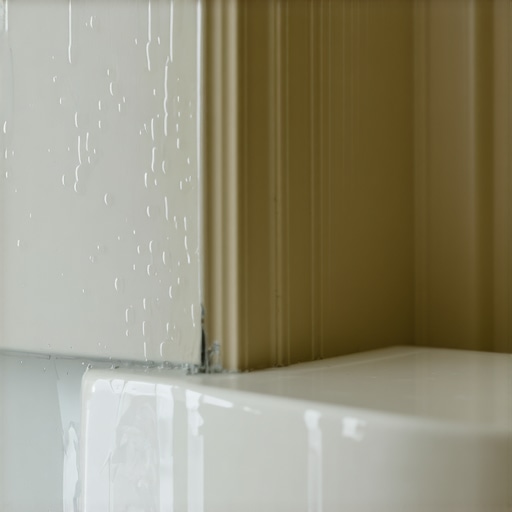
Bubbling bathroom baseboards near a toilet indicate that moisture has penetrated the porous core of the trim material, usually MDF. This happens through capillary action where water wicks upward from a leaking wax ring or stagnant floor moisture. The urea-formaldehyde resins in the wood fibers expand and lose their structural bond. When we talk about wood trim, we are really talking about bundles of cellulose. MDF is essentially compressed sawdust held together by glue. When water hits the bottom edge of that trim, it does not just sit there. It climbs. Through a process called wicking, the water moves vertically through the fibers. As the moisture content of the material exceeds twelve percent, the internal bonds of the board fail. The result is that characteristic blistered, bumpy texture that no amount of paint can hide. If you see this, the moisture has already saturated the back of the board, meaning the wall behind it is likely damp too. You can look into chic baseboard designs that transform rooms in 2025 to see what modern, moisture-resistant alternatives look like, but the primary task is stopping the liquid flow.
The wax ring is your best friend and worst enemy
A failing toilet wax ring is the most common cause of baseboard bubbling because it allows water to seep under the tile. This water travels along the subfloor until it hits the perimeter walls. Since tile and grout are often not perfectly waterproof, the liquid finds the path of least resistance. The wax ring creates a gas-tight and water-tight seal between the toilet horn and the closet flange. If that seal is broken, every time you flush, a small amount of greywater escapes. It does not always show up on the bathroom floor immediately. Instead, it creeps under the tile. It follows the slope of the subfloor. In many cases, the water travels several feet and eventually pools against the baseboard. This is why you see bubbles five feet away from the toilet. The physics of water tension allows it to stay hidden under the tile surface while it rots the wood trim from the inside out.
“A floor is only as good as the subfloor beneath it; deflection is the enemy of every joint.” – Master Flooring Axiom
The molecular failure of medium density fiberboard
MDF bubbles because it lacks the natural lignin structure found in solid wood, making it highly susceptible to thickness swelling. When moisture enters the board, the compressed fibers try to return to their original, uncompressed state. This mechanical expansion creates the unsightly bubbles near the bathroom floor. In my twenty five years on the job, I have seen guys try to sand down these bubbles. It never works. Once the fiber bond is broken, the material is structurally compromised. Solid wood will cup or warp, but MDF will simply disintegrate. This is particularly problematic in bathrooms where humidity is high. If the bottom of the baseboard was not back-primed or sealed with a high-quality silicone bead, it is basically a straw for any water on the floor. Even small amounts of water from cleaning can cause this if the tile cleaning tips for a sparkling bathroom in 2025 are not followed correctly, specifically regarding the volume of liquid used.
A comparison of bathroom trim materials
| Material Type | Moisture Resistance | Typical Failure Mode | Acclimation Time |
|---|---|---|---|
| MDF (Standard) | Low | Bubbling and Swelling | 48 Hours |
| Solid Pine | Medium | Twisting and Cupping | 72 Hours |
| PVC / Polymer | High | None (Waterproof) | None |
| HDF (High Density) | Medium | Edge Swelling | 48 Hours |
The hidden path through the grout and tile
Grout is a porous cementitious material that acts like a bridge for water to move toward your walls. Even if your tile is waterproof, the grout lines are not unless they have been properly sealed with a high-solids penetrating sealer. Many homeowners assume that because they have tile, the floor is a waterproof tub. That is a dangerous myth. Standard grout is full of microscopic voids. When you have a leak near the toilet, the water occupies these voids. If the grout is old or cracked, the speed of moisture transfer increases. You might need to learn how to refresh grout without replacing it to ensure your seals are tight. If the grout is failing, the baseboards are the first to tell the story. They are the canary in the coal mine for your bathroom floor.
The one eighth inch that ruins everything
Installers often make the mistake of pinning the baseboard tight against the tile floor. This creates a zero-clearance joint that traps water against the trim through surface tension. Leaving a tiny expansion gap and filling it with 100 percent silicone is the professional standard. Most people want a clean look, so they jam the trim down onto the floor. When water spills, it gets sucked into that tiny crack. If there was a 1/8 inch gap, the water might just sit on the floor where you can see it and wipe it up. By forcing the materials together, you are creating a wick. I always tell my apprentices to use a spacer. A small bead of silicone at the bottom of the baseboard creates a gasket. This gasket prevents water from reaching the raw bottom edge of the MDF. If you are doing a baseboards makeover to elevate your space, make sure you don’t repeat the mistakes of the previous installer.
Checklist for diagnosing bathroom moisture damage
- Check the toilet base for any rocking or movement that could break the wax seal.
- Inspect the grout lines around the toilet for darkening or cracks.
- Remove a small section of the bubbling baseboard to see if the drywall behind it is damp.
- Use a pinless moisture meter to check the levels in the subfloor.
- Check the supply line and shut-off valve for slow drips that follow the pipe to the floor.
The ghost in the expansion gap
An expansion gap is required for the floor to move, but it is also a highway for moisture if not managed correctly. In humid environments, the air itself carries enough water to cause swelling if the back of the trim is not sealed. If you live in a high humidity area like Houston or Florida, your baseboards are under constant attack. The air enters the expansion gap behind the baseboard. If the wall is a cold exterior wall, condensation forms. This condensation drips down the back of the trim. The bubbling you see might not even be from a leak; it could be the house breathing. This is why I advocate for PVC baseboards in bathrooms. They don’t care about humidity. They don’t care about wax rings. They are inert. If you are interested in sustainability, you might look at eco-friendly tile solutions for sustainable homes in 2025 which often include better moisture management systems.
“Water does not follow the rules of the homeowner; it follows the rules of gravity and surface tension.” – Master Flooring Axiom
Why your subfloor is lying to you
The subfloor can hold gallons of water without showing a single drop on the surface. By the time the baseboard bubbles, the plywood or OSB underneath is likely saturated. I have seen jobs where the tile looked perfect, but when I pulled a single tile, the plywood was black with mold. This happens because the thin-set mortar can act as a reservoir. It holds the water against the wood subfloor. The moisture has nowhere to go but out toward the edges. If your baseboards are bubbling near the toilet, do not just replace the trim. You must pull the toilet and check the flange. If the wood around the flange is soft, you have a structural problem. No amount of new grout or fancy baseboards will fix a rot issue. You can see modern shower designs at showers that wow modern designs for 2025 that incorporate better waterproofing membranes like Kerdi or Wedi to prevent this exact scenario.
The contrarian truth about thick underlayments
While many people think a thick, cushiony underlayment is better for comfort, it actually ruins bathroom floors. Too much cushion allows the tile or LVP to flex. This flex breaks the grout bonds or the toilet seal. When the seal breaks, the water flows. A rigid, stable subfloor is the only way to prevent the movement that leads to leaks. If you are working in a small space, check out showers with a style trendy ideas for small bathrooms to see how rigid waterproofing systems are integrated into modern layouts. The goal is zero deflection. If the floor doesn’t move, the seals don’t break. If the seals don’t break, the baseboards don’t bubble. It is a simple chain of engineering that most builders ignore to save twenty dollars on a wax ring or a bag of fortified thin-set.
Steps to fix the bubbling baseboard problem
First, you have to stop the source. Turn off the water to the toilet and remove it. Scrape away the old wax and inspect the flange height. If the flange is below the level of the tile, you need a flange extender. This is a common point of failure. Once the leak is fixed, you must dry the area completely. Use a dehumidifier and fans for at least forty eight hours. Do not rush this. If you trap moisture behind new trim, you will be doing this again in six months. After the area is dry, replace any rotted drywall or subfloor. Finally, install your new baseboards. Use a moisture-resistant material like PVC or a high-quality solid wood that has been sealed on all six sides. For more help with restorations, you can read about grout restoration secrets for long-lasting results to ensure your floor stays dry for the next decade. If you have questions about specific materials, you can always contact us for professional guidance.