The deceptive reality of bathroom humidity and paint failure
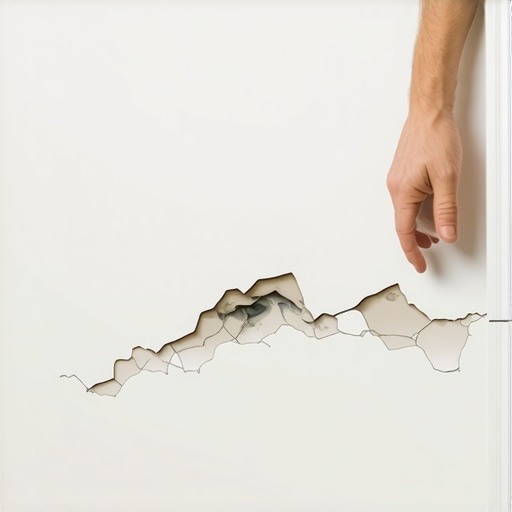
Bathroom baseboards peel because of a phenomenon known as capillary action combined with high vapor pressure in small, enclosed wet environments. When you take a hot shower, the air saturates with moisture that seeks out any porous surface, especially the unsealed bottom edge of your trim. This moisture wicks upward into the material, breaking the bond between the substrate and the paint layer from the inside out.
I have spent twenty-five years on my knees with a moisture meter and a level, smelling of WD-40 and oak dust. I have seen it all. I once walked into a house where a $15,000 wide-plank walnut floor was cupping so bad it looked like a potato chip because the installer didn’t check the crawlspace humidity. People think the bathroom is just another room. It is not. It is a structural engineering challenge where every joint is a potential failure point. If your baseboards are peeling, it is a symptom of a systemic failure in how the transition between your floor and wall was handled. You are likely dealing with builder-grade MDF, which is essentially compressed sawdust held together by hope and urea-formaldehyde resin. Once moisture hits that core, it swells like a cheap sponge, and no amount of top-coat paint will save it. You have to address the molecular level of the installation. We are talking about the hydrostatic pressure that builds up behind the board and the chemical bond of your primer.
The structural lie of builder grade materials
Builder grade MDF baseboards are fundamentally incompatible with high-moisture environments like bathrooms due to their hygroscopic nature and lack of internal structural integrity. These materials are designed for cost efficiency in dry areas, yet they are routinely installed in splash zones where they inevitably fail through delamination and fungal growth. When water touches the edge of a medium-density fiberboard, the fibers expand at different rates, causing the paint to crack and flake off in large chunks.
If you look at chic baseboard designs that transform rooms in 2025, you will see that the trend is moving toward materials that can actually handle a splash. Most contractors use what is cheap and easy to cut. They do not care about the long-term maintenance of your tile or the longevity of your showers. They want to get the job done and get paid. But if you want a fix that lasts, you have to understand the density of the material you are putting against your floor. Solid wood is slightly better, but even then, the tannins can bleed through the paint if you do not use a high-quality oil-based primer. The real solution often involves moving away from wood entirely in the wettest zones of the home.
“A floor is only as good as the subfloor beneath it; deflection is the enemy of every joint.” – Master Flooring Axiom
The physics of the one eighth inch gap
Maintaining a precise one eighth inch gap between the bottom of the baseboard and the floor surface is the most overlooked requirement for a successful bathroom installation. This gap prevents the baseboard from sitting in standing water and allows for the natural expansion and contraction of the flooring material without putting stress on the wall trim. Without this micro-gap, the baseboard acts as a wick, pulling every drop of water from the floor directly into the core of the material.
When I am on a job site, I see guys shoving the baseboard right down against the tile. It looks clean for a week. Then the homeowner mops the floor. That water hits the base of the trim and stays there. It cannot evaporate. It just sits and soaks. You need that gap, and then you need to fill it with a high-quality, 100 percent silicone sealant, not a cheap acrylic caulk. Acrylic shrinks. Silicone remains flexible. If you want to know about maintaining the rest of your surface, check out tile cleaning tips for a sparkling bathroom in 2025. Proper cleaning won’t save a bad installation, but it will extend the life of a good one. The physics of evaporation dictate that moisture will always find the path of least resistance. If you leave an unsealed edge, you are inviting rot.
The ghost in the expansion gap
Expansion gaps are not just for the flooring itself but are essential for the health of the wall assembly and the baseboard bond. If the flooring is locked tight against the wall, the pressure from thermal expansion will push the baseboard away from the studs, breaking the caulk line at the top. This opening at the top of the board then allows humid air from showers to enter the wall cavity, leading to mold growth behind the trim where you cannot see it.
| Material Type | Moisture Resistance | Typical Longevity | Best Use Case |
|---|---|---|---|
| MDF | Very Low | 2 to 5 Years | Dry Bedrooms Only |
| Solid Pine | Medium | 10 to 15 Years | General Living Areas |
| PVC/Composite | Total | 50+ Years | Bathrooms and Mudrooms |
| Tile Base | Total | Lifetime | Wet Rooms and Showers |
The table above shows the reality of material selection. If you are tired of repainting every two years, you are using the wrong material. I recommend a PVC baseboard or a tile baseboard for any room with a tub or shower. These materials do not have fibers to swell. They do not have resins that break down. They are inert. When you combine them with proper grout techniques, the system becomes nearly indestructible. You can find more about this in grout restoration secrets for long-lasting results. It is about building a system, not just slapping a board on a wall.
The chemical failure of cheap paint and primer
Peeling occurs when the mechanical bond of the primer fails to penetrate the surface of the baseboard or when the topcoat lacks the elasticity to handle the expansion of the substrate. In a bathroom, you need a primer that is specifically formulated for high-adhesion and moisture resistance, typically an alkyd or high-end acrylic urethane. Cheap latex paints are too porous and allow water vapor to pass through the film, reaching the wood fibers below.
I have seen people try to fix peeling by just scraping and repainting. It will fail. Every single time. You have to get down to a clean, dry surface. If the material is damp, you are just sealing in the destruction. I use a heat gun to ensure the moisture levels are below ten percent before I even open a can of primer. Then I apply a coat of Zinsser Cover Stain or a similar high-solids primer. This creates a barrier that moisture cannot easily penetrate. For more ideas on how to finish these surfaces, look at baseboards makeover ideas to elevate your space. The finish is only as good as the prep work that preceded it.
The 1/8 inch that ruins everything
Small errors in measurements and sealants lead to catastrophic failures in the bathroom ecosystem because water is a persistent solvent. A missing bead of caulk behind a toilet or next to a shower glass panel allows water to seep under the baseboard. Once water is trapped between the baseboard and the drywall, it creates a micro-climate that is perfect for black mold, which eats the paper backing of the drywall and the wood fibers of the trim.
- Remove all existing damaged trim and inspect the drywall for soft spots.
- Treat the bottom two inches of the wall with a mold-inhibiting solution.
- Seal the transition between the floor and the wall with waterproof flashing tape if using wood.
- Switch to a waterproof material like cellular PVC for the replacement.
- Back-prime the new boards even if they are sold as pre-primed.
- Leave a 1/8 inch gap at the floor and fill with 100 percent silicone.
If you are dealing with a small space, you might also be looking at showers with a style trendy ideas for small bathrooms. The smaller the bathroom, the higher the humidity concentration. This means your ventilation has to be perfect. If your fan isn’t moving at least 50 CFM, your baseboards are doomed no matter what you do. It is all connected. The floor, the walls, the air quality. You cannot fix one without looking at the others. That is the architect’s approach to flooring. We don’t just look at the surface. We look at the soul of the room.
“Tile is only as waterproof as the person who installed the underlying membrane; grout is not a shield, it is a filter.” – Master Tile Axiom
Why your subfloor is lying to you
Subfloors often harbor residual moisture that migrates upward, attacking the baseboard from underneath even when the bathroom surface appears dry. This is especially common in concrete slab homes where the slab lacks a proper vapor barrier. The moisture moves through the concrete and gets trapped under your LVP or tile, eventually finding its way to the perimeter where your baseboards sit. This is the silent killer of bathroom trim.
I spent three days grinding concrete on a job last month just so the floor wouldn’t click like a castanet. People think they can just lay floor and trim and be done. They don’t check for moisture. They don’t check for levelness. If your floor has a dip at the wall, your baseboard will have a gap. If you try to force the baseboard down into that dip, you put tension on the nails. Eventually, that tension wins, the board pops, and moisture gets in. If you have old grout, you might find that moisture is traveling through the cracks in the floor itself. You can learn how to refresh grout without replacing it to help seal those pathways. But remember, if the subfloor is wet, you are just putting a band-aid on a broken leg. The fix that actually lasts requires a dry foundation and a material that doesn’t care about water.