
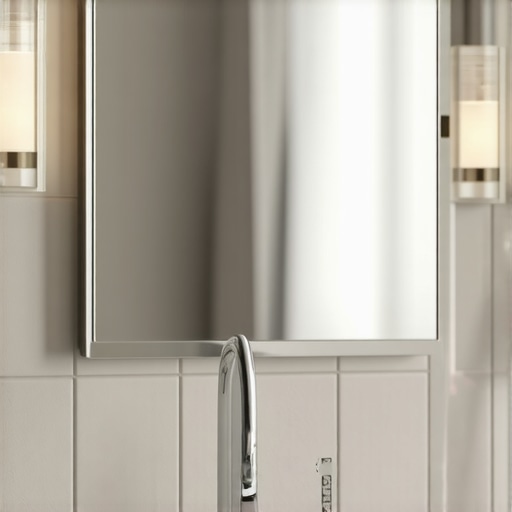
I spent three days grinding concrete on a job last month just so the floor wouldn’t click like a castanet, but while I was there, the client pointed at her vanity. The edges of her mirror were turning black, looking like a rotting piece of fruit. I smell like WD-40 and oak dust most days, but I know a structural failure when I see one. Whether it is a wide-plank walnut floor cupping or a mirror losing its silver, the culprit is almost always moisture management. I have spent 25 years on my knees checking moisture meters, and I can tell you that what is happening to your glass is no different than what happens to a poorly installed hardwood floor in a basement. It is a chemical war between your environment and the substrate. Most people think a mirror is just a piece of glass, but it is actually a complex assembly of silver, copper, and paint. When that assembly fails, the mirror dies. This is not about aesthetics, it is about the physics of your bathroom. If your mirrors are failing, your showers, grout, and tile are likely contributing to the problem through excessive humidity and capillary action. You cannot just wipe away the black edges. Once the silver is gone, it is gone forever. You have to understand the chemistry to stop the rot before it takes over the whole vanity.
The black rot creeping from the edges
Desilvering occurs when the silver backing of a mirror is exposed to oxygen and moisture, leading to oxidation. This chemical reaction transforms the reflective silver nitrate into dark silver oxide. Common triggers include ammonia-based cleaners, high humidity from showers, and standing water trapped against the bottom edge of the glass.
A mirror starts its life as simple float glass. To make it reflective, manufacturers apply a thin layer of silver nitrate. Because silver is incredibly reactive, they have to protect it. Usually, they add a layer of copper on top of the silver, followed by several coats of protective paint. Think of it like a finished floor. You have the raw wood, the stain, and then several coats of polyurethane. If the poly fails, the wood rots. In the bathroom, the paint and copper are your poly. When you use harsh cleaners or let steam settle on the edges, you are eating away that protective shell. I have seen guys install mirrors directly against a backsplash without a gap. That is a death sentence. Water wicks up between the glass and the wall through capillary action, just like moisture wicking up through a concrete slab into your underlayment. It sits there, hidden, slowly dissolving the paint. Once the paint is breached, the copper oxidizes, and the silver is next. It is a slow, relentless process that starts at the edges because that is where the silver is most vulnerable. The edge is the open grain of the mirror. If you do not seal it, you are inviting the rot in.
“A floor is only as good as the subfloor beneath it; deflection is the enemy of every joint.” – Master Flooring Axiom
How moisture vapor destroys silver nitrate
Moisture vapor transmission is the movement of water molecules through porous materials like drywall and grout. When bathroom humidity remains high, water vapor penetrates the mirror backing, causing the metallic layers to delaminate. This process is accelerated by temperature fluctuations that cause the glass to expand and contract constantly.
In the flooring world, we talk about MVER, or Moisture Vapor Emission Rate. It is the amount of water coming out of a slab. Your bathroom has its own MVER. Every time you run one of those showers that wow, you are pumping gallons of water into the air. If your ventilation is garbage, that water looks for a place to go. It finds the back of your mirror. Most mirrors are glued to the wall with mastic. If that mastic was not applied in vertical strips, it can trap pockets of moist air. Those pockets become little incubators for desilvering. The silver atoms actually begin to migrate and clump together, which is why the mirror looks cloudy or black. It is not just on the surface. It is a structural failure of the bond. I always tell my clients that if they are going to spend money on high-end showers with a style, they better have a fan that can pull the chrome off a bumper. You need to move that air. Without airflow, the dew point is reached on the cold surface of the mirror, and the chemical breakdown begins. The glass itself is stable, but the silver is a delicate metal that wants to return to its natural, oxidized state.
Why your tile choices impact mirror life
Porous tile and grout act as a moisture reservoir, holding onto water long after the shower is turned off. High porosity in natural stone or unsealed grout increases the ambient humidity in the room. This sustained moisture load puts constant stress on the mirror coatings, leading to premature desilvering and edge rot.
If you have unsealed grout, you have a giant sponge in your bathroom. I have seen bathrooms where the tile looks great, but the grout is full of micro-fissures. Water gets in there and stays. It keeps the room at 80 percent humidity for hours. This is why I advocate for grout restoration secrets to keep things watertight. When grout is sealed, the water stays on the surface and can be evaporated by the fan. When it is unsealed, it migrates into the wall cavity. I have pulled down mirrors where the drywall behind them was mushy. That moisture is attacking the mirror from the back. It is the same reason we use moisture barriers under hardwood. You have to isolate the finish material from the source of the dampness. If your tile is absorbing water, your mirror is paying the price. Even the best eco-friendly tile solutions require proper maintenance to ensure they do not become a liability for your other finishes. You have to treat the bathroom as a sealed system. Any leak in the system, whether it is a grout line or a cracked tile, will eventually manifest as a problem elsewhere, like those black spots on your glass.
The baseboard connection to wall humidity
Bathroom baseboards serve as the bottom seal for the wall assembly, preventing floor water from wicking into the drywall substrate. If baseboards are improperly installed or made of absorbent materials like MDF, they can transport moisture upward toward the mirror vanity. Proper baseboard selection is essential for maintaining a dry wall cavity.
People overlook the floor to wall transition. I see people put MDF baseboards in a bathroom and then wonder why they are swelling after six months. That swelling is not just ugly, it is a sign of a moisture problem. Using chic baseboard designs made of PVC or solid wood with a high-quality finish can help. More importantly, those baseboards makeover ideas should include a bead of silicone at the bottom. If you are mopping the floor and water is hitting the bottom of the mirror or the baseboard, it is getting sucked up into the wall. I have seen mirrors desilver from the bottom up because of wet-mopping habits. The water travels through the baseboard, into the drywall, and sits behind the glass. It is a slow wick. You need to keep the base of the wall dry to keep the top of the wall dry. It is all connected. In my world, we call this the envelope. If the envelope is breached at the floor level, the whole wall is at risk.
“Excessive moisture vapor transmission through a concrete slab or wall cavity is the primary cause of finish failure in residential construction.” – NWFA Technical Guidelines
Technical specifications for bathroom durability
When selecting materials for a bathroom renovation, you have to look at the technical data. You cannot just pick what looks pretty. You need to look at the Janka hardness for any wood elements and the absorption ratings for your tiles. If you are putting wood in a bathroom, you are asking for trouble unless it is engineered or a very stable species like teak. Even then, the finish is everything. For mirrors, look for those with “edge sealer” applied at the factory. This is a special polymer coating that wraps around the cut edge of the glass to keep the moisture out of the silver layer. If you are buying a cheap mirror from a big-box store, it probably does not have this. You can buy edge sealer yourself and apply it before you hang the mirror. It is a five-minute job that can save you a thousand dollars in glass replacement later. Also, pay attention to how you clean it. Never spray cleaner directly on the glass. The liquid runs down and pools in the bottom channel, which is exactly where the desilvering starts. Spray the cloth instead. It is a simple habit that changes the life expectancy of your mirror from five years to fifty.
Hardness and Moisture Resistance Comparison
| Material Type | Janka Hardness | Moisture Resistance | Best Use Case |
|---|---|---|---|
| Solid Red Oak | 1290 | Low | Living Rooms |
| Porcelain Tile | N/A (Very Hard) | Excellent | Showers and Floors |
| Engineered Maple | 1450 | Moderate | Kitchens |
| PVC Baseboards | N/A | High | Bathrooms |
| MDF Trim | N/A | Very Low | Dry Bedrooms |
A checklist for a dry bathroom environment
- Install an exhaust fan rated for at least 1 CFM per square foot of bathroom space.
- Run the fan for at least 20 minutes after every shower to clear latent humidity.
- Apply a high-quality grout sealer every 12 to 24 months to prevent water absorption.
- Maintain a 1/8 inch gap between the mirror and the backsplash to prevent wicking.
- Switch to ammonia-free glass cleaners to protect the silver and copper layers.
- Check the silicone seal around the base of the vanity and the baseboards monthly.
- Ensure the mirror is mounted with a small air gap behind it using specialized spacers.
- Use a squeegee on tile cleaning tips to remove standing water immediately.
The 1/8 inch that ruins everything
In flooring, if I leave a 1/4 inch gap for expansion and the homeowner covers it with a heavy cabinet, the floor buckles. In mirrors, that 1/8 inch gap is about airflow. If the mirror is slapped flat against a cold exterior wall, condensation will form behind it every single day. That condensation has nowhere to go. It sits against the backing paint and slowly eats through. I recommend using small rubber bumpers on the back of the mirror. This creates a tiny chimney effect. Warm air can rise behind the glass, carrying moisture away. It is the same logic as a rainscreen in siding or a vented crawlspace. You have to give the water an exit strategy. If you trap it, you lose. I have seen people try to use how to refresh grout techniques to fix moisture issues, but if the water is already behind the mirror, you are just masking the symptoms. You have to address the structural airflow. Stop thinking of your bathroom as a series of decorative choices. Start thinking of it as a laboratory where steam and chemicals are trying to destroy your investment. Protect the edges, seal the grout, and let the air move. That is how you keep your mirror clear and your floors solid for the long haul.