
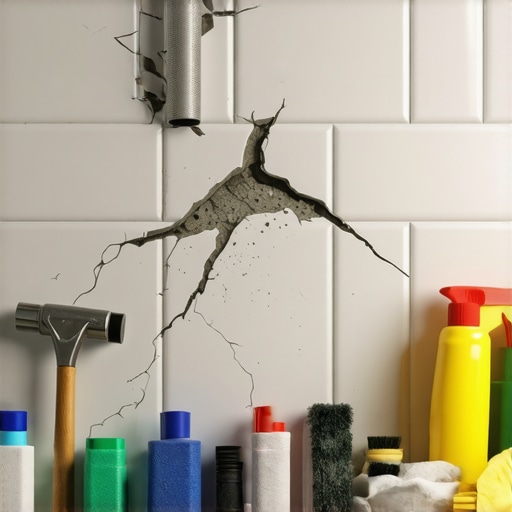
The invisible forces destroying your bathroom floor
I spent three days grinding concrete on a job last month just so the floor wouldn’t click like a castanet. Most guys skip the leveling compound. They think the underlayment will hide the dip. It won’t. I have spent twenty five years on my knees with a moisture meter and a straightedge. I have seen fifteen thousand dollar wide plank walnut floors turn into potato chips and master bathroom porcelain tiles shatter like glass because an installer forgot that physics does not care about your aesthetic choices. A floor is a performance surface. It is a structural component of your home that must withstand thousands of pounds of pressure, humidity fluctuations, and the constant movement of the building envelope. If you see a crack in your grout or a hairline fracture in your tile, you are not looking at a cosmetic defect. You are looking at a structural failure. It is the sound of the subfloor winning the war against the finish material.
The math of subfloor deflection
Subfloor deflection and joist spacing are the primary causes of cracked ceramic tiles and fractured grout lines. If the wood subfloor flexes more than L/360, the rigid tile bond breaks. Engineers measure this as vertical displacement under a concentrated load to ensure structural integrity. To calculate this, you take the span of the floor joist in inches and divide it by 360. If your joist spans 12 feet, that is 144 inches. Divided by 360, your maximum allowable deflection is 0.4 inches. That is less than half an inch of movement. If your floor moves more than that when you walk on it, your tile will crack. It is a mathematical certainty. Natural stone like marble requires even more rigidity, specifically a rating of L/720. This means the floor must be twice as stiff as what is required for standard ceramic. Most builders install the bare minimum. They use 5/8 inch OSB over joists spaced 24 inches on center. This is a recipe for disaster. I always insist on a double layer of subflooring or an uncoupling membrane to isolate the tile from this inevitable movement. If the skeleton of the room is weak, the skin will always tear.
“A floor is only as good as the subfloor beneath it; deflection is the enemy of every joint.” – Master Flooring Axiom
The chemistry of a failed bond
Polymer modified thin set requires specific hydration cycles to create a mechanical bond between the tile substrate and the porous ceramic backing. Failure occurs when the open time is exceeded or when evaporation happens too quickly on a dusty concrete slab. When you spread thin set, the water in the mix starts a chemical reaction. This is not just drying like paint. It is a crystalline growth process. If the concrete slab is too dry, it sucks the moisture out of the mortar before the crystals can grow into the pores of the tile. This creates a dry bond. It looks fine for a month. Then, the first time you drop a heavy shampoo bottle in one of your showers with a style, the tile pops loose. Professional installers use a technique called back buttering. We apply a thin layer of mortar to the back of the tile itself to ensure one hundred percent coverage. If you have air pockets under your tile, you have weak points. Those air pockets are where the cracks begin. You can hear them. Walk across your bathroom floor. If you hear a hollow thud, you have a bond failure. It is only a matter of time before that hollow spot becomes a crack.
Why expansion gaps are non negotiable
Expansion gaps at the perimeter of the room allow the tile assembly to expand and contract with temperature changes and moisture shifts. Without a 1/4 inch gap hidden under the baseboards, the tiles will tent or buckle as they push against the walls. This is one of the most common mistakes in bathroom installations. People want the tile to look tight against the wall. They grout right up to the drywall. This is a mistake. Grout is rigid. Tile is rigid. Wood framing is not. When the humidity rises in the summer, the wood framing in your house swells. If the tile has nowhere to go, it has to move up. This causes tenting, where two tiles push against each other until they lift off the floor in a V shape. You must leave a gap. This gap is later covered by your chic baseboard designs. The baseboard is not just decorative. It is a functional cover for the expansion joint that keeps your floor from exploding. I have seen entire bathroom floors lift three inches off the subfloor because the installer forgot to leave that quarter inch of space. It is a simple step that saves thousands of dollars in repairs.
| Substrate Type | Deflection Limit | Recommended Underlayment |
|---|---|---|
| Plywood Joists | L/360 | 1/2 inch Cement Board |
| Natural Stone | L/720 | Double Layer Plywood |
| Concrete Slab | N/A | Uncoupling Membrane |
| Green Board | Not Rated | Do Not Tile Directly |
The ghost in the grout lines
Grout cracking is usually a symptom of lateral movement or insufficient structural support within the joist system. Using epoxy grout or high performance additives can mitigate surface cracking, but it cannot fix a failing subfloor or unstable framing. Many homeowners think they can just scrape out the old grout and put in new stuff. This is a temporary fix. If the grout cracked once, it will crack again unless you address the movement. One way to prevent this is by using 100 percent silicone caulk in the corners where walls meet floors. Never use grout in a change of plane. Grout will always crack in a corner. Silicone is flexible. It can handle the movement of the house without breaking the seal. If you are struggling with old, stained, or failing joints, you should look into grout restoration secrets before you decide to rip the whole floor out. Sometimes the problem is just a poor mix or a lack of sealant, but more often, it is a sign that the floor is moving more than it should.
The information gain on underlayment
While most people want the thickest underlayment, too much cushion actually causes the locking mechanisms on LVP to snap under pressure. In the world of tile, the equivalent mistake is using too much thin set to level a floor. Mortar is not a leveling agent. It is a bonding agent. If you try to build up a low spot with an inch of thin set, the mortar will shrink as it cures. This shrinkage pulls on the tile and can cause it to crack or lip. Lipping is when one edge of a tile is higher than the one next to it. It is a trip hazard and it looks terrible. If your floor is not level, you must use a self leveling underlayment before you start tiling. This creates a flat, stable plane. A flat floor is a happy floor. I tell my apprentices that if they spend eighty percent of their time on floor prep, the tiling will take care of itself. If they rush the prep, they will spend the rest of their lives fixing their mistakes.
- Check subfloor moisture levels with a calibrated meter.
- Verify joist spacing and calculate the deflection rating.
- Apply a primer to concrete slabs to prevent moisture wicking.
- Ensure 95 percent mortar coverage in wet areas.
- Leave a 1/4 inch expansion gap at all vertical surfaces.
- Use a waterproof membrane in all shower applications.
Waterproofing and the humidity trap
Waterproofing membranes like liquid membranes or polyethylene sheets are essential for preventing rot in the subfloor. However, if the concrete moisture vapor emission rate is too high, the vapor pressure will delaminate the membrane from the slab. In humid climates, this is a constant battle. You cannot just slap a membrane down and hope for the best. You have to test the calcium chloride levels in the concrete. If the slab is breathing out too much water, it will push the tile right off the floor. This is especially true in modern showers that wow where the water usage is high. The moisture gets behind the tile and has nowhere to go. If the installer didn’t use the right materials, the studs will rot, the floor will flex, and the tiles will crack. It is a chain reaction of failure that starts with a single drop of water hitting an unprotected piece of wood. Proper maintenance is also key to keeping these systems functional. Knowing tile cleaning tips can help you spot issues before they become catastrophes. If you see mold in your grout, you have a moisture problem that is likely deeper than the surface.
The 1/8 inch that ruins everything
Accuracy in flooring is measured in sixteenths of an inch. If your subfloor has a dip of 1/8 of an inch over a ten foot span, your large format tiles will crack. Large format tiles are anything with one side longer than 15 inches. These tiles have zero flexibility. They are like sheets of glass. If the floor is not perfectly flat, the tile will bridge the gap over the low spot. When you step on that tile, you are applying hundreds of pounds of pressure to a hollow space. The tile will snap. This is why floor prep is the most expensive part of a professional installation. It requires a laser level and a lot of patience. If your installer doesn’t bring a six foot level to the job site, fire them. They are not a floor installer; they are a tile sticker. There is a big difference between the two. One understands the engineering of the home, while the other just wants to get paid and leave before the cracks appear. Always invest in the prep. You can buy the cheapest tile at the big box store, and if the prep is perfect, it will last fifty years. You can buy the most expensive Italian marble, and if the prep is bad, it will be ruined in six months. Choose your installer based on their prep process, not their price per square foot.