
I spent three days grinding down a slate entry last month because the previous owner had slathered it in cheap acrylic floor wax for twenty years. Every time it got dull, they just added another layer. By the time I got there, the floor was a quarter-inch thick yellowed skin of plastic that trapped hair, dirt, and dead skin cells like a prehistoric insect in amber. It did not just look bad. It was a structural mess that was peeling away in sheets, taking the top layer of the stone with it. That is the problem with shortcuts in this industry. People want the shine today but they do not think about the chemical bond tomorrow. Most homeowners think a floor is just something you walk on, but to me, it is a living engineering assembly. When you smother a tile floor in wax, you are essentially plasticizing a surface that was designed to be either breathable or inert. You are creating a trap for grime that no mop can ever reach.
The chemical war on your kitchen floor
Stripping floor wax requires high-pH alkaline solutions that break the cross-linked polymer chains of acrylic finishes while protecting the underlying ceramic or stone. You must understand that most modern floor finishes are not wax at all; they are liquid plastics. Removing them involves a chemical reaction called emulsification where the solid plastic is forced back into a liquid state. This process is delicate because the same chemicals that melt the wax can also degrade the grout or discolor certain types of natural stone if left too long. You need to manage the dwell time, the temperature of the water, and the mechanical agitation to ensure the slurry does not dry back into the tile pores. If the chemical dries before you vacuum it up, you have just created a harder, more concentrated mess than you started with.
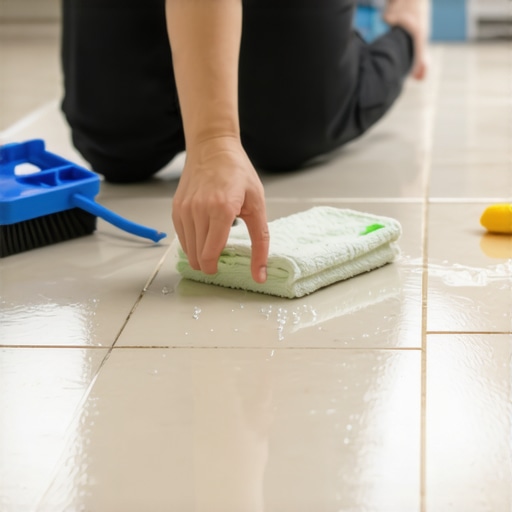
The mechanics of the process are simple but brutal. You are fighting against years of buildup. Most guys skip the leveling compound or the deep clean because they think the underlayment will hide the dip. It will not. In the same way, you cannot just mop on a stripper and expect a miracle. You need to be on your knees with a stiff-bristle brush, watching the chemical turn from a clear liquid into a milky, disgusting sludge. That sludge is the ghost of every dirty footprint and spilled soda from the last decade. If you do not get it all off, your new sealer will fail within weeks. A floor is only as good as the surface preparation; shortcuts are the fastest way to a ruined installation. I have seen 15,000 dollar walnut floors cup like potato chips because of humidity, and I have seen 5,000 dollar tile jobs ruined because someone used a cheap wax that turned yellow in the sun. It is all about the chemistry.
“Tile surfaces must be free of all topical coatings or contaminants before the application of modern thin-sets or sealers to ensure a proper mechanical bond.” – TCNA Technical Manual
The ghost in the expansion gap
Expansion gaps at the perimeter of a room are essential for tile stability and wax removal because they prevent chemical pooling under baseboards. When you are stripping a floor, the edges are where the disaster happens. The stripper solution runs toward the walls and gets sucked up into the drywall or the bottom of the baseboards through capillary action. If you are not careful, you will end up with warped trim and ruined paint. This is why I tell people to look into baseboards makeover ideas to elevate your space after a deep clean. Usually, the old trim is so caked in wax and stripper residue that it is easier to replace it than to clean it. The gap between the tile and the wall is not just for movement; it is a catch basin for every chemical you pour on that floor. You have to tape it off with the precision of a surgeon.
The physics of the expansion gap are non-negotiable. Tile and grout do not move much, but the house does. If you fill that gap with wax or grout, the floor has nowhere to go when the temperature changes. It will tent or crack. When you are stripping the floor, you need to ensure that no stripper residue remains in those gaps. Use a wet-dry vacuum with a crevice tool to suck every drop of moisture out of the perimeter. If you leave it there, it will slowly eat away at the adhesive holding your tiles down. I have pulled up tiles that literally clicked like castanets because the owner had been flood-mopping with wax stripper for years, and the chemicals had dissolved the bond underneath. It is a slow death for a floor.
The 1/8 inch that ruins everything
A single eighth of an inch of residual wax in the grout lines will prevent new sealers from bonding and lead to immediate discoloration and peeling. Grout is porous. It is basically a hard sponge. When you apply wax to a tile floor, the grout drinks it up. This is the hardest part to clean. You can get the surface of the tile clean quite easily, but getting the wax out of the grout requires deep agitation. If you fail, the new sealer will just sit on top of the old wax and eventually flake off like a bad sunburn. This is why many homeowners look for grout restoration secrets for long lasting results after they realize their floor looks patchy. You have to get to the raw cementitious material before you can ever hope to seal it properly.
| Chemical Type | pH Level | Best Use Case | Risk Factor |
|---|---|---|---|
| Alkaline Stripper | 11.0 to 13.0 | Heavy acrylic buildup | Can burn skin and darken wood |
| Solvent-Based | Neutral | Oil-based waxes or urethane | High VOCs and fire risk |
| Acidic Wash | 2.0 to 4.0 | Mineral deposits and grout haze | Will etch marble and limestone |
Stripping is not a one-time event; it is a cycle of application and removal. You apply the chemical, you wait, you scrub, and you vacuum. Then you do it again. You do it until the water runs clear. If the water is still gray or yellow, you are not done. Most people quit 70 percent of the way through because their back hurts and the room smells like ammonia. That is when the floor fails. You have to be relentless. I use a black stripping pad on a floor machine for the big areas, but the corners always require hand-scrubbing. There is no machine that can replace the detail work of a man with a brush and a reason to get it right. If you want a floor that looks like those showers that wow modern designs for 2025, you have to put in the foundational labor. You cannot build a palace on a foundation of old floor wax.
Why your subfloor is lying to you
Subfloor moisture levels and deflection directly impact how floor wax adheres and how stripping agents react with the tile bond. If you have a concrete slab with high moisture emission, it will push the wax off the tile from the bottom up, creating white bubbles. This is called efflorescence or hydrostatic pressure. When you go to strip that floor, the water you use can actually migrate down through the grout and aggravate the moisture problem. You might think you are cleaning the floor, but you are actually feeding a monster in the crawlspace. I always check the moisture content before I even open a bottle of stripper. If the slab is wet, the wax was never the problem; the subfloor was. Most installers ignore this because they want to get paid and get out. I stay because I do not want to come back for a warranty repair in six months.
- Tape off all baseboards using blue painter’s tape and plastic sheeting.
- Test a small, inconspicuous corner first to check for tile etching.
- Apply the stripping solution in small manageable sections of twenty square feet.
- Let the chemicals dwell for exactly twelve minutes without letting them dry.
- Scrub with a stiff-bristle nylon brush or a floor machine with a black pad.
- Vacuum the slurry immediately using a wet-dry vac to prevent re-deposition.
- Neutralize the floor with a clean water rinse and a splash of white vinegar.
- Inspect the grout lines for residual wax using a pick or a small brush.
- Dry the surface completely for twenty-four hours with high-volume fans.
- Re-seal with a breathable penetrating sealer suited for the specific tile type.
The chemistry of the neutralizing rinse is the most overlooked step. Strippers are highly alkaline. If you do not bring the pH of the floor back to neutral, your new sealer will undergo a process called saponification. That is just a fancy word for the sealer turning into soap. It will stay sticky forever and track every bit of dirt from your shoes. A little bit of white vinegar in your rinse water is the secret to balancing the scales. It is a simple trick, but it saves the job. For more maintenance advice, you should check out tile cleaning tips for a sparkling bathroom in 2025 to keep things fresh after the heavy lifting is done.
“A floor is only as good as the subfloor beneath it; deflection is the enemy of every joint.” – Master Flooring Axiom
The Phoenix heat and the brittle bond
In dry climates like Phoenix, floor wax bakes into a brittle, glass-like shell that requires more aggressive mechanical agitation and longer chemical dwell times. The heat strips the plasticizers out of the wax, leaving behind a hard resin that is nearly impossible to move with standard cleaners. You have to use the chemical to soften it, but in the desert air, the chemical evaporates in five minutes. This creates a catch-22. You have to keep the floor wet with stripper without over-saturating the grout. I usually work at night or early morning in these regions just to keep the evaporation rates under control. If you are in a high-humidity area like Houston, the wax stays gummy, which is a different kind of nightmare. Gummy wax gums up your scrubbing pads in seconds, requiring you to go through ten times as many pads as a normal job.
The regional climate dictates the toolset. You cannot treat a floor in a swamp the same way you treat a floor in a furnace. The expansion and contraction cycles are different. If you have questions about how your specific climate affects your tile, you can always contact us for a professional assessment. I have seen floors in the southwest literally pop off the thin-set because the wax blocked the natural moisture transmission and the heat did the rest. It is a structural engineering challenge every time you walk through the door. You have to respect the materials. If you are looking for how to refresh grout without replacing it, the first step is always getting the environment under control. You can’t paint a house in a rainstorm and you can’t strip a floor in a sauna.
The final rinse and the road ahead
Once the wax is gone, the floor will look dull. Do not panic. That is what a clean floor actually looks like. The shine was a lie. Now you have a blank canvas. You can see the true color of the stone or the ceramic. You can see the chic baseboard designs that transform rooms in 2025 against a surface that is actually clean, not just shiny. This is the moment where you decide the future of your floor. Are you going to go back to the cheap wax? Or are you going to use a high-quality penetrating sealer that protects the tile from the inside out? A penetrating sealer does not sit on top; it lives in the pores. It lets the floor breathe while repelling oil and water. It is the professional choice for a reason. It does not yellow, it does not peel, and it does not require stripping ever again. You just mop it with a neutral cleaner and move on with your life. That is the mark of a well-engineered floor.