I spent three days grinding concrete on a job last month just so the floor wouldn’t click like a castanet, but the bathroom next door reminded me why I hate shortcuts even more. I walked into the master suite and the homeowner pointed at the tile. It looked fine at a glance. Then I stepped on the shower curb. The tile did not just move, it compressed. It felt like stepping on a wet sponge wrapped in ceramic. That is the sound of a thousand dollars of lumber rotting into compost behind a wall of expensive porcelain. Most guys skip the leveling compound and they definitely skip the proper curb assembly. They think the underlayment or the thin-set will hide the dip or the leak. It won’t. If your shower curb is squishy, you are not looking at a cosmetic issue. You are looking at a structural engineering failure that has likely been brewing for years because someone forgot that water is a patient, destructive chemist.
The structural reality of a failing curb
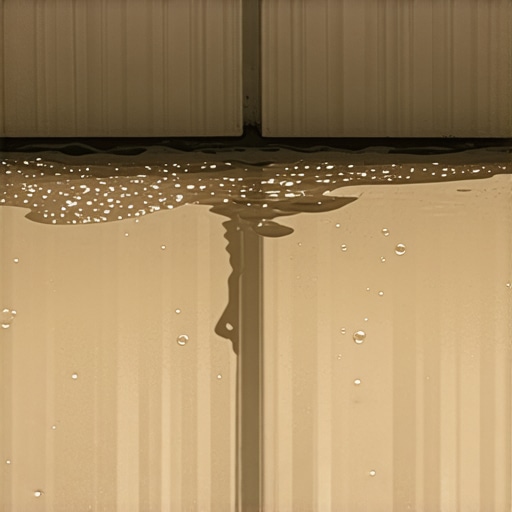
A squishy shower curb indicates that the internal wood framing has absorbed enough moisture to lose its structural integrity and began to rot. This happens when water penetrates the grout or tile layer and finds a path through the waterproofing membrane, often through nail holes or improper corner seals. Once the wood softens, the tile loses its rigid backing and starts to flex under weight. This is the terminal stage of a bathroom leak. [image_placeholder] When I see this, I know the subfloor is also in danger. The physics of a shower curb are simple but unforgiving. It is a dam. If the dam is built out of 2×4 studs stacked on top of each other, those studs must be completely isolated from moisture. In the old days, we used lead pans or thick PVC liners. The problem with those liners is that installers often nail them to the curb. Every nail is a hole. Every hole is a capillary pathway for soapy water to enter the wood. When water hits that wood, the cellular structure of the pine or fir expands. Then the fungus moves in. By the time you feel the squish, the wood has turned into a substance with the density of damp cardboard. You are likely dealing with a total tear out of the curb and the first few rows of tile on the floor and walls. It is a mess that smells like wet earth and regret. This is why I am a stickler for the TCNA standards. There is no middle ground here.
“A floor is only as good as the subfloor beneath it; deflection is the enemy of every joint.” – Master Flooring Axiom
The hidden chemistry of water damage
Water moves through tile assemblies via capillary action, which is the ability of a liquid to flow in narrow spaces without the assistance of external forces. If you use a cementitious grout that is not sealed, it acts like a wick. It pulls water toward the curb core every time you take a shower. Over time, this water saturates the mortar bed. If the installer did not use a topical waterproofing membrane, that moisture sits against the curb framing. This constant saturation triggers a chemical breakdown in the adhesives. Even the best modified thin-set will eventually weaken if it is perpetually submerged. I have seen guys try to fix this by just slapping more grout on top. That is like putting a band-aid on a gunshot wound. You need to understand the moisture vapor transmission rate. If the moisture cannot escape, it will find a way out through your baseboards or into the subfloor. I always tell people to look at grout restoration secrets for long lasting results because maintaining that top layer is your first line of defense. But once the curb is soft, restoration is off the table. You are in the realm of reconstruction. The wood has failed. The bond has failed. The system has failed.
Why your subfloor is lying to you
Subfloors often hide the extent of a leak by absorbing water and spreading it laterally across the joists before showing signs of distress. This means a squishy curb in the master bath might actually be rotting the floor joists under the hallway. When we talk about showers that wow, we usually talk about the aesthetics, but the real wow factor is a floor that stays dry for fifty years. I use a moisture meter on every inspection. If I see a reading above 15 percent in the subfloor around a shower, I know we have a problem. The subfloor is the foundation of the entire installation. If you are using OSB, it will swell and flake once it gets wet. Plywood is slightly more resilient, but even it will delaminate. This is why I prefer a concrete slab or a high-quality cement board with a topical moisture barrier. You cannot trust the subfloor to stay dry on its own. You have to force it to stay dry by creating a tanked environment. The physics of deflection also play a role. If the subfloor is too thin, it will bounce. That bounce cracks the grout. Those cracks let in the water. It is a cycle of destruction that starts with poor structural planning. Do not let a contractor tell you that a thick underlayment will fix a bouncy floor. Too much cushion actually causes the locking mechanisms on LVP or the bond on tile to snap under pressure.
| Waterproofing Method | Vapor Permeance | Adhesive Class | Best Use Case |
|---|---|---|---|
| PVC Liner | High (Poor) | Solvent Weld | Traditional Mortar Beds |
| Liquid Membrane | Moderate | C2TE Thinset | Custom Curbs and Benches |
| Sheet Membrane | Low (Best) | Modified Thinset | Steam Showers and Wet Rooms |
The 1/8 inch that ruins everything
Precision in the slope of the curb and the shower floor is the difference between a dry bathroom and a mold factory. A shower curb must have a slight inward pitch of at least 1/8 inch to 1/4 inch per foot toward the drain. If the curb is level or, heaven forbid, pitched outward, water will sit on the tile and eventually find a way under the edge. This is a common mistake for DIYers and budget contractors. They use a level and think flat is good. Flat is the enemy of drainage. When water pools on the curb, it puts constant hydrostatic pressure on the grout lines. Eventually, the sealer fails. Then the water penetrates. I have seen beautiful showers with a style ruined because the installer did not understand basic gravity. You also have to look at the transitions. If your bathroom has chic baseboard designs, those boards are likely made of MDF or pine. They are even more sensitive to water than the shower curb. A leaking curb will wick moisture into the baseboards, causing them to swell and the paint to peel. If you see your baseboards turning black or the paint bubbling near the shower, your curb is already compromised. I always recommend checking out baseboards makeover ideas to elevate your space but you must fix the leak first or you are just throwing money away.
“The transition from the shower floor to the curb must be a continuous waterproof plane to prevent capillary migration.” – Master Flooring Axiom
The ghost in the expansion gap
Expansion gaps are required at the perimeter of every tile installation to allow for the natural movement of the building structure. In a shower, this gap is usually filled with a flexible 100 percent silicone caulk rather than hard grout. If an installer uses grout at the change of plane where the curb meets the wall or the floor, that grout will inevitably crack. Buildings breathe. They expand in the summer and contract in the winter. Hard grout cannot handle that movement. When it cracks, it leaves a direct opening for water. This is the ghost that haunts many bathrooms. The leak is so small you do not notice it, but every shower sends a few drops behind the tile. Over a year, that is gallons of water. This is why tile cleaning tips for a sparkling bathroom always emphasize checking your caulk lines. If the silicone is peeling or moldy, it needs to be replaced immediately. Using an eco-friendly tile solution does not mean you can skip the synthetic sealants. You need the chemistry of silicone to protect the physics of your framing. I have seen guys try to use color-matched caulk that is actually just water-based. It does not hold up. You need the high-solids stuff that smells like vinegar until it cures. It is the only thing that stays flexible enough to bridge the gap between a rigid tile floor and a moving wall.
How to diagnose and repair the damage
Fixing a squishy curb requires a systematic demolition to identify the source of the leak and the extent of the wood rot. You cannot fix this from the outside. You must remove the tile. First, use a sharp utility knife to cut the grout or caulk around the affected tiles. Then, carefully pry them up. If the wood underneath is dark, wet, or crumbles when poked with a screwdriver, it must be replaced. You need to strip the curb down to the subfloor. Check the joists. If they are solid, you can rebuild the curb using pressure-treated lumber or, preferably, a high-density foam curb kit. Foam kits are superior because they are 100 percent waterproof throughout their entire core. They do not rot. They do not wick water. Once the new curb is in place, you must tie the new waterproofing membrane into the existing liner. This is the tricky part. It is why many pros refuse to do partial repairs. If you cannot get a perfect seal between the old and the new, the leak will return. If the damage is extensive, you might need to learn how to refresh grout without replacing it for the rest of the room to match the new work. But for the curb itself, replacement is the only way. Do not forget to seal the new grout. Use a high-quality penetrating sealer that creates a hydrophobic barrier at the molecular level. This prevents the capillary action from starting the whole cycle over again.
- Inspect the curb for any movement or soft spots when stepped on.
- Check the baseboards adjacent to the shower for swelling or discoloration.
- Look for cracked grout lines at the change of plane between the curb and the floor.
- Use a moisture meter to detect hidden dampness behind the tiles.
- Ensure the curb has a positive pitch toward the shower drain.
- Replace any moldy or peeling silicone caulk with 100 percent silicone sealant.
The reality is that a shower is a machine for moving water. If any part of that machine fails, the whole thing breaks down. You can have the most beautiful marble in the world, but if your curb is squishy, you have a pile of expensive trash. Take the time to build it right. Use topical membranes. Avoid nails in the curb cap. Ensure your pitch is correct. If you do that, you will never have to worry about the squish. If you are already at that point, call a professional who knows how to use a moisture meter and isn’t afraid to tell you the truth about your subfloor. It is better to spend the money now than to wait until the shower falls through the ceiling of the kitchen below. Professional flooring is about the things you cannot see. The tile is just the skin. The framing and the waterproofing are the skeleton and the circulatory system. Keep them healthy, and your floor will last a lifetime.