
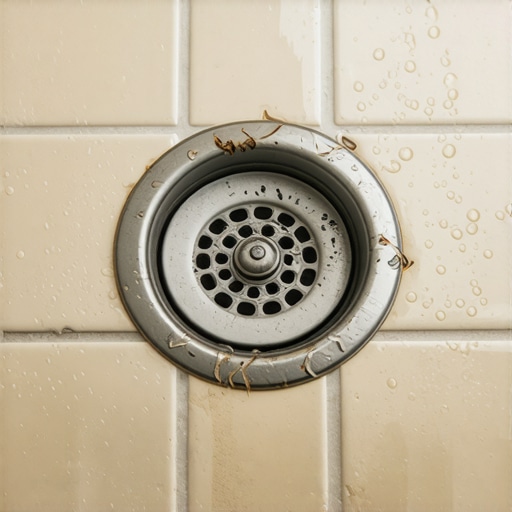
I spent three days grinding concrete on a job last month just so the floor wouldn’t click like a castanet. The homeowner was furious about the dust until I showed him the water damage creeping out from the adjacent bathroom. The shower drain was a mess. It had been resealed twice in a year. The problem wasn’t the sealant. The problem was the structural ignorance of the installer who thought a little bit of plumber’s putty could fight the laws of physics and subfloor deflection. This is the reality of modern flooring. You can have the most expensive tile in the world, but if the drainage physics are wrong, you are just building a very expensive bathtub that leaks into your crawlspace. I have seen fifteen thousand dollar wide plank walnut floors cupping like potato chips because a shower drain three rooms away was slowly weeping into the joists. Most guys skip the leveling compound and ignore the pre-slope. They think the underlayment or the tile will hide the dip. It won’t. Water finds the low point every single time.
The structural myth of the waterproof drain assembly
Shower drain seals fail because of subfloor deflection and improper weep hole management. Most installers ignore the TCNA requirements for subfloor rigidity, leading to minute movements that snap the chemical bond of the sealant. When the floor moves even a fraction of an inch, the rigid drain assembly stays put while the shower pan shifts, creating a microscopic gap where water enters through capillary action.
The mechanics of a shower drain are not complicated, yet they are executed poorly in nine out of ten residential builds. When we talk about a drain failing every six months, we are usually looking at a failure of the mechanical bond. Plumber’s putty is an ancient technology. It is a linseed oil based clay that dries out. In a modern shower environment with high heat and harsh cleaning chemicals, that oil evaporates. Once the oil is gone, the putty shrinks. Once it shrinks, the seal is dead. You need to understand the molecular interaction between the drain flange and the waterproofing membrane. If you are using a traditional three-piece clamping ring drain, the secret is not in the top seal but in the weep holes. These tiny holes are designed to let water that gets past the grout or tile into the pan liner flow back into the drain. If your installer clogged those holes with thin-set or mortar, that water stays trapped in the mud bed. It becomes a stagnant, acidic pond that eats away at the drain’s rubber gaskets and putty from the underside. It is a slow motion chemical attack that most homeowners never see until their chic baseboard designs start to swell and turn black with mold.
“A floor is only as good as the subfloor beneath it; deflection is the enemy of every joint.” – Master Flooring Axiom
Why subfloor deflection is the hidden drain killer
Subfloor deflection refers to the amount of vertical movement a floor experiences under a load. If your joists are spaced too far apart or your plywood is too thin, the floor will flex when you step into the shower. This movement puts immense stress on the drain throat, which is the most rigid part of the entire plumbing system. Eventually, something has to give.
When I walk onto a job site, the first thing I do is jump. If I feel a bounce, I know the tile is going to crack and the drain is going to leak. We use the L/360 standard for ceramic tile, but for natural stone, you need L/720. That means the floor should not deflect more than the span of the joist divided by 360. If you are installing heavy 12 by 24 porcelain tiles in a shower, you are adding significant weight. That weight increases the deflection. Most installers ignore the chemistry of the bond. They use cheap, unmodified thin-set that has no polymer flexibility. When the floor flexes, the thin-set snaps. This creates a pathway for water to bypass the tile and reach the drain flange. Once moisture sits on that flange, it begins the process of delamination. You need to ensure your subfloor is rock solid before the first piece of liner goes down. This often means adding a second layer of 1/2 inch exterior grade plywood or using a high quality self-leveling underlayment to create a perfectly flat plane. If the plane isn’t flat, the drain assembly sits at an angle. An angled drain can never be properly torqued, meaning the gasket will have uneven pressure. One side will be crushed while the other side is loose. That loose side is where your six month failure begins.
The chemical war between sealants and cleaning products
Modern cleaning chemicals are designed to dissolve organic matter, but they also dissolve the oils in traditional drain sealants. Using bleach or heavy degreasers in your shower eventually strips the plasticizers from the rubber gaskets and the oils from the plumber’s putty. This leads to hardening, cracking, and eventual seal failure.
I always tell my clients to stop using the big box store liquids that promise to melt hair and grease. Those chemicals sit in the drain throat and cook the seal. Instead, you should be looking at the structural integrity of the installation. For a seal to last twenty years instead of six months, you need to use 100 percent silicone or integrated fleece-bonded gaskets. These materials are chemically inert. They do not react to bleach or high heat. They maintain their elasticity. When the house settles in the winter, the silicone stretches. When it expands in the summer humidity, the silicone compresses. Putty cannot do this. Putty is a one-way street. Once it is compressed, it stays compressed. When the gap opens back up, the putty stays flat, leaving a hole. This is especially true in regions with high humidity swings where the wood framing of the house is constantly breathing. If you want to keep your showers that wow looking good, you have to stop thinking about the surface and start thinking about the chemistry of the assembly.
| Sealant Type | Expected Lifespan | Flexibility Rating | Chemical Resistance |
|---|---|---|---|
| Plumber’s Putty | 6 to 12 months | Very Low | Low |
| Standard Caulk | 1 to 2 years | Medium | Medium |
| 100% Silicone | 5 to 10 years | High | High |
| Fleece-Bonded Gasket | 20+ years | Extreme | Very High |
The failure of the pre-slope and the stagnant pond effect
The pre-slope is a layer of mortar installed under the shower liner that directs water toward the weep holes. Without a pre-slope, any water that penetrates the tile and grout sits flat on the liner. This water becomes a breeding ground for bacteria and creates a constant hydrostatic pressure against the drain seal.
Most lazy installers put the liner directly on the flat subfloor. Then they put the mortar bed on top of the liner. This is a recipe for disaster. The water goes through the grout, hits the liner, and just stays there. It has no gravity to pull it toward the drain. This is why your grout stays dark and wet for days after a shower. It is also why your drain seal fails. That standing water is constantly trying to find a way out. It eventually works its way under the clamping ring. If the weep holes are blocked by thin-set, the water has nowhere to go but into the subfloor. You must ensure that your installer uses a pre-slope of at least 1/4 inch per foot. This ensures that every drop of moisture that enters the system is actively moving toward the drain. I have seen grout restoration secrets fail because the moisture was coming from underneath the tile. No amount of topical sealer will save a shower that is rotting from the bottom up. You need to understand the physics of capillary action. Water can move sideways and even upwards through porous materials like cement. If the drain area is constantly saturated, that water will find the path of least resistance, which is usually the gap between the PVC pipe and the drain body.
“Water does not follow rules; it follows gravity and the path of least resistance.” – TCNA Installation Handbook
A checklist for a permanent shower drain seal
- Confirm subfloor meets L/360 deflection standards.
- Install a mortar pre-slope under the waterproofing liner.
- Ensure weep holes in the clamping ring are clear of all debris.
- Use 100 percent silicone instead of plumber’s putty for the top flange.
- Pressure test the shower pan for 24 hours before installing tile.
- Verify the drain pipe is properly supported to prevent sagging.
How baseboards and drywall reveal your drain’s secrets
Water from a leaking drain often travels along the subfloor and manifests as damage to baseboards and drywall in adjacent rooms. By the time you see the paint peeling or the wood swelling, the leak has been happening for months. This is why a six month seal failure is so dangerous. It is frequent enough to cause constant damage but slow enough to be ignored.
I have walked into homes where the owners wanted a baseboards makeover because the wood was rotting. They thought it was a cleaning issue. I had to tell them the truth. Their shower drain was the culprit. The water was wicking through the plywood, traveling ten feet under the hallway carpet, and soaking into the bottom of the baseboards. This is the structural zooming I talk about. You have to look at the house as a connected organism. The drain is the heart of the wet area. If the heart leaks, the extremities rot. In high humidity environments like the coastal south, this moisture leads to immediate mold growth. In drier climates, it leads to dry rot and structural weakening of the floor joists. You should always inspect the perimeter of your bathroom for any sign of discoloration. If your grout is cracking near the drain, it is a sign of movement. If it is changing color, it is a sign of saturation. Both lead to seal failure. You need to be proactive. If you suspect a leak, do not just throw more caulk at it. Rip it out and fix the subfloor. It is the only way to stop the cycle of failure every six months. Your floor is a performance surface. Treat it with the respect that engineering demands or suffer the consequences of a rotting home.
{“@context”:”https://schema.org”,”@type”:”HowTo”,”name”:”Fixing a Failing Shower Drain Seal”,”step”:[{“@type”:”HowToStep”,”text”:”Remove the drain grate and inspect the existing sealant for cracks or voids.”},{“@type”:”HowToStep”,”text”:”Clean the flange area thoroughly using a wire brush to remove old putty and mineral deposits.”},{“@type”:”HowToStep”,”text”:”Apply a continuous bead of 100 percent silicone sealant to the underside of the drain flange.”},{“@type”:”HowToStep”,”text”:”Tighten the clamping ring from below until the sealant oozes out evenly around the perimeter.”},{“@type”:”HowToStep”,”text”:”Clear the weep holes using a small wire to ensure sub-surface drainage is not obstructed.”}]}