
The hidden physics of grout failure and structural bonding
I once spent three days grinding down a concrete slab on a job where the previous guy thought a thick bed of thin-set would hide a 1/2 inch dip. It did not. Within six months, the tiles snapped like crackers, and the grout turned to powder. This is the reality of flooring. Most guys skip the leveling compound. They think the underlayment will hide the dip. It won’t. If you see grout falling out of your shower joints, you are not looking at a cleaning problem. You are looking at a structural failure. I have spent twenty-five years with a moisture meter and a level, and I can tell you that grout is the canary in the coal mine for your entire bathroom build. It smells like wet concrete and honest work in here, so let us get into why your shower is falling apart at the seams.
The structural failure behind the surface crack
Grout failure in showers is primarily caused by substrate deflection, improper hydration, and a failure to account for expansion joints. When the subfloor or wall studs move beyond the L/360 industry standard, the rigid cementitious bond of the grout breaks, leading to crumbling and moisture intrusion. Most homeowners think the grout is the waterproof layer. It is not. Grout is porous. If the structure behind the tile moves, the grout is the first thing to snap. I have seen countless showers with a style that look great for a month then fail because the installer did not understand the physics of movement. Check out some showers with a style to see how proper planning avoids these disasters.
“A floor is only as good as the subfloor beneath it; deflection is the enemy of every joint.” – Master Flooring Axiom
The technical term we use is deflection. If your joists are too thin or spaced too far apart, the floor bounces. Tile does not bounce. Grout does not bounce. When the wood moves and the tile stays rigid, the bond breaks. We use the TCNA Handbook as our bible. It specifies that for ceramic tile, the maximum allowable deflection is L/360. For natural stone, it is L/720. If your installer did not sister those joists or add a layer of 5/8 inch exterior grade plywood over the subfloor, your grout is doomed from day one. It is a mechanical certainty.
Why your subfloor is lying to you
Subfloor integrity depends on the modulus of elasticity of the materials used and the moisture content of the wood. A subfloor that appears level can still fail if the osmotic pressure within the thin-set is compromised by vapor transmission. You need to understand that wood and tile are enemies. Wood expands and contracts with humidity. Tile is dimensionally stable. When you glue one to the other without a decoupling membrane, the wood wins. The wood moves, the tile resists, and the grout is the victim trapped in the middle. I always tell people to look at showers that wow and notice the lack of cracks. That is not luck. That is engineering.
We also have to talk about the chemistry of the bond. When you mix grout, you are initiating a chemical reaction called hydration. If you add too much water to make it easier to spread, you are effectively ruining the floor. As that excess water evaporates, it leaves behind microscopic voids. These voids make the grout brittle and porous. It looks fine when it is wet, but once it cures, it has the structural integrity of a dried cracker. This is why professional installers use a specific water-to-powder ratio and never “re-temper” grout that has started to set in the bucket. Adding more water to an old bucket of grout is a sin in my book. It kills the polymer chains and ensures the bond will fail within a year.
The chemical reality of the bond
Polymer-modified grout uses latex additives to increase flexural strength and reduce porosity. The chemical bond is formed when calcium silicate hydrate crystals grow into the microscopic pores of the tile edge. If the tile edge is dusty or the grout is mixed at the wrong RPM, these crystals cannot latch on. Most guys use a high-speed drill to mix grout because it is fast. That is a mistake. High speeds whip air into the mix. Air bubbles are weaknesses. You want a slow, steady mix to ensure the polymers are fully integrated without creating a foam. If you want to see what happens when grout is treated with respect, look into grout restoration secrets for long lasting results. It starts with the mix.
| Grout Type | Typical Joint Width | Compressive Strength | Best Use Case |
|---|---|---|---|
| Unsanded | 1/16 to 1/8 inch | 3,000 PSI | Polished Marble / Wall Tile |
| Sanded | 1/8 to 1/2 inch | 3,500 PSI | Floor Tile / Heavy Traffic |
| High Performance | 1/16 to 1/2 inch | 5,000 PSI+ | Showers / Steam Rooms |
| Epoxy | 1/16 to 3/8 inch | 8,000 PSI | Commercial Kitchens / Pools |
The 1/8 inch that ruins everything
Expansion joints are mandatory per TCNA EJ171 standards to allow for thermal expansion and moisture movement. A shower is a wet, hot box that grows and shrinks every time you turn on the water. If you fill the change of plane (where the wall meets the floor) with rigid grout instead of 100 percent silicone sealant, it will crack. Hard stop. Every single time. The grout cannot handle the shear force of two planes moving in different directions. You need a flexible joint there. I see guys grout the corners all the time because it is faster than pulling out the caulk gun. It is lazy work. If you want to know how to refresh grout without replacing it, the first step is often removing that cracked corner grout and doing it right with silicone.
Critical Installation Checklist
- Verify subfloor deflection meets L/360 or L/720 standards before laying a single tile.
- Use a moisture meter to ensure the substrate is below 12 percent moisture content.
- Always use a decoupling membrane like Schluter-Ditra for floor installations.
- Never mix grout at high speeds to avoid air entrapment.
- Allow grout to slake for ten minutes after initial mixing to allow polymers to hydrate.
- Install 100 percent silicone in all changes of plane and corners.
Modern solutions for a lasting shower
Eco-friendly tile solutions often involve recycled glass or low-VOC adhesives that require specific grout chemistry. Using epoxy grout provides a non-porous surface that is resistant to mold and mildew. If you are looking for eco-friendly tile solutions for sustainable homes in 2025, you need to match your grout to your material. Glass tile, for example, requires unsanded grout or high-performance fine-aggregate grout to avoid scratching the surface. It is about the right tool for the right job.
Even your baseboards play a role in the health of your floor. If you have baseboards tight against a tile floor without an expansion gap, the pressure from a shifting wall can actually pop tiles off the floor or crack the perimeter grout. I always leave a 1/4 inch gap between the tile and the wall, then cover it with the baseboard. This allows the house to breathe without destroying the tile work. For some design inspiration on how to finish these edges, check out chic baseboard designs that transform rooms in 2025 or baseboards makeover ideas to elevate your space. It is the small details that keep the grout from crumbling under pressure.
“Grout is not a glue; it is a filler that relies on mechanical interlocking within the tile joint.” – TCNA Handbook for Ceramic Tile Installation
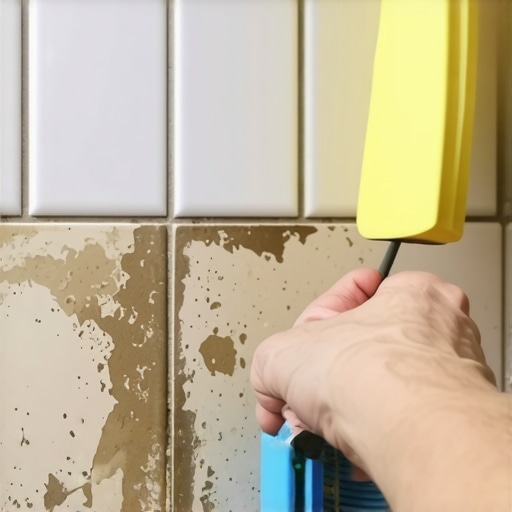
If you find that your grout is already failing, do not just smear more on top. That is a temporary fix that will fail within weeks because the new grout cannot bond to the old, dirty, and crumbly material. You have to remove at least 2/3 of the depth of the joint using a carbide-tipped grout saw or an oscillating tool. Then you have to clean the joint thoroughly. If you are tired of the mess, you might want to look at tile cleaning tips for a sparkling bathroom in 2025 to keep your new grout looking fresh once you have fixed the bond. Fix the structure, fix the chemistry, and then you can worry about the aesthetic. That is how a master does it.