
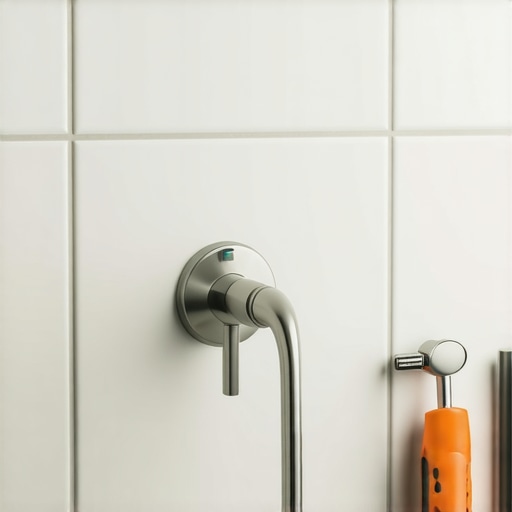
I spent three days grinding concrete on a job last month just so the floor wouldn’t click like a castanet. Most guys skip the leveling compound and they think the underlayment will hide the dip. It won’t. I see the same lazy logic in bathrooms where a homeowner calls me because their expensive tile is cracking around the faucet. They think it is a grout issue. It is not. It is a structural failure of the valve mounting. I once walked into a luxury master suite where the shower handle felt like a loose tooth. Every time the owner turned on the water, the copper pipes rattled against the studs like a drum set. That vibration eventually pulverized the grout and sent moisture straight into the subfloor. A loose handle is never just a handle. It is a symptom of a mechanical system losing its battle against physics.
The phantom movement within the wall
A loose shower handle usually stems from a backing plate failure or a stripped set screw within the valve assembly. Fixing this requires an understanding of how the cartridge connects to the handle and how the entire valve is braced against the framing. If the handle wobbles but the escutcheon plate stays still, the problem is local to the handle. If the whole assembly moves, your plumber skipped the blocking. You cannot ignore this. A vibrating valve will eventually shear the solder joints on your copper lines. It will lead to a hidden leak that rots your baseboards from the inside out. You need to identify if the play is in the handle screw or the internal stem of the cartridge. Metal on metal wear is inevitable when hardware is not torqued to the correct specification.
“A floor is only as good as the subfloor beneath it; deflection is the enemy of every joint.” – Master Flooring Axiom
Why your Allen wrench keeps slipping
Most shower handles are held in place by a tiny 1/8 inch or 7/64 inch hex set screw hidden in a hole at the base. Over time, the constant torque of turning the water on and off creates microscopic metal fatigue. If you have hard water, calcium deposits migrate into these threads. When you try to tighten it with a cheap wrench, you strip the head. Now you have a handle that is permanently loose. I always tell people to spray a bit of penetrating oil into that hole and wait twenty minutes. Do not force it. If you strip that screw, you are looking at a drill out. That risk increases the chance of Marring the finish on your showers with a style and high end finishes. A loose handle allows water to bypass the handle seal and enter the wall cavity. Once that water hits the wood framing, the structural integrity of your tile substrate begins to degrade.
The physics of the shower valve cartridge
The cartridge is the engine of the shower. It is a plastic or brass cylinder with a series of O-rings and gaskets that regulate flow and temperature. When the handle is loose, it puts uneven pressure on the cartridge stem. This causes the O-rings to wear lopsided. Eventually, the cartridge starts to leak. You might notice a drip from the showerhead or water seeping out from behind the handle plate. This water often travels down the back of the tile and pools on the subfloor. By the time you see it rotting your chic baseboard designs, the damage is already done. You must ensure the handle is seated perfectly on the broached end of the stem. Any gap here acts as a lever that multiplies the force applied to the delicate internal seals.
| Valve Material | Vibration Resistance | Average Lifespan | Failure Mode |
|---|---|---|---|
| Solid Brass | High | 25+ Years | O-ring Perishing |
| Plastic Polymer | Low | 5 to 10 Years | Stem Fracturing |
| Stainless Steel | Medium | 15+ Years | Mineral Scaling |
| Zinc Alloy | Very Low | 3 to 7 Years | Corrosion Pitting |
The hidden structural support you cannot see
In a proper installation, the shower valve is screwed into a 2×4 block of wood called a stringer. This stringer is nailed between the studs. If the installer was lazy, they just let the copper pipes hold the valve in place. This is a disaster. Copper is a soft metal. It will flex. Every time you pull the handle, the valve moves back and forth. This movement creates a gap in the tile cleaning and maintenance routine because the caulk will constantly pull away from the wall. You cannot fix a lack of blocking from the front. If the valve moves inside the wall, you might have to open the drywall from the back of the shower. It is a painful realization. Most homeowners would rather live with the wobble until the ceiling below starts to drip.
When grout fails because of mechanical vibration
Grout is rigid. It does not like to move. If your shower valve is not secure, the escutcheon plate will rub against the tile. This creates a grinding motion that turns grout into dust. Once the grout is gone, water has a direct path to the wall cavity. I have seen beautiful eco-friendly tile solutions ruined by a simple loose handle. If you see cracks forming around your shower trim, you need to act. You can learn how to refresh grout without replacing it, but that is a temporary fix if the vibration persists. You must stabilize the mechanical components first. Use a high quality silicone sealant behind the plate to provide a secondary water barrier. This also helps dampen the vibration against the tile surface.
Step by step guide to tightening the handle
- Locate the set screw at the bottom or side of the handle.
- Clean out any mineral buildup with a small wire brush or toothpick.
- Insert the correct size hex key and turn clockwise to check for resistance.
- If the screw is missing, replace it with a stainless steel version to prevent rust.
- Remove the handle to inspect the cartridge stem for rounded edges.
- Apply a small amount of blue thread locker to the screw to prevent future loosening.
- Reinstall the handle and test for any play or wobble.
The 1/8 inch that ruins everything
While most people want the thickest underlayment, too much cushion actually causes the locking mechanisms on LVP to snap under pressure. The same logic applies to shower hardware. If you over-tighten the escutcheon plate against the tile without a gasket, you will crack the tile. There needs to be a perfect 1/8 inch gap filled with a flexible sealant. This allows for the thermal expansion of the hot water pipes without stressing the ceramic. The chemistry of the sealant is just as important as the torque of the screw. Use 100 percent silicone. Do not use cheap latex caulk. Latex will shrink and pull away within months. You want a material that stays elastic. This elasticity absorbs the shock of the handle being slammed shut by a teenager or a guest.
“Deflection is not just a floor problem; it is a wall and ceiling problem that starts at the plumbing stack.” – Master Flooring Axiom
Advanced restoration for long lasting results
If the handle has been loose for years, the internal splines of the handle are likely stripped. No amount of tightening will fix a rounded out handle interior. You will need a new handle kit. When you install it, look at the condition of the grout. If it is stained or crumbling, check out grout restoration secrets for long lasting results. This is the time to ensure the waterproof envelope of your shower is intact. A loose handle is the entry point for mold. It is the beginning of the end for your subfloor. Treat the hardware with the same respect you treat the foundation of the house. Clean the area. Secure the mount. Seal the perimeter. If you are unsure of the internal damage, contact us for a professional evaluation of the structural integrity of your shower walls. Do not wait for the leak to show up on your living room ceiling. Fix the wobble now.