Why your bathroom baseboard is jumping off the wall
Bathroom baseboards fall off because high relative humidity weakens the bond between the substrate and the trim material. Moisture causes expansion in porous materials while concurrently degrading the chemical structure of standard construction adhesives. In 2026, the shift toward stick-on solutions requires understanding these thermodynamic stresses on vertical surfaces near showers and tile floors.
I spent three days grinding concrete on a job last month just so the floor wouldn’t click like a castanet. Most guys skip the leveling compound. They think the underlayment will hide the dip. It won’t. This same negligence applies to baseboards. People slap them on with a prayer and some cheap glue, then wonder why the trim is curling away from the wall within six months. When you are dealing with the micro-climate of a bathroom, you are essentially fighting a war against vapor pressure. The air is saturated, the walls are often cool, and that temperature differential creates a dew point right behind your trim. If your adhesive cannot handle that localized moisture, it is going to fail. I have seen high-end chic baseboard designs completely ruined because the installer ignored the surface energy of the paint. You cannot just stick things to a greasy, dust-covered wall and expect them to stay. My hands are stained with the residues of a thousand failed glue jobs, and I am here to tell you that the physics of the bond is all that matters.
The mechanical failure of standard bathroom trim
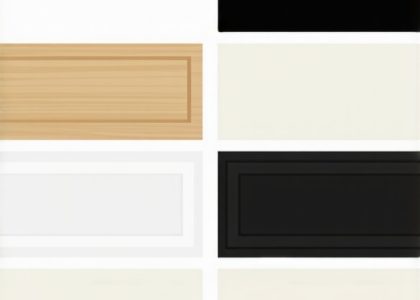
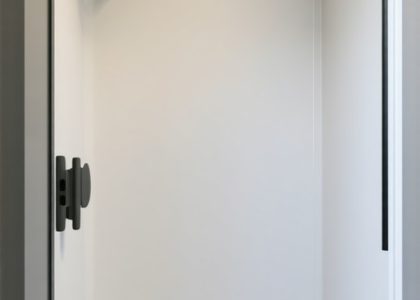
Standard bathroom trim fails when the adhesive reaches its glass transition temperature or when moisture vapor transmission rates exceed the bond strength. In high-steam environments, the adhesive layer often becomes plasticized, losing its internal cohesion. This leads to the baseboard pulling away from the wall at the corners where tension is highest. Underneath that trim, the wall is breathing. If the wall is damp, the glue won’t bite. If the wall is too dry and dusty, the glue just skins over and falls off. You need to understand the molecular interaction between the back of the trim and the substrate. Most modern baseboards are made of PVC or MDF. PVC is non-porous, meaning the glue has nothing to ‘grab’ into except for the surface profile. MDF is the opposite; it is like a sponge that will suck the moisture right out of your adhesive before it has a chance to cure. This is why I always tell people to check their subfloors and wall plates before they even think about aesthetics. You are building a system, not just decorating a room. If you want to see baseboards makeover ideas that actually last, you have to start with the chemistry of the stick.
“A floor is only as good as the subfloor beneath it; deflection is the enemy of every joint.” – Master Flooring Axiom
Fix number one involving high-bond acrylic polymers
High-bond acrylic polymers provide a permanent stick-on fix by creating a viscoelastic bond that absorbs the expansion and contraction of the bathroom walls. These industrial-strength tapes are designed to replace mechanical fasteners like nails, which often rust or pull out of damp drywall. By using a closed-cell foam core, these strips seal out moisture from reaching the adhesive interface. This is not the double-sided tape you find in a junk drawer. We are talking about materials used to hold glass panels onto skyscrapers. The chemistry here involves long-chain molecules that can stretch and return to their original shape. When the bathroom heats up during a hot shower, the baseboard expands. A rigid glue would snap. This acrylic tape just stretches. It is a structural engineering solution for a cosmetic problem. You have to clean the wall with a 50/50 mix of isopropyl alcohol and water first. If there is any soap scum or tile cleaning residue left behind, the tape will only stick to the dirt, not the wall.
Fix number two utilizing hybrid peel and stick moisture barriers
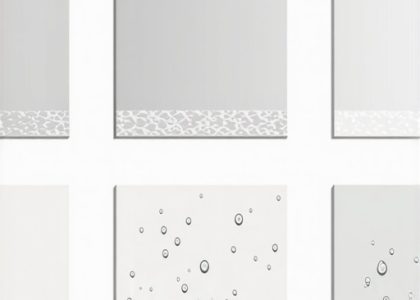
Hybrid peel and stick moisture barriers function by integrating a waterproof membrane with a high-tack butyl adhesive to prevent baseboard detachment. This method is particularly effective in bathrooms where the floor is frequently wet, as the barrier prevents capillary action from drawing water up behind the trim. Butyl is a synthetic rubber that never truly hardens. It remains sticky and flexible for decades. In the flooring world, we use similar materials for flashing and waterproofing. When you apply this to a baseboard, you are essentially creating a gasket. This is vital if you have a grout restoration project happening nearby where moisture might be more prevalent. The key is the application pressure. These adhesives are pressure-sensitive. If you just lean it against the wall, it will fail. You need to use a J-roller and put your weight into it to collapse the adhesive beads and ensure 100 percent surface contact. This is the difference between a DIY hack and a professional installation.
Fix number three with graphene-reinforced adhesive strips
Graphene-reinforced adhesive strips represent the 2026 standard for high-performance bathroom trim by offering superior thermal stability and shear strength. These strips utilize the high surface area of graphene flakes to create more bonding sites at a microscopic level, ensuring the baseboard stays put even in extreme humidity. Graphene is one of the strongest materials known to man. When it is embedded in a polymer matrix, it prevents the adhesive from ‘creeping’ or sliding down the wall under the weight of the baseboard. I have seen cheap vinyl baseboards sag in the summer heat because the glue turned to goo. Graphene prevents that. It also acts as a thermal conductor, helping to even out the temperature between the wall and the trim, which reduces the internal stress that causes curling. If you are aiming for eco-friendly tile solutions, look for graphene strips that are solvent-free and low-VOC. They are better for the air and they are better for the bond.
“Adhesion failure is rarely a fault of the glue; it is almost always a failure of the surface preparation and environmental control.” – NWFA Technical Guidelines
Technical comparison of bathroom adhesive fixes
Choosing the right fix depends on the weight of the baseboard material and the expected moisture levels in the specific bathroom zone. For lightweight PVC trim, simple acrylic tapes are usually sufficient, but for heavier composite materials, graphene-reinforced options are necessary to prevent vertical slippage. Refer to this data for 2026 standards.
| Adhesive Type | Bond Strength (PSI) | Moisture Resistance | Best Material |
|---|---|---|---|
| Acrylic Tape | 85 | High | PVC / Vinyl |
| Butyl Hybrid | 60 | Extreme | MDF / Wood |
| Graphene Polymer | 120 | Very High | Heavy Composites |
The installation checklist for a permanent bond
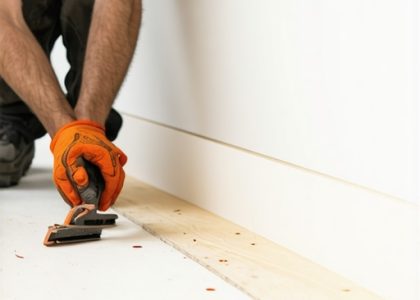
Success in sticking baseboards to bathroom walls requires a rigorous multi-step preparation protocol to ensure the chemical bond is not compromised by contaminants. Skip one step and you might as well be throwing your money in the toilet. Here is how I do it on my job sites.
- Scrape away any old caulk or adhesive residue with a sharp carbide scraper.
- Degloss the wall surface with 120-grit sandpaper to increase the mechanical ‘tooth’ of the substrate.
- Wipe the area down with a lint-free cloth and isopropyl alcohol to remove all oils and dust.
- Acclimate the baseboard to the bathroom humidity for at least 48 hours prior to installation.
- Apply the stick-on fix at a temperature between 65 and 80 degrees Fahrenheit.
- Use a heavy-duty roller to apply uniform pressure across the entire length of the trim.
- Seal the top edge with a high-quality silicone to prevent water from entering the bond line.
The physics of the expansion gap
Expansion gaps are required even for stick-on baseboards because the floor and walls move at different rates during seasonal humidity shifts. If you jam a baseboard tight against a tile floor with no room to move, the force of the expanding floor will eventually shear the adhesive right off the wall. I see this all the time. A homeowner buys ‘waterproof’ LVP and locks it under a heavy baseboard. The floor tries to move. Something has to give. Usually, it is the glue. You need to leave a tiny gap, about the thickness of a credit card, between the bottom of the baseboard and the top of the tile. Then you fill that gap with a flexible color-matched caulk. This allows the floor to slide slightly without dragging the baseboard with it. It is about understanding the structural reality of the house. Nothing is static. Your house is a living, breathing thing that moves with the weather. If you treat it like a rigid box, you are going to have failures. Proper showers with modern designs always account for this movement. It is the secret to a professional finish that stays looking good for years rather than weeks. Don’t be the guy who thinks glue solves everything. Be the guy who understands how the glue works with the rest of the room.