Homeowners always ask why their waterproof vinyl is buckling or why the baseboards next to the shower are swelling like a discarded sponge. Usually, it is because they locked moisture behind a decorative trim piece, killing the wall’s ability to breathe and the floor’s ability to move. I spent three days last month grinding concrete on a job just so the floor would not click like a castanet, only to find that the previous contractor had installed MDF baseboards right against a walk-in shower. The baseboards had sucked up water through capillary action, turning the bottom six inches of drywall into a black, moldy mess. This is the reality of builder-grade shortcuts. In my twenty-five years of kneeling on subfloors with a moisture meter, I have learned that the transition between your shower tile and your bathroom floor is the most dangerous zone in your home. If you do not get the tuck right, you are just waiting for a structural failure. We are moving into 2026, and the standards for high-moisture environments have shifted toward non-porous materials and engineered tucks that prioritize drainage over simple aesthetics. You need to think like a hydraulic engineer, not a decorator. If water can find a path, it will. Your job is to ensure that path leads to a drain, not into your floor joists.
The wet rot nightmare in your master bath
The primary cause of bathroom rot is the failure to account for moisture migration at the intersection of the baseboard and the shower curb. When steam condenses or water splashes, it tracks along the perimeter. If your baseboards are porous, they absorb this liquid, holding it against the drywall where it cannot evaporate, eventually leading to structural decay and mold. I have seen fifteen-thousand-dollar bathroom remodels destroyed in eighteen months because someone used the wrong trim. You smell it before you see it. That earthy, damp scent of wood rot is the smell of money evaporating. We use non-porous materials like PVC, high-density polyurethane, or solid stone because they do not participate in the water cycle. They act as a barrier, not a wick. When we talk about a tuck, we are talking about the physical geometry of how the trim meets the tile. It is not just about looks. It is about managing the hydrostatic pressure that builds up when water gets trapped in a tight gap. Most guys think a fat bead of caulk is the solution. They are wrong. Caulk is a maintenance item that fails. The tuck is a permanent structural decision.
“A floor is only as good as the subfloor beneath it; deflection is the enemy of every joint.” – Master Flooring Axiom
The myth of the waterproof baseboard
A waterproof material does not create a waterproof installation unless the joints and transitions are engineered to prevent water bypass at the edges. Even if your baseboard is made of solid plastic, water can still slip behind it and sit against the paper backing of your drywall or the wooden studs. In 2026, we are seeing a move toward integrated systems where the baseboard and floor are treated as a single unit. This involves using silane-modified polymers for adhesives that do not break down when submerged. You have to understand the chemistry of what you are using. Standard construction adhesive is a joke in a wet room. It will emulsify and lose its bond within years. I only use high-performance bonders that can handle the thermal expansion of a bathroom. Bathrooms are high-stress environments. They go from sixty degrees to ninety degrees and back again in twenty minutes. This thermal cycling causes materials to grow and shrink. If your baseboard is pinned too tight, it will bow. If it is too loose, the gap becomes a reservoir for filth. You want that sweet spot of a 1/16-inch gap that is properly filled with a high-flex sealant, not a rigid grout that will crack the first time you take a hot shower.
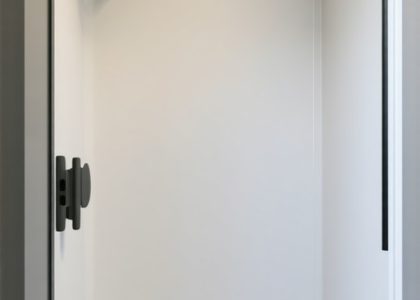
The floating tuck method for curb transitions
The floating tuck method involves installing the baseboard slightly above the floor surface to create a shadow line that prevents water from wicking upward. This technique utilizes a small spacer during installation, usually 1/8 of an inch, which is later filled with a color-matched 100 percent silicone sealant rather than water-based caulk. This gap is the secret to longevity. It allows the floor and the wall to move independently. If you jam the baseboard down onto the tile, any movement in the subfloor will put pressure on the trim, causing it to pop off the wall or crack the grout. I see this all the time in new builds. The house settles, the floor drops a fraction of an inch, and suddenly there is a massive gap that the homeowner tries to fix with more caulk. It looks like garbage. By using a floating tuck, you create a controlled joint. We often use this in conjunction with showers that wow to ensure the aesthetic remains sharp while the structure remains dry. You need to be precise. If your floor is not level, you cannot just slap the trim down. You have to scribe it to the floor so the gap remains consistent. It is tedious work, but it is the difference between a floor that lasts thirty years and one that lasts three.
Integration with high-performance grout systems
Modern grout systems are no longer just sand and cement but are now sophisticated chemical compounds designed to repel water at a molecular level. When tucking baseboards near tile, the choice of grout determines whether the perimeter becomes a gutter or a seal. Using high-performance grouts is essential when you want to refresh grout without replacing it in the future. I prefer epoxy-based or high-density cementitious grouts that have a lower than 0.5 percent absorption rate. Standard grout is like a sponge. It pulls water in and holds it. If your baseboard is tucked against standard grout, you are inviting moisture to sit right at the base of your wall. I always tell my clients that the grout is the weakest link in any tile installation. If the grout fails, the whole system fails. That is why we use non-porous baseboards. They do not hold the water that the grout might let through. You also need to look at the chemical bond. Some silicones will not stick to certain types of grout. You have to test your materials. I have seen guys spend thousands on Italian marble only to have the silicone peel off like a sunburn because they didn’t prep the surface or use a compatible chemistry.
Comparing Moisture Resistance in Baseboard Materials
| Material | Moisture Absorption Rate | Expansion Coefficient | Best Use Case |
|---|---|---|---|
| MDF (Fiberboard) | High (15-30%) | High | Dry Hallways Only |
| Solid Pine | Medium (8-12%) | Medium | Traditional Bedrooms |
| PVC (Solid) | Zero (0%) | Low | Showers and Wet Rooms |
| High-Density Poly | Zero (0%) | Low | High-End Bathrooms |
| Natural Stone | Low (0.1-2%) | Very Low | Luxury Curbs |
While most people want the thickest underlayment for comfort, too much cushion actually causes the locking mechanisms on LVP to snap under pressure when transitioning to a rigid shower curb. This is a contrarian fact that many big-box retailers will not tell you. They want to sell you the most expensive padding. In a bathroom, you want a high-density, low-compression underlayment. If your floor deflects more than 1/8 of an inch over ten feet, your baseboard tucks will eventually pull away. You have to fix the subfloor before you even think about the trim. I have spent more time with a level and a floor grinder than I have with a miter saw. If the foundation is crooked, the finish will be crooked. It is that simple. When you are looking at chic baseboard designs, look for profiles that have a flat back or a recessed channel. This allows for better adhesive coverage and creates a secondary air pocket that can help with drying if moisture does manage to find a way in.
The checklist for a leakproof 2026 shower
- Verify subfloor moisture levels are below 12 percent for wood or 3 lbs per 1000 sq ft for concrete.
- Ensure the shower curb has a slight inward pitch of 1/8 to 1/4 inch toward the drain.
- Apply a liquid-applied waterproofing membrane at least 6 inches up the wall behind where the baseboard will sit.
- Use only 100 percent silicone sealant at the floor-to-wall transition.
- Select a baseboard material with a 0 percent water absorption rating.
- Scribe all baseboards to the floor to maintain a consistent expansion gap.
- Back-prime any wood trim if you absolutely must use it, though PVC is preferred.
Why thick silicone beads fail over time
Thick beads of silicone fail because they exceed the material’s ability to stretch and compress, leading to adhesive or cohesive failure at the edges. Most installers think more is better. They goop on the silicone until it looks like a thick white rope. This is a mistake. Silicone is designed to work in a specific joint geometry, usually a 1:1 or 2:1 width-to-depth ratio. If the bead is too thick, it cannot flex properly when the floor moves. It will tear away from the tile or the baseboard. This creates a microscopic slit where water can enter but cannot easily escape. This is how you get mold. I always use a foam backer rod in larger gaps before applying sealant. This ensures the silicone only bonds to two sides, allowing it to stretch like a rubber band. If it bonds to the bottom of the gap as well, it will snap. This is basic material science. If you want grout restoration secrets, the biggest one is simply preventing the water from getting in there in the first place. A clean, properly sized silicone joint is your first line of defense. Use a profiling tool to get a consistent finish. Do not use your finger. The oils from your skin will contaminate the bond and lead to early failure.
“Water is the most patient architect; it will find every flaw in your seal.” – TCNA Installation Guide Reflection
Advanced drainage at the perimeter
Advanced perimeter drainage involves creating a hidden channel behind the baseboard that allows trapped vapor to escape or redirect back to the waterproof shower pan. In high-end 2026 builds, we are seeing the use of “vented” baseboards. These have small, invisible kerfs cut into the bottom edge. It sounds counterintuitive to have a gap, but it allows for airflow. If you seal a wall perfectly on the outside but it is wet on the inside, you have created a terrarium for rot. You have to allow for vapor transmission. This is especially true if you are using tile cleaning tips that involve heavy steam or water. The steam can penetrate the grout and get behind the tile. If that moisture hits a solid, unvented PVC baseboard, it just sits there. We are also seeing the integration of metal trim profiles that act as a baseboard. These aluminum or stainless steel pieces are completely non-porous and offer a zero-clearance tuck that looks incredibly modern. They are a nightmare to install because they require a perfectly flat wall, but they are the ultimate solution for water damage. No wood, no paper, no mold. Just metal and stone. This is where the industry is going. We are moving away from the organic materials that the 1990s were obsessed with and toward inorganic, high-performance alloys and polymers.
Final architectural thoughts on moisture management
The longevity of a bathroom renovation depends entirely on the invisible details of the subfloor and the chemical compatibility of the adhesives used. You can have the most beautiful baseboards makeover ideas, but if they are not integrated into the moisture management system, they are temporary. I have seen too many people focus on the color of the tile and the finish of the faucet while ignoring the fact that their subfloor is bouncy or their walls are out of plumb. A good installer will spend more time talking to you about waterproofing membranes and deflection ratings than about paint colors. That is the hallmark of a pro. We look at the house as a system. The shower is a wet box inside a dry box. The baseboard tuck is the transition between those two worlds. If that transition is not handled with precision, the dry box becomes a wet box. And a wet box is a house that is falling apart. Do not settle for builder-grade thinking. Use non-porous materials. Respect the expansion gaps. Understand the chemistry. That is how you build a bathroom that lasts for the next fifty years instead of the next five. If you need help choosing the right materials, you can always contact us for a professional consultation on your specific site conditions. We have seen it all, and we have fixed it all. Do it right the first time so I do not have to come back and rip it out in two years.