I spent three days grinding concrete on a job last month just so the floor wouldn’t click like a castanet. People think flooring is about what you see on the surface, but I know better. My hands are permanently stained with thin-set and my knees have the mileage of a long-haul trucker. I have walked into too many high-end bathrooms where the owner spent twenty thousand dollars on Italian marble only to have black mold blooming in the corners within six months. It breaks my heart and it irritates my professional pride. Most of these failures come down to one simple, neglected element. Grout. Specifically, the outdated reliance on Portland cement in a wet environment. If you want a floor that survives 2026, you have to stop thinking like a decorator and start thinking like a structural engineer. Water is a persistent enemy that never stops looking for a way into your subfloor. When it finds a path through porous grout, it does not just sit there. It rots the plywood, it de-bonds the mortar, and it feeds the spores that make your family sick. I have torn out enough ‘beautiful’ showers to know that what happens at the molecular level in your grout joints determines whether your bathroom is a sanctuary or a biohazard. This is why resin grout is no longer an optional upgrade for the wealthy. It is a technical necessity for anyone who wants a floor that lasts longer than the mortgage. We are going to look at why these high-performance systems are the only way forward and how you can apply these hacks to your own project to ensure a lifetime of waterproof integrity.
The structural failure of cementitious grout systems
Traditional cement grout fails because it is naturally porous and allows water to penetrate the substrate through capillary action. This material is essentially a sponge made of Portland cement and sand. Even when sealed, the chemical bonds are weak compared to modern resins. Over time, household cleaners and acidic shampoos erode the surface, opening microscopic pathways for moisture and mold spores to settle deep within the joint. To understand why your shower is failing, you have to look at the physics of a cement joint. Cement is a hydraulic binder. It cures by forming a crystalline structure that, while hard, is full of tiny voids. These voids are the perfect size for water molecules to travel through. Once that water gets behind the tile, it hits the thin-set. Standard thin-set is also cement-based and porous. You end up with a saturated ‘mud bed’ that never truly dries out in a high-use bathroom. This creates a permanent damp zone. It is the perfect incubator for Aspergillus and other fungi. I have seen subfloors so saturated that the floor joists began to lose their structural load-bearing capacity. This is why I tell my clients that saving a few hundred dollars on grout is the fastest way to spend ten thousand dollars on a total tear-out later. You can learn more about maintaining these surfaces in our guide on grout restoration secrets for long lasting results which covers the basics of recovery before a total failure occurs.
“A floor is only as good as the subfloor beneath it; deflection is the enemy of every joint.” – Master Flooring Axiom
The chemistry of resin grout and polymer cross linking
Resin grout uses epoxy or urethane polymers to create a completely non porous barrier that is impervious to water and chemicals. Unlike cement, these systems do not rely on evaporation to cure. They use a chemical reaction between a resin and a hardener to create a dense, plastic-like matrix. This matrix is so tight that water molecules cannot find a single path through the material, making it the ultimate weapon against mold and structural rot. When we talk about epoxy grout, we are talking about a three-part system: the resin, the catalyst, and the colored quartz aggregate. When you mix these, you are initiating a cross-linking process. Imagine a million tiny chains all locking together simultaneously. This creates a surface with a flexural strength that dwarfs traditional grout. While cement grout might have a compressive strength of 3,000 PSI, a high-quality resin grout can exceed 8,000 PSI. This means it does not just block water; it actually reinforces the edges of your tile. It resists cracking even when there is slight movement in the house. This is the level of engineering required for showers that wow in the modern era. You are not just filling a gap. You are installing a structural gasket between your tiles that is chemically resistant to everything from bleach to sulfuric acid. It is the difference between a screen door and a submarine hatch.
| Feature | Portland Cement Grout | High-Performance Resin Grout |
|---|---|---|
| Water Absorption | High (5-10%) | Zero (0.01%) |
| Stain Resistance | Poor (requires sealing) | Excellent (permanent) |
| Flexural Strength | Low (prone to cracking) | Very High (flexible) |
| Chemical Resistance | Low (eroded by acids) | Maximum (industrial grade) |
| Cure Time | 24-48 Hours | 12-24 Hours (Chemical) |
The perimeter expansion gap secret for moisture control
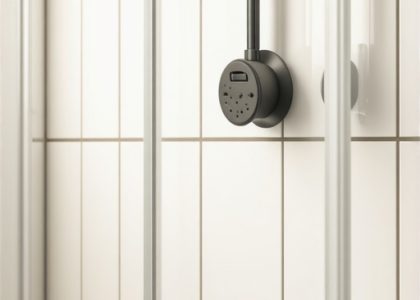
An expansion gap at the perimeter of the shower floor prevents the grout from cracking under the thermal expansion of the tile. Every material expands and contracts as the temperature changes, and in a shower, these shifts are rapid and extreme. Without a flexible joint at the transition between the floor and the wall, the rigid grout will eventually buckle or shear. This creates a hairline fracture that serves as a highway for moisture to bypass your waterproofing layer. I see this mistake on ninety percent of DIY jobs. People grout the ‘change of plane’ where the floor meets the wall. That is a death sentence for your shower. That joint must be filled with a 100 percent silicone sealant or a color-matched resin caulk that remains flexible. If you use rigid grout there, the movement of the house will crush that grout into powder. Once that powder washes away, you have a direct line for water to pour into the wall cavity. This is particularly dangerous if you have installed chic baseboard designs just outside the shower stall. Water will travel along the subfloor, hit the back of those baseboards, and start rotting the drywall from the inside out. You won’t even know it’s happening until you see the paint peeling or smell the musty odor of decaying wood. Proper engineering requires a 1/8 inch gap at every change of plane to allow the floor to breathe and move without breaking its seal.
Mastering the installation of reactive resin systems
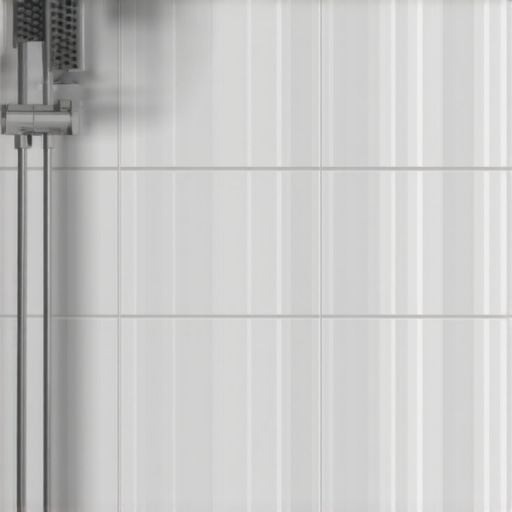
Installing resin grout requires precise temperature control and a specialized cleaning protocol to avoid leaving a permanent haze on the tile surface. This is not like working with mud where you have all day to clean up. Once the chemical reaction begins, you are on a ticking clock. If the room is too hot, the grout will kick in the bucket before it even hits the floor. If it is too cold, it will never reach its full hardness. I always keep my epoxy grout in a temperature-controlled environment for 24 hours before the job. Ideally, you want the room between 70 and 80 degrees Fahrenheit. You also need a specialized epoxy sponge. Do not use a standard yellow grout sponge. It is too soft and will pull the grout out of the joints. You need a stiff, white scrub pad and a firm epoxy sponge to emulsify the resin on the surface of the tile before it sets. If you leave a haze, you are looking at a nightmare of acid-washing or mechanical grinding to get it off. This is why I emphasize professional techniques even for homeowners looking at how to refresh grout without replacing it. Sometimes the best way to refresh is to remove the old sand and replace it with a modern resin. It is a labor-intensive process, but the results are bulletproof. You get a finish that looks like a single, solid sheet of stone rather than a grid of dirty lines.
- Check subfloor deflection to ensure it meets L/360 standards for ceramic or L/720 for stone.
- Acclimate all resin components to room temperature for 24 hours prior to mixing.
- Use a digital scale to ensure the resin-to-hardener ratio is exact to the gram.
- Work in small sections of no more than 10 square feet to prevent the resin from setting too fast.
- Maintain a two-bucket cleaning system with specialized epoxy emulsifier solution.
- Wait a full 24 hours before allowing any foot traffic or moisture contact.
The relationship between baseboards and shower floor integrity
Baseboards act as the final structural seal that protects the junction between your flooring and your wall framing from incidental moisture. While they are often viewed as decorative, in a bathroom, they are a functional component of the moisture management system. If you use mdf or cheap pine baseboards near a shower, they will act as a wick. They will draw water up from the floor and hold it against the studs. This is a common point of failure that leads to mold. For 2026, I recommend only using high-density polymer or waterproof PVC baseboards in wet areas. These materials do not rot and do not support mold growth. When you install them, you should also back-caulk the top edge and the floor transition to create a secondary barrier. This level of detail is what separates a professional installation from a weekend hack job. If you are looking for aesthetic inspiration that doesn’t compromise function, check out these baseboards makeover ideas. The goal is to create a transition that looks elegant but behaves like a dam. I have seen beautiful bathrooms ruined because someone used a standard wood baseboard that warped and pulled away from the wall, allowing steam to penetrate the wall cavity. It is a small detail that has massive consequences for the longevity of your home.
“Waterproof is a promise that most materials cannot keep without the help of chemistry.” – Master Flooring Axiom
Future proofing your bathroom with sustainable resin solutions
Modern resin grouts are evolving to include recycled glass content and low VOC formulations that meet the strictest indoor air quality standards. We are moving away from the toxic, high-odor epoxies of the past. The new generation of resins is much easier to work with and far better for the environment. This aligns with the growing demand for eco friendly tile solutions. These products provide the same waterproof performance without the off-gassing. When you choose a resin grout, you are also making a long-term sustainability choice. Because it never needs to be replaced and never needs harsh chemical cleaners, the total lifecycle impact is significantly lower than cement grout. You won’t be throwing away buckets of bleach or hiring someone for tile cleaning tips every six months. You simply wipe it down with a mild soap and it stays pristine. This is the future of flooring. We are moving toward systems that are designed to last for fifty years rather than five. If you are planning a remodel, don’t let the contractor talk you out of resin because it is harder to install. It is harder for them, but it is better for you. Demand the best materials because your subfloor depends on it. If you have questions about which resin is right for your specific tile type, you can always contact us for a technical consultation. We see the stuff that’s behind the walls, and trust me, you want the resin.