
The subfloor secret that contractors wont tell you
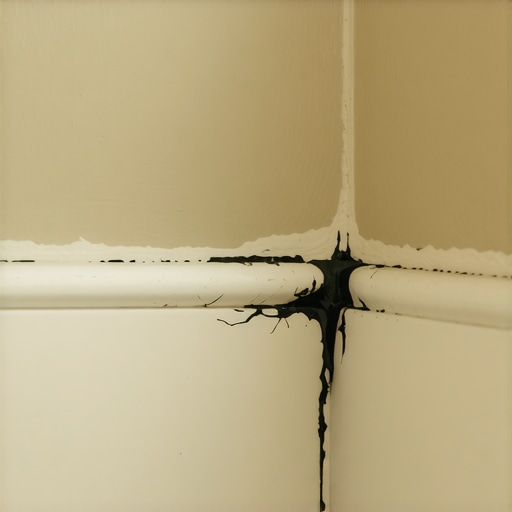
Bathroom baseboards pull away from walls primarily due to hydrostatic pressure and elevated relative humidity levels that cause localized material expansion. When moisture from showers permeates the joint between the tile and the trim, the cellular structure of the baseboard swells, forcing it to bow outward from the wall studs. Most guys skip the leveling compound. They think the underlayment will hide the dip. It won’t. I spent three days grinding concrete on a job last month just so the floor wouldn’t click like a castanet. That same unevenness is often what starts the slow crawl of your baseboard away from the drywall. If the floor is not flat within one eighth of an inch over a ten foot radius, the baseboard is being forced to follow a curve it was never designed to take. You are fighting physics from day one. I have spent twenty five years smelling of oak dust and WD-40, and I can tell you that a baseboard is the canary in the coal mine for your entire bathroom structure. When you see that gap, do not just reach for the caulk gun. That is a band-aid on a broken leg. You need to understand the molecular reality of what is happening behind that painted wood. Moisture is not just water you can see. It is a vapor pressure that moves through your tile and into the wall cavity. If your grout is porous, it is acting like a straw. It sucks water up and deposits it right into the back of your trim. This is especially true in showers where the waterproofing membrane was not carried high enough behind the wallboard. It is a slow, invisible war. It will buckle. It will snap. Your wall is a breathing organism, and right now, it is gasping for air.
“A floor is only as good as the subfloor beneath it; deflection is the enemy of every joint.” – Master Flooring Axiom
The humidity trap inside your walls
Atmospheric moisture levels in a bathroom can fluctuate from thirty percent to ninety percent in a matter of minutes during a hot shower. This rapid cycling causes the wood fibers in your baseboards to expand and contract at a rate that the fasteners cannot support. When the wood swells, it pushes against the nail heads. When it shrinks, it does not always return to its original position because the nail has been slightly displaced in the soft pine or MDF. Over a hundred shower cycles, that baseboard has walked itself right off the wall. Most people think they need more nails. They are wrong. You need a better moisture barrier. In high humidity regions like Houston or the swampy coastal areas, this effect is magnified by the exterior vapor pressure. If your bathroom shares an exterior wall, you have moisture attacking from both sides. The drywall acts as a semi-permeable membrane. If you used a cheap builder grade primer, you are essentially inviting the water to stay and live in the gypsum core. I have seen chic baseboard designs ruined because the installer forgot that wood is basically a bundle of vertical straws. If you do not seal the bottom edge of the trim before installation, you are leaving the end grain open to every splash from the floor. This is why I insist on back-priming. It is a pain. It takes time. But it is the only way to stop the cellular expansion that leads to that ugly black gap at the top of your trim.
Why your subfloor is lying to you
Structural deflection in the floor joists creates a seesaw effect that pulls baseboards away from the wall as the floor sinks under weight. If your subfloor has a dip near the perimeter, the weight of the toilet, the tub, or even a person walking past can cause the floor to flex downward. Since the baseboard is nailed to the wall studs and not the floor, that downward movement of the floor creates a void. Then, the baseboard, which is often pinned against the floor during installation, gets dragged down by the friction of the flooring material. I once walked into a house where the owner thought the house was sinking. It was not. It was just a three quarter inch plywood subfloor that had lost its structural integrity because of a slow leak in the showers next door. While most people want the thickest underlayment, too much cushion actually causes the locking mechanisms on LVP to snap under pressure, and it also allows the floor to bounce. That bounce is a silent killer for your trim joints. You need a floor that is dead flat. If the floor moves, the trim moves. If the trim moves, the caulk cracks. If the caulk cracks, water gets in. It is a cycle of failure that starts with a lazy man with a level. I have seen guys try to fill the gap with more grout or thick layers of silicone. It never works. You are trying to use a liquid to solve a structural engineering problem. You need to address the deflection. You need to stiffen the joists or use a self-leveling underlayment to create a stable plane for the floor and the trim to meet. It is about the physics of the load path.
| Material | Water Absorption Rate | Linear Expansion | Recommended Adhesive |
|---|---|---|---|
| MDF | High | 0.3% | Polyurethane |
| Pine | Medium | 0.15% | PVA |
| PVC | Zero | 0.05% | Solvent Cement |
The microscopic failure of fasteners
Galvanic corrosion and mechanical withdrawal are the primary reasons nails lose their grip in a bathroom environment. When a steel finish nail is exposed to the high humidity of a bathroom, it begins to oxidize. This oxidation smooths out the surface of the nail, reducing the friction that holds it into the wooden stud. Furthermore, as the wood baseboard cycles through wet and dry phases, the hole around the nail becomes enlarged. This is known as wood cell crushing. Once the cell walls are crushed, the nail has no bite. It just sits there while the wood bows out. I always use stainless steel trim nails for bathrooms. They are expensive. They are hard to find at the big box stores. But they do not rust and they hold their grip for decades. Most contractors use a pneumatic 18 gauge brad nailer with galvanized nails. That is fine for a bedroom, but in a bathroom, it is a recipe for a call back in two years. You also have to consider the angle of the fastener. If you fire the nail straight into the stud, it is easy to pull out. If you cross-nail, driving two nails at opposing forty five degree angles, you create a mechanical lock that the wood cannot pull away from. It is basic geometry. I have seen eco friendly tile solutions that were perfectly installed, but the whole room looked like junk because the baseboards were flapping in the breeze. Do not be the guy who skimps on the fasteners. Use the right metal and the right angle.
“Excessive moisture in the subfloor or wall cavity is the primary catalyst for dimensional instability in perimeter moldings.” – TCNA Industry Standard
The 1/8 inch that ruins everything
Precision in the expansion gap is the difference between a floor that lasts and a floor that fails within the first season. Every floating floor, whether it is laminate or LVP, needs room to breathe. If you push your floor tight against the wall, it has nowhere to go when it expands in the summer heat. It will push against the baseboard with hundreds of pounds of force. Something has to give. Usually, it is the baseboard that gets shoved off the wall, or the floor itself buckles in the center of the room. You need that quarter inch gap. But you also need to make sure that the baseboard is not pinned so tightly against the floor that it prevents this movement. This is the delicate dance of the master installer. I use spacers every single time. No exceptions. I have seen homeowners try to save money by doing it themselves, and they always forget the expansion gap. Then they wonder why their baseboards are bowing. It is not the wood. It is the floor. It is a giant wooden or plastic piston pushing against your walls. If you are in a dry climate like Phoenix, your wood will shrink more than you think. If you do not account for that, you will have gaps at every mitered corner. The physics of wood movement is not a suggestion. It is a law. You can either follow it or you can pay me to come fix it later. I prefer you do it right the first time.
Pre-Installation Audit Checklist
- Check subfloor levelness with a 10-foot straight edge.
- Measure relative humidity in the room and the moisture content of the trim.
- Back-prime all wood baseboards with a high-quality oil-based sealer.
- Verify that the tile grout is fully cured and sealed before installing trim.
- Select stainless steel fasteners to prevent corrosion.
- Ensure a 1/4 inch expansion gap for all floating floor materials.
If you need expert help with your next project, feel free to contact us or check our privacy policy for how we handle your data. Fixing a bathroom is about more than just the looks. It is about the chemistry of the adhesives and the physics of the structure. Do not let a small gap turn into a major renovation. Secure your baseboards properly and keep the moisture where it belongs, in the drain and not in your walls.