
I spent three days grinding concrete on a job last month just so the floor wouldn’t click like a castanet. Most guys skip the leveling compound and think the underlayment will hide the dip. It won’t. This same philosophy applies to grout. If you think you can just slap a sealer on and call it a day, you are going to end up with a hazy, sticky nightmare on your tiles. I have seen fifteen thousand dollar bathroom installs ruined because someone got lazy with a bottle of cheap solvent. Grout is not just filler. It is a porous, cementitious bond that requires a precise chemical application to survive the daily assault of moisture and minerals. If you do not seal it correctly, you are basically leaving a wide open door for mold to move in and pay rent. We are going to break down the physics of how to keep that sealer exactly where it belongs. It will take patience. It will take the right tools. But your floor will thank you for the next decade.
The hidden physics of grout saturation
Applying grout sealer requires understanding that cementitious grout is essentially a hard sponge at a microscopic level. You must use penetrating sealers or fluoropolymers to create a hydrophobic barrier within the capillary pores of the material. This process prevents liquid ingress and staining from organic matter or hard water minerals. Most people fail because they do not realize that grout is a thirsty substrate. When you apply a liquid to it, the surface tension determines if it stays on top or dives deep. A quality sealer is engineered with surfactants that break that tension. This allows the protective molecules to travel deep into the grout line. If the grout is still wet from a recent cleaning, those pores are already filled with water. The sealer will just sit on the surface and create a sticky film that attracts dirt. You need at least 48 to 72 hours of dry time after a deep clean before you even touch a bottle of sealer. If you ignore this, you are wasting your money. Check out these tile cleaning tips for a sparkling bathroom in 2025 to ensure your prep work is handled properly before you begin the sealing phase. This is about chemistry, not just wiping a rag across the floor.
“A floor is only as good as the subfloor beneath it; deflection is the enemy of every joint.” – Master Flooring Axiom
Why moisture always wins the long game
Managing moisture levels in showers and bathrooms is the primary goal of grout sealing. Without a moisture barrier, the substrate behind the tile can rot, leading to structural failure and mold growth. You must apply the sealer in thin layers to avoid over-saturation and puddling on tile surfaces. I have seen guys in Florida or Texas where the humidity is a constant battle try to seal grout in a damp room. It never works. The sealer needs a dry environment to cure. If you seal in moisture, you are basically canning a jar of rot. In regions with high humidity, the curing time can double. You might think the surface is dry, but the core of the grout is still holding onto molecules of H2O. This is why professional installers use moisture meters even on grout lines. It sounds like overkill until you see a whole floor of tiles popping off because the moisture had nowhere to go. You have to treat the grout line like a specialized engineering component. It is the weakest link in your tile assembly. If the link breaks, the whole system fails. This is especially true for showers that wow, where the water exposure is constant. You cannot afford a mistake here.
| Sealer Type | Primary Chemical Base | Best For | Longevity |
|---|---|---|---|
| Penetrating | Silanes / Siloxanes | Natural Stone, Sanded Grout | 3 to 5 Years |
| Film-Forming | Acrylic / Urethane | Slate, Saltillo, Terracotta | 1 to 2 Years |
| Solvent-Based | Complex Fluoropolymers | Dense Tiles, High Traffic | 5 to 10 Years |
| Water-Based | Silicate Blends | DIY Projects, Low VOC needs | 2 to 3 Years |
The chemistry of the invisible barrier
Modern grout sealers utilize nanotechnology to create an invisible shield that is breathable yet water-resistant. You should look for solvent-based sealers for dense tiles and water-based sealers for standard ceramic applications to ensure maximum adhesion and protection. When we talk about “breathability,” we mean that water vapor can escape, but liquid water cannot enter. This is vital. If a sealer is not breathable, it can cause spalling. This happens when moisture gets behind the sealer and freezes or expands, literally blowing the face off the grout. It looks like the grout is crumbling. People blame the grout, but the fault lies with the wrong sealer choice. You want a sealer that stays below the surface. If you see a shine on your grout after it dries, you probably used a film-forming product. These are magnets for scuff marks and oil. For a real professional finish, you want the grout to look exactly like it did when it was dry, just with a hidden superpower. If you have old grout that looks terrible, you might need grout restoration secrets for long lasting results before you can even think about sealing. You can’t seal over dirt. You just end up with shiny mud.
The checklist for a controlled application
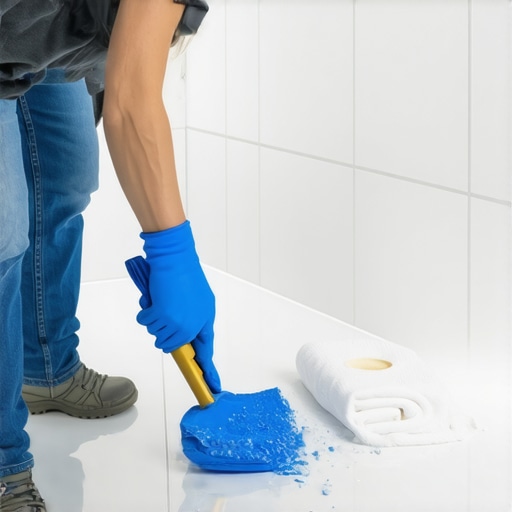
Applying sealer without a mess requires a precision applicator or a foam brush to maintain line control. You must keep a microfiber cloth handy to wipe excess sealer off the tile faces within three to five minutes of application to prevent ghosting or haze. Here is the reality. Gravity is your enemy. If you are working on a wall, the sealer will want to run down the tile. If you are working on a floor, it will want to pool in the low spots. You have to be faster than the sealer. Work in small sections. I usually tell my guys to work in a three by three foot area. No more. If you try to do the whole bathroom at once, the first section will dry before you can wipe the excess off the tile. Once that stuff dries on a ceramic glaze, it is a nightmare to get off. You will be there with a razor blade for hours. It is much easier to just be meticulous as you go. Use a rolling applicator bottle if you can find one. It puts the liquid exactly in the center of the joint. It is a tool of precision. We do not use big fuzzy rollers for this. That is a amateur move that leads to hours of cleanup.
- Use a grout sealer applicator bottle with a roller wheel for maximum precision.
- Keep low-tack painter’s tape ready if you are working near baseboards or unsealed stone.
- Always have a bucket of clean water and a clean sponge to remove accidental spills immediately.
- Maintain ventilation to manage VOC odors and speed up the evaporation process.
- Wear nitrile gloves to protect your skin from the chemical solvents in the sealer.
- Test a small inconspicuous area first to ensure the sealer does not discolor the grout.
Gravity and the vertical shower challenge
Sealing shower walls involves bottom-to-top application to prevent streaking and uneven saturation. You must pay extra attention to corners and niches where water pooling is most likely to occur and cause sealer failure. Vertical surfaces are tricky because the sealer wants to follow the path of least resistance. If you start at the top, the runs will saturate the bottom sections before you get to them. This creates uneven protection. If you start at the bottom, you can catch the drips as they come down. It is a simple trick, but it makes a massive difference in the final look. Also, pay attention to the base of the wall. The transition between the floor and the wall is where most leaks happen. Make sure that joint is packed with sealer. If you have been looking into showers with a style, you know that intricate tile patterns mean more grout lines. More grout lines mean more opportunities for failure. Do not rush the corners. Use a small artist brush for the tight spots. It might take longer, but it is the only way to be sure you have total coverage. While most people want the thickest underlayment, too much cushion actually causes the locking mechanisms on LVP to snap under pressure, and a similar logic applies here. Too much sealer in a corner can create a gummy residue that never quite hardens. Precision is everything.
“Proper sealing of cementitious grout is required to prevent the absorption of liquids and staining agents that degrade the structural integrity of the tile assembly.” – Industry Standard Handbook
Why your baseboards deserve better protection
Protecting adjacent surfaces like baseboards or trim is a pivotal step in professional grout sealing. You should use painter’s tape and drop cloths to ensure solvents do not damage the finish of your woodwork or paint. Sealer is designed to penetrate. If it gets onto your baseboards, it will soak into the wood or the paint and leave a permanent mark. It can even cause the paint to peel if the solvent is strong enough. I always tell homeowners to look at their baseboards makeover ideas to elevate your space and then realize how much a drip of sealer will ruin that aesthetic. It takes five minutes to tape off the trim. It takes five hours to sand and repaint it. If you are working with chic baseboard designs that transform rooms in 2025, the last thing you want is a greasy stain at the floor line. Use a high-quality tape that won’t pull the paint off when you are done. Remove the tape while the sealer is still slightly damp to get a clean line. If you wait until it is fully cured, the sealer can bridge between the floor and the tape, causing it to tear or pull the sealer out of the grout joint. It is all about timing.
Maintaining the seal for the coming decade
Grout maintenance after sealing requires pH-neutral cleaners to avoid stripping the protective layer. You must re-evaluate the water bead test every twelve months to determine if re-application of the sealer is necessary for optimal performance. If you use harsh chemicals or bleach on a sealed floor, you are basically throwing your hard work down the drain. Acidic cleaners will eat right through the sealer molecules. Once the sealer is gone, the grout is vulnerable again. Use a gentle touch. If the water stops beading up on the grout line, it is time for a refresh. You might not need to do a full deep clean if you have maintained it well. Sometimes a simple wipe down and a fresh coat of sealer is all it takes. If the grout has become significantly stained or worn, you might need to learn how to refresh grout without replacing it before you put a new seal on. Think of sealer like the wax on a car. It is a sacrificial layer. It takes the beating so the grout doesn’t have to. If you take care of the sealer, the grout will last as long as the house. Don’t be the person who ignores their floor until it starts falling apart. A little maintenance goes a long way in this business. Keep it clean. Keep it dry. Keep it sealed.