
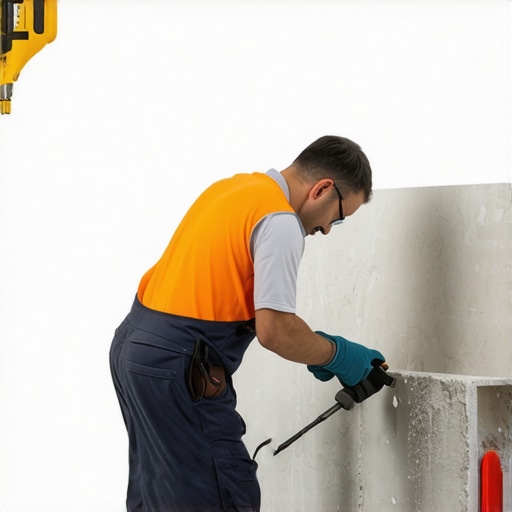
Mastering the Physics of Precision Cuts in Large Porcelain Slabs
Most guys skip the leveling compound. They think the underlayment will hide the dip. It won’t. I spent three days grinding concrete on a job last month just so the floor wouldn’t click like a castanet. That same job required cutting twelve holes in large format porcelain for a custom walk-in shower. If you don’t understand the structural tension inside a 24×48 inch porcelain plank, you are going to watch a five hundred dollar tile crack right down the middle because you didn’t respect the material physics. Cutting holes in porcelain isn’t about force. It is about heat management and molecular abrasion. Porcelain is a vitrified material fired at temperatures exceeding 2,200 degrees Fahrenheit. This process creates a dense, glass-like internal structure that is incredibly hard but lacks the elasticity of natural stone. When you introduce a drill bit, you are fighting against a material that has a water absorption rate of less than 0.5 percent. There is nowhere for the energy to go except into heat or fracture. I have seen countless installers ruin a high-end bathroom because they treated porcelain like it was a soft ceramic. It isn’t. You need to approach every hole as a structural engineering challenge. Any deviation in the subfloor or any vibration in your hand will translate into a spiderweb crack that ruins the entire installation. This guide breaks down the chemical and physical realities of making clean openings for plumbing and fixtures without sacrificing the integrity of the slab.
The molecular stress of vitrified clay
Cutting holes in large porcelain tiles requires diamond-encrusted bits and constant thermal regulation to prevent the material from shattering due to internal stress. Success depends on using high-RPM tools coupled with a cooling agent like water or internal wax to dissipate the friction heat that accumulates at the contact point. Porcelain is significantly harder than granite on the Mohs scale, meaning traditional carbide bits will simply melt before they penetrate the surface. You are essentially using industrial diamonds to sand away the tile at a microscopic level until a void is formed. This process generates localized heat that can reach hundreds of degrees in seconds. If that heat is not managed, the surrounding tile expands while the cold tile stays still, leading to a catastrophic failure known as thermal shock. This is why we never use the hammer setting on a drill. Percussion is the enemy of porcelain. You want smooth, consistent rotation. When planning showers that wow, the precision of these cuts determines if the final product looks like a professional installation or a DIY disaster. Any gap larger than 1/8 inch around a valve body is a failure in my book. You need that tight fit to ensure the escutcheon plate covers the hole perfectly and the waterproofing system remains intact.
“A floor is only as good as the subfloor beneath it; deflection is the enemy of every joint.” – Master Flooring Axiom
The physics of the diamond bit
The diamond hole saw is the primary tool for this task. These bits do not have teeth. They have a rim of industrial diamond grit bonded to a steel core. The grit size determines the speed of the cut and the smoothness of the finish. For large porcelain, I prefer a vacuum-brazed diamond bit. Unlike electroplated bits where the diamonds are just a thin layer on the surface, vacuum-brazed tools have the diamonds integrated into the metal matrix. This allows for better heat dissipation and a longer lifespan. When you start the cut, you cannot go straight in. If you try to start a hole saw flat against the tile, it will wander across the surface and leave a permanent scar. You have to start at a 45-degree angle. This allows the edge of the bit to create a crescent-shaped groove that acts as a guide. Once that groove is established, you slowly bring the drill to a 90-degree angle while maintaining high speed and light pressure. The weight of the drill is usually enough. If you push, you generate excess heat. If you generate excess heat, the diamonds will glaze over and stop cutting. I always keep a wet sponge nearby to keep the bit cool. Even “dry” bits last five times longer if you give them a little moisture. This is especially true when working near grout lines where the material density can vary slightly.
A checklist for the porcelain professional
- Inspect the tile for any micro-cracks before starting the cut.
- Mark the center point with a grease pencil or high-visibility tape.
- Verify the subfloor is perfectly flat to prevent the tile from flexing under the pressure of the drill.
- Select a diamond hole saw that is 1/4 inch larger than the pipe to allow for expansion.
- Set the drill to a high RPM setting and ensure the hammer function is disabled.
- Prepare a cooling station with water or a damp sponge.
- Wear a respirator and eye protection to guard against silica dust.
- Test the bit on a scrap piece of the same batch to check for chipping.
The 1/8 inch that ruins everything
In my twenty-five years on the job, I have seen more floors fail due to poor subfloor preparation than any other factor. When you are cutting a hole in a large tile, the tile must be fully supported. If there is a void in the thin-set or a dip in the plywood beneath where you are drilling, the pressure will snap the tile. This is why back-buttering is not optional for large format porcelain. You need 100 percent coverage. I have walked onto jobs where guys are trying to drill holes in tiles that are only spot-bonded. It is a recipe for disaster. The vibration of the grinder or drill causes the tile to bounce against the subfloor, and within seconds, you have a crack running from the hole to the edge of the tile. You also have to consider the expansion gap. Porcelain expands and contracts. If your hole is too tight against a copper pipe, the vibration of the plumbing or the thermal expansion of the pipe will eventually crack the tile. I always leave a small buffer. This gap is then filled with a high-quality 100 percent silicone sealant, never grout. Grout is rigid and will crack when the pipe moves. Silicone is flexible and maintains the waterproof seal. This is a detail that separates the masters from the amateurs. When we talk about baseboards and transitions, we always look for these small engineering details that ensure the floor lasts for decades.
| Tool Type | Ideal RPM | Cooling Method | Best For |
|---|---|---|---|
| Diamond Hole Saw | 2,000 to 3,500 | Water/Wet Sponge | Round plumbing pipes |
| Angle Grinder | 10,000 to 11,000 | Air/Dry (Vacuum) | Rectangular outlets |
| Diamond Core Bit | 1,500 to 2,500 | Internal Wax | Hardest porcelains |
| Glass Drill Bit | 500 to 1,000 | Submerged Water | Not recommended for porcelain |
Why your subfloor is lying to you
Standard subfloors are rarely flat enough for large format porcelain. If you are off by more than 1/8 inch over ten feet, you are asking for trouble. Before I even think about cutting a hole, I am out there with a straight edge and a bag of high-flow self-leveling underlayment. If the substrate isn’t perfect, the tile is under constant tension. When you remove material by cutting a hole, you are changing the distribution of that tension. It is like a piece of glass under a heavy weight. If you scratch it, it breaks. Porcelain behaves the same way. The “click-lock” crowd thinks they can just float a floor over anything, but with real porcelain, the bond to the substrate is what provides the strength. If you are installing in a bathroom, you need to ensure the waterproofing membrane is also flat. Bunched up fabric or uneven liquid membranes can create high spots that lead to cracking during the drilling process. I always recommend a decoupling membrane for anything over 12×24 inches. This allows the tile and the subfloor to move independently, reducing the lateral stress on your precision cuts. This level of detail is what ensures your chic baseboard designs look perfect because the floor hasn’t shifted or cracked away from the wall.
“Precision in the layout phase prevents a catastrophe in the execution phase; measure for the hole twice, cut the porcelain once.” – TCNA Handbook Insight
The ghost in the expansion gap
People focus so much on the hole itself that they forget about the perimeter. A large porcelain floor is a living thing. It breathes with the temperature. If you have cut your holes for the toilet flange and the vanity drains but you didn’t leave an expansion gap at the walls, the floor will eventually buckle. This pressure often manifests as cracks radiating from the holes you so carefully cut. I always leave a 1/4 inch gap at the perimeter, which is hidden by the baseboards or tile cove base. This gives the entire assembly room to move. When cutting rectangular holes for electrical outlets in a backsplash, use a small diameter diamond blade on a 4-inch angle grinder. Do not over-cut the corners. An over-cut creates a weak point where a crack can start. I prefer to drill small holes in the four corners first, then use the grinder to connect the dots. This rounds out the corners on a microscopic level, which significantly reduces the stress concentration. It is the same principle used in airplane windows. Round corners don’t crack as easily as sharp ones. This is technical, but it is the difference between a floor that lasts five years and one that lasts fifty. Following tile cleaning tips is easy, but fixing a cracked slab because you didn’t understand expansion is a nightmare. Always plan for movement. Always plan for heat. Always respect the material.