
The glass tile heartbreak
To cut thin glass tile without it shattering you must use a high-grit diamond blade on a wet saw or a specialized manual glass scorer while maintaining constant water irrigation to prevent thermal shock fractures. I spent three days grinding concrete on a job last month just so the floor wouldn’t click like a castanet, and let me tell you, that same level of obsessive preparation is the only thing that saves a glass tile installation. Most guys walk onto a job site thinking glass is just shiny ceramic. It is not. Ceramic is a porous, baked clay that yields to a standard blade, but glass is a non-crystalline solid that holds immense internal tension. If you approach a thin glass mosaic with a standard 40-grit blade, you are going to end up with a pile of expensive green shards and a homeowner breathing down your neck about their budget. The secret lies in the molecular stress distribution of the material. Glass does not technically break, it propagates a crack. My mission is to teach you how to control that propagation so the tile goes on the wall, not in the trash. When we look at showers that wow in modern design, they almost always feature these delicate glass accents that require surgical precision.
The molecular reality of a clean cut
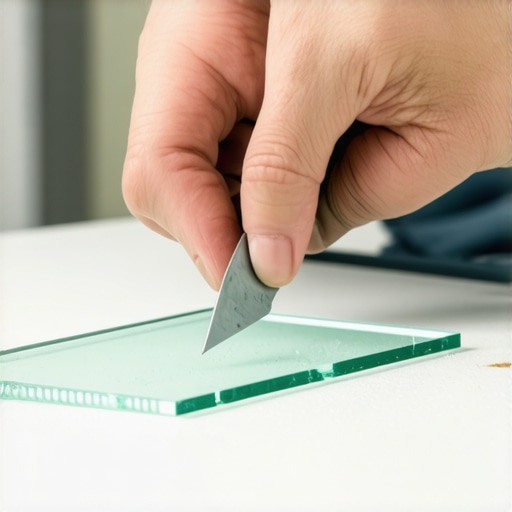
Cutting glass involves creating a controlled failure in the material tension through a process known as scoring where a median crack is introduced to the surface. When you run a diamond blade or a tungsten carbide wheel across the face of a thin glass tile, you are not actually removing material in the way a wood saw does. Instead, you are creating a microscopic fissure. In the flooring world, we call this the Griffith crack. Glass is incredibly strong under compression but remarkably weak under tension. By scoring the top layer, you create a point of extreme stress concentration. If your blade is dull or your pressure is inconsistent, that stress spreads laterally rather than vertically. This is why you see those jagged, milky edges instead of a clean, transparent snap. You are witnessing a failure of physics, not just a bad tool. I always tell my apprentices that they need to listen to the cut. A good score sounds like a high-pitched zip, like a zipper on a heavy jacket. A bad score sounds like grinding gravel. If you hear gravel, stop immediately. You have already ruined the tile.
“A floor is only as good as the subfloor beneath it; deflection is the enemy of every joint.” – Master Flooring Axiom
Why your wet saw is the enemy
Standard wet saws often fail with glass because their vibration frequency is too high and their blade oscillation causes micro-chips along the fragile painted backing of the tile. Most installers use a general-purpose porcelain blade for everything. That is a $100 mistake on a glass job. Porcelain blades have a coarse diamond matrix designed to hog out hard clay. Glass needs a continuous rim blade with a 300 or 400 grit diamond bond. This finer grit doesn’t ‘bite’ the glass; it polishes its way through the cut. Furthermore, you must check your saw for arbor wobble. If the shaft that holds the blade has even a millimeter of play, the glass will shatter before the blade even finishes the first inch of the cut. I have seen guys try to force a cut through a $40 square foot mosaic with a $50 DIY saw. It never works. You need a stable platform and a high-volume water pump to keep the interface cool. Heat is the primary reason glass tiles shatter during a power cut. The friction of the blade generates localized thermal expansion, while the rest of the tile remains cool. That temperature gradient creates a shear force that the glass cannot handle.
| Blade Type | Grit Rating | Best Application | Risk Level |
|---|---|---|---|
| Standard Diamond | 40-80 | Porcelain/Ceramic | High (Shattering) |
| Fine Glass Blade | 200-400 | Thin Glass/Mirrors | Very Low |
| Lapidary Blade | 600+ | Mosaic Jewelry Glass | Zero Chipping |
| Turbo Blade | N/A | Granite/Stone | Immediate Failure |
The 1/8 inch that ruins everything
Precision in glass tile cutting is measured in fractions of a millimeter because the transparency of the material reveals every flaw in the substrate and the cut. When you are working on showers with a style that uses glass, you cannot hide a bad cut under a thick layer of grout. The light passes through the glass and hits the edge. If that edge is chewed up, it will cast shadows inside the tile. I have seen beautiful installations look like garbage because the installer didn’t use a dressing stone on their blade. A dressing stone is a simple block of silicon carbide that you run the blade through to expose new, sharp diamonds. If you don’t dress your blade every five to ten cuts, the diamond matrix gets clogged with glass dust. This creates friction, which creates heat, which creates shards. Another trick I learned the hard way is the masking tape method. Cover the cut line with blue painter tape. This stabilizes the surface tension and prevents the ‘blowout’ that happens when the blade exits the back of the tile. It also gives you a better surface for marking your measurements with a fine-point sharpie.
Thermal shock and the irrigation problem
Maintaining a constant flow of water on both sides of the cut line is mandatory to prevent the glass from cracking due to localized heat buildup. If your water nozzle is only hitting one side of the blade, the other side of the glass is getting hot. This imbalance is a recipe for disaster. I once saw a guy try to dry-cut a glass border. He got halfway through before the tile literally exploded. It sounded like a gunshot. That is because the internal stresses of the glass were fighting the expansion of the heated edge. When you are setting up your workspace, ensure your water reservoir is clean. Recirculating water filled with ceramic grit from a previous job will scratch the face of your glass tiles. I always use a fresh bucket of water for glass. It sounds like a pain, but so is replacing a ruined $200 box of tile. Once the cut is done, you aren’t finished. You need to take a hand-rubbing stone, usually a 200-grit diamond pad, and lightly break the sharp edge of the cut. This prevents the grout from catching on micro-burrs later.
- Always use a continuous rim diamond blade specifically labeled for glass.
- Check the arbor for any signs of vibration or wobble before starting.
- Apply blue painter tape over the cut line to stabilize the surface.
- Keep the water flow high and the feed rate slow.
- Finish the edge with a diamond hand-polishing pad.
The role of the subfloor in glass stability
While the cut is the immediate challenge, the longevity of that cut depends entirely on the lack of deflection in the wall or floor substrate. Glass has zero flexibility. If your subfloor has a dip, or if your shower wall has a slight bow, the glass tile will eventually crack at its weakest point, which is usually the cut you just made. This is why I spend so much time on prep. You need to use a high-polymer-modified thin-set specifically designed for glass. These mortars have a higher bond strength and a slight bit of ‘give’ to handle the different expansion rates of glass and concrete. Also, consider the color of your thin-set. Since glass is often translucent, a gray thin-set will ruin the color. Always use bright white. If you are integrating glass with other materials, check your chic baseboard designs to ensure you have proper expansion gaps at the perimeter. If the glass is pinched against a hard surface like a baseboard or a ceiling, it will eventually shatter when the house settles.
“Glass tile requires a substrate that is flat to within 1/8 inch over 10 feet; anything less is an invitation for failure.” – TCNA Technical Bulletin
Grout and the final stress test
Grout selection for glass tile must prioritize non-sanded varieties to avoid scratching the delicate surface during the application process. Once you have successfully cut and installed the tile, you face the risk of ruining the finish during the grouting phase. Sanded grout is essentially sandpaper. If you rub it across the face of a thin glass tile, you will leave thousands of microscopic scratches that dull the shimmer. Use a high-performance unsanded grout or an epoxy grout if you are working in a wet area. If you find that your grout is looking a bit tired after a few years, you should look into how to refresh grout without replacing it to keep the glass looking pristine. Proper maintenance is key because glass shows every water spot and soap scum buildup. I recommend homeowners check out tile cleaning tips that involve pH-neutral cleaners. Harsh acids can actually etch the surface of certain glass tiles over time, leading to a permanent cloudiness that no amount of scrubbing can fix.
Integrating glass with modern architectural elements
The transition between glass tile and other materials like baseboards or trim requires a soft joint to accommodate structural movement. Never butt glass tile directly against a metal trim or a wood baseboard. Always leave a 1/16 inch gap and fill it with a color-matched 100 percent silicone caulk. This acts as a shock absorber. In the world of baseboards makeover ideas, we often see people trying to run tile right down to the floor. If that floor moves, the glass breaks. By using a silicone joint, you allow the materials to breathe. This is the difference between a job that lasts five years and a job that lasts fifty. I have seen enough failures to know that shortcuts always catch up to you. Whether you are doing a small backsplash or a full-scale wet room, the physics remain the same. Respect the material, use the right blade, and never rush the score. Glass is a beautiful, permanent material if you treat it with the technical respect it demands. If you follow these protocols, you will achieve those clean, factory-finish edges that define a master installation.