
I spent three days grinding concrete on a job last month just so the floor wouldn’t click like a castanet because the previous installer ignored a simple level check. That same obsession with structural integrity applies to your plumbing. A shower handle stuck in the hot position is not just a nuisance. It is a mechanical failure that threatens the integrity of your shower walls, the tile, and the subfloor below. When water remains at a scalding temperature, the thermal expansion within the pipes and the valve body reaches its limit, leading to potential leaks that seep into your grout lines and rot your framing from the inside out. I have seen million-dollar homes with baseboards rotting off the walls because a $40 shower cartridge seized up and nobody bothered to fix the moisture migration. We are going to treat this repair like a structural engineering project. We are going to zoom into the chemistry of mineral deposits and the physics of the pressure-balance valve to ensure your bathroom stays dry and your shower stays functional.
The physics of a seized cartridge
A shower handle stuck in the hot position usually stems from a failed pressure-balance cartridge or heavy mineral accumulation within the valve body. Fixing this requires shutting off the water, removing the cartridge, and cleaning or replacing the internal components to restore mechanical movement and safety. The internal cartridge is a precision-engineered plastic or brass cylinder that manages the flow of water. Within this cylinder, small O-rings and a balancing spool slide back and forth. When calcium and magnesium from your water supply precipitate out of solution, they form a hard, crystalline crust. This crust acts like sandpaper against the rubber seals. Eventually, the friction becomes so great that the handle locks. If it locks on hot, the balancing spool is likely stuck in a position that has fully opened the hot water inlet while closing the cold. This is common in regions with hard water where mineral scale builds up faster than the average homeowner can keep up with.
“A floor is only as good as the subfloor beneath it; deflection is the enemy of every joint.” – Master Flooring Axiom
Why minerals are the enemy of your valve body
Hard water is the primary culprit behind mechanical seized valves in residential bathrooms. Calcium carbonate is a persistent adversary. It does not just sit on the surface. It bonds to the brass housing of the shower valve. When the water sits in the pipes, the heat from the hot water line accelerates the chemical reaction that causes these minerals to drop out of the water and stick to the internal components. This process is called scaling. In a shower valve, the clearances are measured in fractions of a millimeter. Even a microscopic layer of scale can increase the diameter of the cartridge just enough to create a mechanical bind. This is why you cannot simply force the handle. If you apply too much torque to a stuck handle, you will snap the plastic stem of the cartridge or, worse, crack the solder joints on the copper pipes behind the wall. That is how you end up needing tile cleaning tips for a sparkling bathroom in 2025 because you’ve had to rip out the wall to fix a flood. You need a surgical approach.
The technical breakdown of common valve types
Understanding what is behind your handle is the first step in the repair process. Not all shower valves are created equal. The mechanical resistance you feel depends on the architecture of the valve itself. Most modern homes utilize a single-handle pressure-balance valve designed to prevent scalding when someone flushes a toilet elsewhere in the house. These valves use a diaphragm or a sliding spool. If that spool gets stuck due to grit or scale, the handle will not budge. Older homes might have a three-handle system or a simple ball-style valve. The ball-style valves are notorious for spring and seat failures where the rubber parts expand and wedge themselves into the openings. Below is a comparison of how these systems fail and the difficulty of the repair.
| Valve Type | Failure Mode | Repair Complexity | Typical Lifespan |
|---|---|---|---|
| Pressure Balance | Spool seizure | High | 10-15 years |
| Thermostatic | Wax element failure | Extreme | 15-20 years |
| Ball Valve | Spring degradation | Medium | 5-8 years |
| Compression | Washer flattening | Low | 3-5 years |
Tools for the structural breakdown
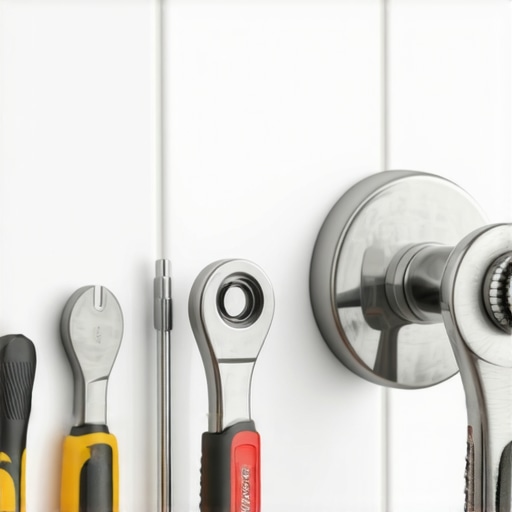
You cannot fix a seized shower valve with a pair of cheap pliers. You need the right gear. My toolbox always contains a dedicated cartridge puller, a set of hex keys, a needle-nose plier, and a gallon of white vinegar. The cartridge puller is the most vital piece. It is a specialized tool that threads onto the cartridge stem and uses a screw mechanism to provide even, linear pressure. Pulling a cartridge by hand often results in the plastic casing snapping off, leaving the guts of the valve stuck inside the brass housing. When that happens, you are looking at hours of drilling and picking at plastic bits while trying not to gouge the brass. If you gouge the brass, the new cartridge will never seal, and you will have a permanent drip that will eventually destroy your chic baseboard designs that transform rooms in 2025 through capillary action.
The 1/8 inch that ruins everything
When you are working on a shower valve, precision is everything. A single 1/8 inch gap in your caulking or a slightly off-center cartridge will lead to disaster. I have seen guys install a brand new cartridge but forget to grease the O-rings. The first time the homeowner turns the handle, the dry rubber catches on the brass port and tears. Now you have a slow leak inside the wall. You won’t see it today. You won’t see it tomorrow. But in six months, your grout will start to darken. That is the sign of moisture saturation. If you do not catch it, you will need grout restoration secrets for long lasting results just to keep the tiles from falling off the wall. Always use plumber’s grease. It is a silicone-based lubricant that does not degrade rubber and provides a waterproof barrier that prevents future mineral bonding.
Step by step guide to valve restoration
Follow this checklist to ensure you do not turn a simple repair into a bathroom renovation. Every step is necessary for a professional-grade result. Skip one, and you are asking for a leak.
- Turn off the main water supply and open the lowest faucet in the house to drain the lines.
- Remove the handle screw, usually hidden behind a small plastic cap, and pull the handle off.
- Remove the escutcheon plate and check for signs of moisture behind the wall.
- Take a photo of the orientation of the cartridge so you know which way is up.
- Use a cartridge puller to slowly extract the seized unit from the brass housing.
- Scrub the inside of the brass valve body with a nylon brush and white vinegar to remove scale.
- Apply silicone grease to the new cartridge O-rings and slide it into place.
- Reinstall the clip, the plate, and the handle, then test for leaks before sealing the trim.
Maintaining the grout and baseboards after the repair
Once the valve is fixed, you must address any collateral damage. If the handle was stuck for a long time, there is a high probability that the escutcheon plate seal has failed. Water running down the wall during every shower has likely been getting behind that plate. Check your baseboards. If they are made of MDF, they will swell at the first sign of water. If you see swelling, you may need to look at baseboards makeover ideas to elevate your space to replace the damaged sections with a moisture-resistant material like PVC or solid primed pine. Furthermore, inspect the grout around the faucet. If it is cracked, it is not protecting your subfloor. You can learn how to refresh grout without replacing it to ensure that your wet area remains sealed and the moisture stays in the pan where it belongs.
The ghost in the expansion gap
A contrarian point that many plumbers ignore is the role of the expansion gap around the valve. In the flooring world, we leave gaps at the perimeter for movement. In a shower, the hole in the tile for the valve should not be tight. If the tile is touching the brass valve body, the vibrations from the water hammer will eventually crack the tile or the grout. You need a small gap, which is then covered by the escutcheon. This allows the plumbing and the tile to expand and contract at different rates as the water temperature changes. If your handle is stuck on hot, the heat has likely caused the brass to expand significantly. Fixing the handle is only half the battle. You must ensure the surrounding structure can handle the thermal cycles. If the shower is old and the tile is failing, it might be time to look into showers that wow modern designs for 2025 to upgrade to a more robust system.
Why your subfloor is lying to you
You might think that because the floor looks dry, everything is fine. It isn’t. Water is a master of disguise. It travels along the outside of the copper pipe, through the hole in the subfloor, and pools on the bottom plate of your framing. By the time you see a stain on the ceiling below or feel a soft spot in the floor, the structural damage is done. Use a moisture meter. I never step onto a job without one. Probe the grout lines around the shower handle. If the reading is above 15 percent, you have a hidden leak. This is why I advocate for eco-friendly tile solutions for sustainable homes in 2025 that utilize advanced waterproofing membranes like Kerdi or Wedi. These systems create a literal bathtub behind your tile, so even if a valve fails, the water is contained.
“Deflection in the subfloor is the silent killer of tile; a seized valve is the silent killer of the subfloor.” – Master Flooring Axiom
The final word on valve maintenance
Repairing a shower handle that is stuck on hot is about more than just getting a comfortable temperature. It is about protecting the structural integrity of your home. By understanding the chemical nature of mineral buildup and the mechanical requirements of the valve cartridge, you can perform a repair that lasts for decades. Do not force the handle. Use the right tools. Grease your seals. And always, always keep an eye on your grout and baseboards for the first sign of moisture. A bathroom is a machine, and like any machine, it requires precision maintenance to prevent a total system failure. If the task seems beyond your mechanical comfort level, or if you find extensive rot behind the wall, reach out through our contact us page for professional guidance on your next steps.