
The chemistry of sticking things down forever
Removing old adhesive from a bathroom floor requires identifying the bond type as either organic mastic or cementitious thin-set to select the correct mechanical or chemical removal strategy. This process is the foundation for any new tile or flooring installation and determines the long-term structural integrity of your bathroom. Most guys skip the leveling compound. They think the underlayment will hide the dip. It won’t. I spent three days grinding concrete on a job last month just so the floor wouldn’t click like a castanet. That client thought they could just slap new luxury vinyl over old yellow mastic. They were wrong. If you leave a 1/16 inch ridge of old glue, your new floor is basically a ticking time bomb of failed joints and hollow sounds. My hands smell like floor wax and the WD-40 I use to clean my scrapers because I know that a clean subfloor is the only thing standing between a professional job and a total teardown. We are going to look at the microscopic reality of these bonds. We will talk about the hydration of concrete and why old adhesives refuse to let go without a fight. Bathroom environments are unique because of the constant moisture cycles. This means the adhesive hasn’t just sat there. It has undergone decades of hydrothermal stress. This makes it brittle in some spots and gummy in others. You cannot just guess your way through this. You need a plan that respects the chemistry of the bond and the physics of the subfloor.
The brutal reality of the floor scraper
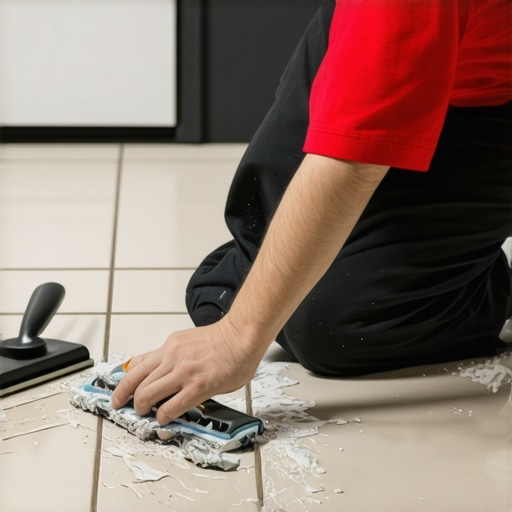
Mechanical removal of adhesive involves using heavy duty floor scrapers or power tools to physically shear the bond between the glue and the subfloor material. This method is preferred for thick deposits of dried mastic or thin-set where chemical softeners might create a slurry that is harder to manage. When you grip a long-handled scraper, you are engaging in a battle of leverage. For wood subfloors, you have to be careful not to gouge the plywood. A gouge is a weak point. If you are working on a concrete slab, you can be more aggressive. I often tell my apprentices that if they aren’t sweating after the first ten square feet, they are doing it wrong. We use specialized blades made of high carbon steel. These blades dull quickly against cementitious thin-set. You need to keep a file handy. A dull blade is a dangerous blade because it requires more force and is more likely to slip. If you are dealing with showers with a style that involves intricate tile patterns, the subfloor must be perfectly flat. Any residual adhesive left behind will telegraph through your new thin-set layer. This creates high spots that lead to cracked tiles. We aren’t just cleaning. We are engineering a surface. The goal is to reach the original substrate. If the subfloor is concrete, we look for the grey pore structure. If it is wood, we look for the grain.
“A floor is only as good as the subfloor beneath it; deflection is the enemy of every joint.” – Master Flooring Axiom
Chemical warfare against mastic and thin-set
Chemical adhesive removers use solvents or soy-based agents to break the molecular chains of the glue, turning a hardened solid into a scrapable gel. This approach is highly effective for stubborn yellow mastics and black cutback adhesives found in older homes. You have to be careful with chemicals in a bathroom. It is a small, enclosed space. Ventilation is not a suggestion. It is a requirement for survival. I have seen guys pass out because they thought a small bathroom window was enough. It isn’t. You need active airflow. When applying these strippers, the wait time is the most important factor. People get impatient. They want to scrape after five minutes. You have to let the chemistry do the heavy lifting. If the label says wait sixty minutes, you wait sixty. While the stripper works, it is the perfect time to plan your baseboards makeover ideas to elevate your space once the floor is finished. Removing the baseboards before you start the adhesive removal is a professional move. It allows you to clean right up to the wall plate. This prevents the ghost in the expansion gap where old glue keeps the new floor from moving naturally. Many people think they can skip the chemical stage if the floor looks mostly clean. They are wrong. Microscopic residues can prevent the new adhesive from biting into the substrate. This is especially true with modern modified thin-sets that rely on a chemical bond as much as a mechanical one.
The ghost in the expansion gap
The perimeter of the bathroom floor must be completely cleared of old adhesive to ensure that the new flooring has the required space for thermal expansion and contraction. Residual glue in these gaps can cause the entire floor system to buckle or peak when temperatures change. Every material moves. Tile moves less than wood, but it still moves. If you leave old, hard mastic in the corners, you are creating a fixed point. A fixed point is where the floor breaks. I always spend extra time with a small hand chisel in the corners. It is tedious work. My knees usually ache by the end of it, but it is the difference between a floor that lasts thirty years and one that fails in three. While you are down there, you should inspect the condition of your walls. This is a great time to look into tile cleaning tips for a sparkling bathroom in 2025 for the remaining surfaces. If you are keeping some of the wall tile, the transition where the floor meets the wall is your most critical junction. You cannot leave a mess there. The new floor needs to tuck in cleanly. If you are also dealing with grout issues, you might want to learn how to refresh grout without replacing it to match your clean new subfloor prep. Precision at the edges defines the quality of the entire job. It is the 1/8 inch that ruins everything if you ignore it. I have seen entire bathrooms ruined because the installer was too lazy to scrape the last two inches near the toilet flange.
| Adhesive Type | Removal Method | Difficulty Level | Typical Tool |
|---|---|---|---|
| Yellow Mastic | Chemical Stripper | Medium | Wide Putty Knife |
| Cement Thin-set | Mechanical Grinding | High | Angle Grinder with Cup Wheel |
| Black Cutback | Wet Scraping | Extreme | Heavy Duty Floor Scraper |
| Pressure Sensitive | Heat Gun / Solvent | Low | Hand Scraper |
Why your subfloor is lying to you
Subfloors often appear flat after adhesive removal while actually harboring significant dips and peaks that are only visible when checked with a long straightedge. Addressing these irregularities is mandatory before proceeding with any new installation. You cannot trust your eyes. You have to trust the level. I use a six-foot magnesium straightedge. I slide it across the floor and look for light. If I see light under the bar, I have a low spot. If the bar rocks, I have a high spot. Most people think a little bit of old glue won’t matter. They think the underlayment will cushion it. This is a lie. Too much cushion actually causes the locking mechanisms on LVP to snap under pressure. You want a firm, flat surface. If the old adhesive has pitted the concrete, you need to fill those pits. If you are working with eco-friendly tile solutions for sustainable homes in 2025, you want a subfloor that is just as high-quality as the tile itself. A sustainable home starts with a foundation that won’t need to be ripped out in five years. We are talking about the physics of deflection. If the subfloor deflects more than the industry standard, the grout will crack. It doesn’t matter how expensive your tile was. It will fail. You must be a stickler for the standards set by the TCNA. They aren’t suggestions. They are the rules of the trade.
The 1/8 inch that ruins everything
Precision in adhesive removal is measured in fractions of an inch because modern flooring tolerances are extremely tight. Even a minor elevation of 1/8 inch can cause a lip in the tile or a failure in a click-lock joint. When I am on a job, I am looking for perfection. I want that subfloor to look like a sheet of glass. This is especially important for showers that wow. In a shower, the slope is everything. If old adhesive messes with your pre-slope or your liner, you are going to have drainage issues. Water will sit. Mold will grow. It is a disaster. I always use a vacuum-shrouded grinder for the final pass. It removes the fine dust that scrapers miss. This dust is a bond breaker. If you don’t remove it, your new thin-set is just sticking to dust, not the floor. I also recommend checking your chic baseboard designs that transform rooms in 2025 to see how they will cover your expansion gaps. If the baseboard is thin, your scraping at the edge needs to be even more precise. There is no room for error. You have to be meticulous. You have to be the person who cares about the details that no one will ever see once the tile is down. That is what a master installer does. We build for the long haul. We build for the moisture and the heat of a bathroom environment.
“Surface preparation is the most critical and most often overlooked phase of a flooring installation.” – TCNA Handbook
- Wear a P100 respirator to avoid inhaling old adhesive dust.
- Use a HEPA vacuum to clear the floor between scraping passes.
- Test a small area with solvent before applying it to the whole floor.
- Keep a bucket of warm water and a sponge for final residue cleaning.
- Check the subfloor moisture content after using chemical strippers.
- Inspect the toilet flange for damage during the scraping process.
Preparing for the new installation
The final stage of adhesive removal is the decontamination of the subfloor to ensure that no chemical residues or fine particles remain to interfere with the new bond. This involves multiple cleaning cycles and a final inspection of the structural integrity of the substrate. Once the scraping is done, you aren’t finished. You need to wash the floor. If you used a chemical stripper, you must neutralize it according to the manufacturer’s instructions. If you don’t, the chemical will continue to work. It will eat your new adhesive from the bottom up. I have seen it happen. It is a mess. The new floor just lifts right off like a sticker. After washing, you need to let the floor dry completely. Use a moisture meter. Don’t guess. If the subfloor is wet, the new floor will trap that moisture. This leads to rot in wood and efflorescence in tile. If you find that your grout lines in other areas need help, look into grout restoration secrets for long-lasting results to ensure the whole room looks professional. Everything in a bathroom is connected. The floor, the walls, the shower, and the baseboards. They all rely on the work you did when you were on your knees scraping that old glue. It is the hardest part of the job. It is the part that no one sees in the magazine photos. But it is the part that matters most. If you want more information on our standards, you can visit our privacy policy or contact us for specific architectural advice on your next project. We are here to make sure your floor stands the test of time. We are here to make sure you don’t have to do this twice. Doing it right the first time is the only way to work. Anything else is just a waste of time and materials.