
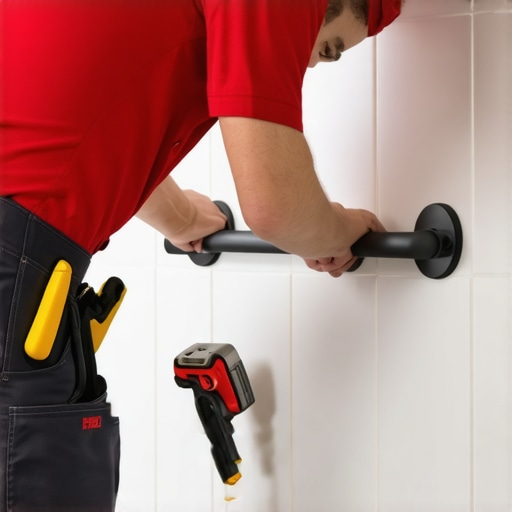
I once walked into a job where a homeowner had tried to install a safety rail using simple plastic wall plugs. The rail stayed up for exactly two days before the tile cracked and the whole thing pulled out of the wall, leaving the elderly resident with a bruised hip and a $2,000 repair bill for the custom marble. Most guys skip the leveling compound on floors and they skip the structural backing on walls. They think the underlayment or the tile will hide the lack of support. It won’t. I spent three days grinding concrete on a job last month just so a floor wouldn’t click like a castanet, and that same level of obsessive prep is what you need for a grab bar in a hollow wall. You are not just hanging a picture. You are engineering a life-safety device that must withstand 250 pounds of sudden, lateral force.
The ghost in the hollow cavity
Installing a grab bar on a hollow tile wall requires specialized hollow wall anchors or toggle bolts that provide clamping force against the back of the substrate. Unlike a stud-mounted installation, you are relying on the shear strength of the tile and the tensile strength of the cement board or green board to prevent structural failure under load.
The physics of a hollow wall are unforgiving. When you have a standard shower wall, you typically have a 1/2 inch or 5/8 inch layer of gypsum or cement-based backing board covered by a layer of thin-set and then the tile itself. If there is no wood stud behind the location where you need the bar, you are effectively bolting the bar to a brittle sandwich of materials. This is why the choice of anchor is the most important decision you will make. You need an anchor that expands to a wide diameter behind the wall to spread the load across a larger surface area. If you use a small anchor, the concentrated pressure will simply punch a hole through the tile the first time someone puts their weight on it.
Why your sub-surface is lying to you
The integrity of a wall depends on the mechanical bond between the tile and the backing material, which can be compromised by moisture intrusion or poor adhesive application. Before drilling, you must verify that the grout lines are solid and that there are no hollow sounds when tapping the surface, as these indicate delamination of the ceramic or porcelain. If the tile is loose, you might need to look at grout restoration secrets for long lasting results to stabilize the area before mounting hardware.
I have seen walls that looked perfect but were actually rotting from the inside because the original installer did not use a proper moisture barrier. If you drill into a hollow wall and the dust that comes out is damp or smells like mildew, stop immediately. You are not looking at a grab bar installation anymore; you are looking at a tear-out. You cannot mount a safety device to a soggy substrate. The anchor will eventually pull through the softened board like a hot knife through butter. We are talking about the chemistry of the wall. In showers that wow modern designs for 2025, we see a lot of large-format tiles. These are beautiful, but they create more hollow space behind the tile if the thin-set was not combed out perfectly with the right trowel size.
| Anchor Type | Weight Rating | Hole Size Required | Best Use Case |
|---|---|---|---|
| Wing-Style Toggle | 300 lbs | 3/4 inch | Hollow Tile on Cement Board |
| Snap-Toggle Bolt | 250 lbs | 1/2 inch | Standard Drywall and Tile |
| Heavy Duty Molly | 150 lbs | 3/8 inch | Thin Tile on Plaster |
| Plastic Plug | 0 lbs | 1/4 inch | Never use for safety bars |
The diamond bit and the cooling curve
Drilling through vitreous porcelain or natural stone requires a diamond-tipped hole saw and a constant water cooling source to prevent thermal shock and cracking. Because porcelain has a MOHS hardness rating of 7 or higher, a standard carbide bit will overheat and dull within seconds, potentially shattering the tile face and ruining the aesthetic finish.
You have to be patient. I see guys trying to lean into the drill like they are pushing a plow. That is how you break things. You let the diamonds do the work. You start at an angle to create a small notch so the bit doesn’t skate across the beautiful surface of your eco-friendly tile solutions. Once you have a bite, you level the drill and keep a wet sponge pressed against the bit. The water carries away the heat and the slurry. If the bit gets too hot, the metal shank will expand and bind, or worse, the tile will undergo a localized expansion that causes a hairline fracture. These fractures might not show up today, but after six months of hot showers, that crack will grow until the whole tile splits.
The 1/8 inch that ruins everything
Proper alignment of the grab bar escutcheon is necessary to ensure the gaskets create a watertight seal against the tile surface. If the hole is even 1/8 inch off center, the anchor may not sit flush, allowing moisture to seep into the hollow wall cavity and cause structural rot or mold growth over time.
I always mark my holes with a grease pencil on a piece of masking tape. The tape serves two purposes: it gives the bit something to grip so it doesn’t wander, and it protects the tile from scratches. You also need to think about where the hole falls in relation to the grout line. Avoid drilling directly on a grout line if you can. The grout is the weakest point of the wall. If the anchor expands against the edge of a tile, it is much more likely to chip the glaze. If you must drill near a corner, you need to be twice as careful with your pressure. Once the hole is drilled and the anchor is set, I always fill the hole with a blob of 100 percent silicone caulk before I drive the screw. This creates an internal gasket that stops water from getting behind the tile. It is a small step, but it is the difference between a job that lasts twenty years and one that fails in two.
“A floor is only as good as the subfloor beneath it; deflection is the enemy of every joint.” – Master Flooring Axiom
- Verify wall type and thickness before purchasing anchors.
- Use a stud finder to ensure you aren’t accidentally hitting a pipe or wire.
- Always use diamond-core bits for porcelain or natural stone.
- Apply silicone sealant to all holes and flanges.
- Check the ADA height requirements, usually 33 to 36 inches from the floor.
The chemistry of the mechanical bond
The mechanical bond between the anchor wing and the backside of the wall is the only thing keeping that bar in place, so the clamping pressure must be distributed evenly. Using a stainless steel bolt prevents galvanic corrosion in high-humidity environments, ensuring that the internal hardware does not rust and snap after years of exposure to steam and cleaning chemicals.
We have to talk about the cleaning aspect too. People use some nasty chemicals in their bathrooms. If you use cheap zinc-plated bolts, the moisture and the bleach in the air will eat those threads. I have seen bolts that looked like rusted toothpicks when I pulled them out of a wall. This is why I tell people to look at tile cleaning tips for a sparkling bathroom in 2025 to understand what chemicals are safe for their hardware. If you are going to the trouble of installing a high-end grab bar, don’t cheap out on the five-cent bolt. Use 304 or 316 grade stainless steel. It is the only way to be sure.
When you finally tighten the bar, do it by hand. Do not use an impact driver. An impact driver is a great way to snap the head off a bolt or, even worse, crack the tile because you over-torqued it. You want it snug, not crushed. The gasket on the back of the bar should be slightly compressed. If you see the tile start to flex, you have gone too far. You are working with a brittle material. Treat it like glass.
The final transition and trim
A successful installation should complement the architectural details of the room, such as baseboards or casing, without creating visual clutter. Integrating safety features into showers with a style trendy ideas for small bathrooms requires a balance between industrial strength and modern aesthetics, ensuring the grab bar looks like a planned feature rather than an afterthought.
I always look at how the bar interacts with the rest of the room. If you have chic baseboard designs that transform rooms in 2025, you don’t want a clunky, hospital-looking chrome bar that ruins the flow. You can find bars in matte black, brushed gold, or oil-rubbed bronze that match your faucets and your baseboards makeover ideas to elevate your space. The goal is to make the bathroom safe without making it look like a nursing home. But remember, the finish is just a skin. Underneath that gold plating, the physics of the hollow wall anchor remain the same. If the anchor fails, the color doesn’t matter.
The bottom line is that you cannot rush this. You have to measure three times and drill once. You have to understand the layers of the wall you are working on. If you are unsure what is behind that tile, you can always contact us or a local structural professional. A hollow wall is not a barrier to safety, it is just a different kind of engineering challenge. Take your time, use the right bits, and never trust a plastic plug with a human life.