
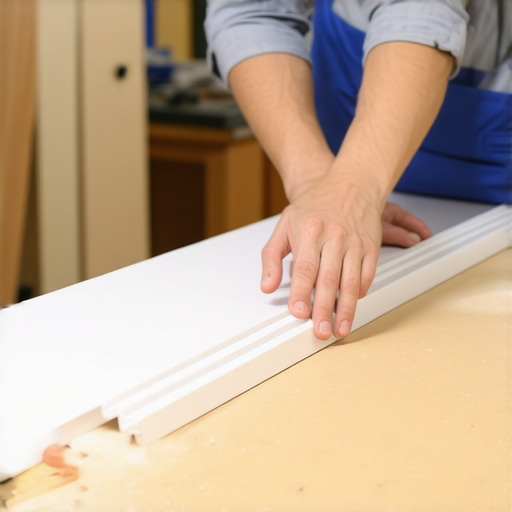
The physics of the perfect PVC miter
PVC baseboards are the only logical choice for high-moisture areas because they are chemically inert and impervious to water absorption. While traditional wood or MDF baseboards act like a sponge in a bathroom, cellular PVC provides a structural barrier that will never rot or swell. Achieving a truly waterproof finish requires more than just making a cut, it requires understanding the thermal expansion and the molecular bonding of the material. Most installers treat PVC like wood, but that is a fundamental mistake. Wood requires mechanical fasteners and wood glue, which relies on a porous bond. PVC requires a chemical weld. When you miter these boards, you are creating a seal that must withstand the humidity of constant showers and the inevitable splashes from the floor.
Why your bathroom baseboards are rotting from the inside
Waterproof baseboards fail when moisture is allowed to penetrate the gaps behind the board or the seams at the corners. Capillary action pulls water into the tiniest voids between the baseboard and the tile, leading to mold growth that stays hidden for years. I spent three days grinding concrete on a job last month just so the floor wouldn’t click like a castanet, and that experience reminded me that the surface is only a fraction of the battle. If your subfloor is not flat, your baseboard will not sit flush. This creates a vacuum that sucks in moisture every time you mop your tile. You need to ensure the transition between the floor and the wall is hermetically sealed. If you are looking for chic baseboard designs that transform rooms in 2025, you must prioritize the technical installation over the visual profile. A pretty board that rots is a liability, not an asset. Most guys skip the leveling compound and they think the underlayment will hide the dip. It won’t. The same logic applies to baseboards. If the wall is bowed, your miter will open up, and once that miter opens, the waterproof integrity is gone.
“A floor is only as good as the subfloor beneath it; deflection is the enemy of every joint.” – Master Flooring Axiom
The chemical weld of a true waterproof joint
A waterproof miter in PVC is achieved through solvent welding rather than traditional wood gluing or simple caulking. Using a PVC cement or a specialized cyanoacrylate adhesive with an activator creates a permanent bond at the molecular level, effectively turning two pieces of trim into a single continuous unit. When you cut a 45 degree angle on a miter saw, the friction of the blade can actually melt the edges of the cellular PVC. This can create a burr that prevents a tight fit. You need a high-tooth-count blade, at least 80 teeth for a 10-inch saw, to ensure the cut is crisp and cold. Heat is the enemy of precision. Once the cut is made, you must clean the surface of any dust or oils. This is where the chemistry happens. Applying the solvent to both faces of the miter softens the plastic. When you press them together, the chains of polymers intertwine. This is not a glue joint that can be pulled apart. It is a weld. This is especially vital when you are dealing with baseboards makeover ideas to elevate your space because it allows for a finish that looks like a single piece of custom-milled trim. For those working with tile cleaning tips for a sparkling bathroom in 2025, a welded joint means you can use cleaning solutions without worrying about them seeping into the corner and breaking down a weak adhesive bond.
| Material Property | Cellular PVC | Solid Pine | Medium Density Fiberboard (MDF) |
|---|---|---|---|
| Water Absorption Rate | 0.01% | 8.0% to 25.0% | High (Swells permanently) |
| Thermal Expansion | High (Requires gaps) | Low (Moisture sensitive) | Moderate |
| Bonding Method | Solvent Weld | PVA Wood Glue | PVA Wood Glue |
| Shore D Hardness | 55 to 65 | 35 to 45 | 40 to 50 |
The 1/8 inch that ruins everything
Precision mitering requires accounting for the thermal expansion coefficient of PVC, which moves significantly more than wood in response to temperature changes. An 8-foot length of PVC can expand or contract by as much as an eighth of an inch depending on the room temperature. If you tight-fit your miters in a cold room, they will buckle when the sun hits the floor. If you fit them in the heat, the joints will pull apart in the winter. The secret is to acclimate the material to the room for 48 hours, exactly like you would with high-end hardwood. When you are installing near showers or wet areas, the stakes are higher. You must use a backer rod or a heavy bead of silicone at the base where the PVC meets the tile. This creates a flexible, waterproof gasket. If you are dealing with how to refresh grout without replacing it, you should also look at the state of your baseboards. Often, grout failure at the wall-to-floor transition is caused by the baseboard moving and pulling on the tile assembly. A properly installed PVC baseboard provides a stable perimeter that protects the grout from unnecessary stress.
- Use a 12-inch compound miter saw for the cleanest cuts.
- Apply a thin layer of PVC cement to both mitered faces.
- Hold the joint together for 30 seconds to allow the chemical weld to set.
- Seal the bottom edge of the baseboard with 100% silicone.
- Leave a 1/32-inch expansion gap at the ends of long runs.
The hidden geometry of out of square walls
Rarely is a corner a perfect 90 degrees, meaning your 45-degree cuts will almost always result in a gap at the front or back of the joint. You must use an angle finder to measure the actual corner and divide by two. A 91-degree corner requires 45.5-degree cuts. This is the difference between a professional finish and a DIY disaster. When the miter is tight, the waterproof seal is easier to maintain. If you have a gap, you are relying entirely on caulk, and caulk eventually fails. I have seen guys try to fill a 1/4-inch gap with painters caulk in a bathroom. Within six months, the steam from the shower caused the caulk to shrink and crack, letting water behind the walls. This leads to drywall rot and structural issues. In the world of showers that wow modern designs for 2025, the details matter. You cannot have a high-end tile job ruined by sloppy trim work. The transition from the tile to the baseboard should be a clean line of silicone that matches the grout color. This creates a cohesive look and a secondary moisture barrier.
“Water follows the path of least resistance; if your miters are the weak link, the water will find them.” – Master Flooring Axiom
The relationship between grout and trim
Grout is porous while PVC is not, which creates a specific challenge at the intersection of the floor and the wall. Most people think they should grout all the way to the wall, but that is a mistake. You must leave a movement joint. This gap is then covered by the PVC baseboard. If you grout the baseboard in, the natural expansion and contraction of the house will cause the grout to crack and fall out. This is a common issue discussed in grout restoration secrets for long-lasting results. By using a PVC baseboard and mitering it correctly, you cover this essential expansion gap while providing a waterproof shield. While most people want the thickest underlayment, too much cushion actually causes the floor to bounce, which can put pressure on the baseboards and break the mitered seals. You need a solid, flat subfloor to ensure the baseboard stays put. If the floor moves, the baseboard moves, and the waterproof integrity is compromised. Finish the job by using stainless steel trim nails that won’t rust when they inevitably come into contact with the moisture of a bathroom environment. This attention to detail ensures the installation lasts for decades rather than just a few seasons. [{“@context”:”https://schema.org”,”@type”:”HowTo”,”name”:”How to miter PVC baseboards for a waterproof finish”,”step”:[{“@type”:”HowToStep”,”text”:”Measure the corner angle using a digital protractor to account for walls that are not square.”},{“@type”:”HowToStep”,”text”:”Cut the PVC baseboard at half the measured angle using a high-tooth-count miter saw blade.”},{“@type”:”HowToStep”,”text”:”Apply PVC solvent cement to both faces of the miter for a chemical weld.”},{“@type”:”HowToStep”,”text”:”Press the pieces together and hold for 30 seconds until the bond is permanent.”},{“@type”:”HowToStep”,”text”:”Install the baseboard and seal the bottom edge with 100% silicone to prevent water infiltration.”}]}]