Most guys skip the leveling compound. They think the underlayment will hide the dip. It won’t. I spent three days grinding concrete on a job last month just so the floor wouldn’t click like a castanet. That same philosophy applies to tile corners. If the foundation is off, the finish will be sharp, dangerous, and ugly. I have seen enough blood on shower floors from poorly finished edges to fill a bucket. We are going to talk about the physics of the edge. A tile corner is more than a meeting of two planes. It is a structural intersection that must withstand thermal expansion, mechanical impact, and the relentless ingress of moisture. When you leave a raw porcelain edge exposed, you are leaving a razor blade in the room. Porcelain is fired at over 2,200 degrees Fahrenheit. This process creates a vitrified material that is denser than granite. When you cut it, the factory glaze is broken, exposing the granular body of the tile. This exposed edge is brittle. It chips easily. It cuts skin. Mastering the corner is about respecting the material science of the ceramic. We do not just slap pieces together. We engineer a transition that is safe, durable, and clean.
The knife edge in the shower stall
Finishing tile corners in a shower requires a waterproof profile or a precision miter to eliminate sharp edges and protect the substrate. Sharp edges in a shower are a liability because soapy skin is soft and easily lacerated. The goal is to create a radius or a blunt transition that diverts water away from the joint. You have to consider the hydrostatic pressure and how water interacts with the grout line at the corner. If the edge is sharp, the grout will not sit correctly. It will eventually crack, allowing water to seep behind the tile. For small bathrooms, the design of these corners can make or break the visual flow. You can see more about maximizing these spaces at showers with a style trendy ideas for small bathrooms. The transition must be mechanical. You need to use a high-quality diamond blade on a wet saw to ensure the edge is as smooth as possible before any finishing work begins. Micro-chipping is the enemy here. Even the best diamond blades can leave tiny jagged points that feel like sandpaper. You have to polish those out with a 200-grit resin pad. It is tedious. It is necessary. If you skip the polishing, you are not a pro. You are just a guy with a saw.
“A floor is only as good as the subfloor beneath it; deflection is the enemy of every joint.” – Master Flooring Axiom
Why mitering tile is a test of patience
Mitering tile involves cutting the edge at a 45-degree angle to create a perfect 90-degree corner without showing the tile body. This is the most aesthetic choice, but it is also the most fragile. You are essentially thinning the tile to a point. This point is prone to shattering during installation. I always back-butter mitered edges with a high-bond modified thin-set to provide structural support behind the point. Without that mortar, the miter is hollow. A hollow miter will cave in if a vacuum cleaner or a heavy bottle of shampoo hits it. The physics of a miter require a 1/16-inch gap between the two points. This gap is then filled with epoxy grout or a color-matched sealant. This allows for the micro-movements of the house. Houses breathe. They expand in the summer and contract in the winter. If your miters are touching, they will crush each other. This is why many pros are moving toward metal profiles. They offer a level of protection that a fragile miter simply cannot match.
| Method | Durability | Aesthetics | Difficulty |
|---|---|---|---|
| Mitering | Moderate | High | Extreme |
| Metal Profiles | High | Modern | Low |
| Bullnose | High | Traditional | Moderate |
| Resin Polishing | High | Professional | High |
The aluminum profile salvation
Metal profiles like Schluter or Blanke provide a rounded or square edge that completely hides the raw tile cut and prevents chipping. These profiles come in various finishes, from brushed nickel to matte black. The chemistry of the metal is important. Anodized aluminum is resistant to the corrosive chemicals found in many bathroom cleaners. When you install a profile, the anchoring leg is embedded in the thin-set. This creates a mechanical bond that reinforces the entire corner. It is a shield. For those looking for showers that wow modern designs for 2025, metal profiles are often the go-to because they provide that crisp, industrial look. The installation requires precision. If the profile is too deep, the tile will sit below the metal, creating a lip that catches dirt. If it is too shallow, the metal will stick out and look like an amateur did the work. You have to measure the tile thickness and the depth of the mortar bed. A 10mm tile usually needs a 12.5mm profile to account for the thin-set. This is the math of the trade. It cannot be guessed.
Bullnose tile and the death of the factory edge
Bullnose tiles have a factory-rounded edge that transitions into the wall, eliminating the need for separate trim pieces or complex cuts. This used to be the industry standard. However, many modern porcelain lines do not manufacture matching bullnose pieces. This is a problem. If you are using a high-end large format tile, you might have to make your own bullnose. This involves using a profile wheel on a wet saw and then polishing the edge through seven stages of diamond pads, from 50 grit all the way to 3000 grit for a mirror finish. It is a labor-intensive process that requires a steady hand and a lot of water. The chemistry of the tile comes into play here. Through-body porcelain is consistent in color all the way through, which makes custom bullnosing possible. Glazed ceramic is different. If you grind a glazed ceramic tile, you will see a white or red clay body underneath that does not match the surface. In that case, you are forced to use a profile or a miter. You have to know your material before you start cutting.
The structural physics of a corner joint
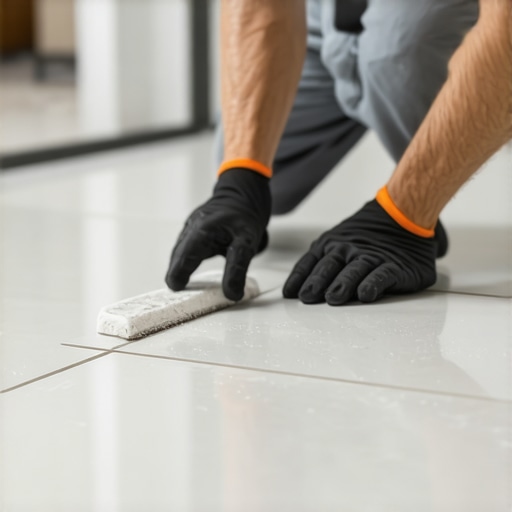
A corner joint must manage the stresses of the building envelope, making the choice of grout and sealant a structural decision rather than just a cosmetic one. Most people think grout is just filler. It is not. Cementitious grout is porous and rigid. In a corner, rigidity leads to cracking. This is why the TCNA recommends a flexible sealant in all change-of-plane joints. This means every corner should be filled with 100 percent silicone or a high-grade urethane caulk that matches the grout color. This allows the walls to move independently of each other without tearing the tile off the wall. If you use hard grout in a corner, it will fail. It is not a matter of if, but when. I have spent years performing grout restoration secrets for long-lasting results because the original installers didn’t understand the physics of movement. A proper joint is 1/8 inch wide. This provides enough surface area for the sealant to bond to the tile edges and remain flexible over time.
- Use a wet saw with a fresh diamond blade for every 100 linear feet of cutting.
- Always polish the cut edges with resin pads to remove micro-burrs.
- Ensure 95 percent thin-set coverage on all corner tiles to prevent hollow spots.
- Use color-matched silicone in all vertical and horizontal corner transitions.
- Verify that the subfloor is within 1/8 inch of level over 10 feet before starting.
Baseboards and the transition failure
Baseboards act as the final guard for tile corners where the wall meets the floor, hiding expansion gaps and protecting the lower edge from impact. If the tile is not finished correctly at the floor level, moisture can wick up into the drywall. This leads to mold and rot. The baseboard provides a physical barrier. For modern homes, chic baseboard designs that transform rooms in 2025 often involve flush-mount or minimalist profiles that require the tile to be perfectly cut and finished. There is no room for error. If your tile edge is jagged, the baseboard will not sit flush. This creates a gap that looks like garbage and collects dust. I prefer to use moisture-resistant materials for baseboards in wet areas. Wood baseboards in a bathroom are a mistake. They will swell and peel. Use a PVC or a composite material that can handle the humidity. You can find more inspiration at baseboards makeover ideas to elevate your space. The goal is a transition that looks like it grew out of the floor, not something that was nailed on as an afterthought.
“Tile is a permanent finish; the quality of the installation determines whether it is an asset or a liability for the next thirty years.” – Master Flooring Axiom
The grout restoration trap
Maintaining smooth tile corners requires regular cleaning and the occasional replacement of the flexible sealant to prevent water damage and bacterial growth. Even a perfect installation will require maintenance. The corner is the lowest point of the wall, where soap scum and hair accumulate. If the grout is not sealed, it will stain. If the silicone is not cleaned, it will grow black mold. This is why I tell people to learn tile cleaning tips for a sparkling bathroom in 2025. You need a neutral pH cleaner. Harsh acids will eat away at the grout and the aluminum profiles. While some think they can just scrub harder, the real secret is preventing the buildup in the first place. If your corners are already looking rough, you might need to look into how to refresh grout without replacing it. This often involves a deep cleaning and the application of a grout colorant that contains a sealer. It is a tedious process, but it is cheaper than a total tear-out. Information gain is important here. While most people want the thickest underlayment, too much cushion actually causes the locking mechanisms on LVP or the grout lines in tile to snap under pressure. This same principle applies to the amount of sealant in a corner. Too much is just as bad as too little.
The chemistry of the bond
The chemical composition of your mortar determines the longevity of the corner assembly, especially when dealing with large format porcelain. Modern porcelain is nearly non-porous. This means a standard unmodified thin-set will not stick to it. You need a mortar with a high polymer content. These polymers act as bridge builders, creating a chemical bond with the tile surface. When you are doing a corner, this bond is under shear stress. The weight of the tile is pulling down, and the expansion of the wall is pulling out. If the mortar is weak, the corner will pop. I always recommend a mortar that meets or exceeds ANSI A118.15 standards. This is the high-performance stuff. It is expensive. It is worth it. It provides the tensile strength needed to keep those corners tight and those edges safe for decades. I have seen guys try to save twenty bucks on a bag of mortar only to have ten thousand dollars worth of tile fail. It is a fool’s errand. You build for the long haul or you don’t build at all.
The geometry of a safe external corner
External corners are high-traffic zones that require a radius or a chamfered edge to dissipate the energy of accidental impacts. If you have a sharp 90-degree corner in a hallway or a kitchen island, someone is going to hit it. A sharp porcelain edge will chip, leaving a jagged, white scar on the corner. A radius edge, however, spreads the force of the impact. This is where resin polishing pads are your best friend. By slowly working the edge, you can create a soft curve that feels smooth to the touch. This is the difference between a house and a home. One is built to a code, the other is built for humans. For those concerned about the environment, eco-friendly tile solutions for sustainable homes in 2025 often focus on recycled porcelain which can be even harder than standard tile. This requires specialized diamond tools to finish correctly. The harder the material, the more heat is generated during grinding. You must use water. Dry grinding porcelain is a recipe for disaster. It creates silica dust which is a major health hazard. It also ruins the tile by causing heat fractures that might not show up until months later. Keep it wet, keep it cool, and keep it smooth.