
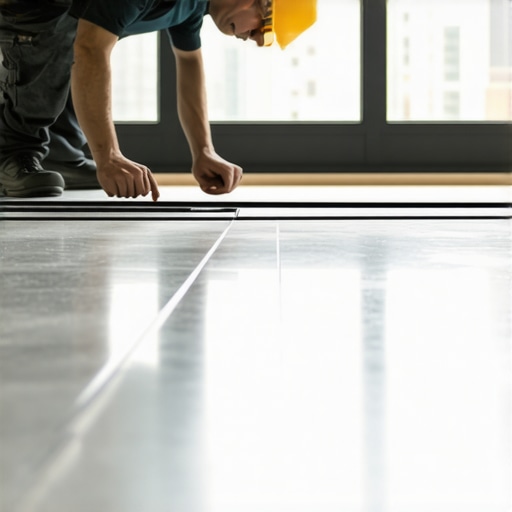
I have spent twenty five years with my knees on a slab and a grinder in my hand. Most guys skip the leveling compound. They think the underlayment will hide the dip. It won’t. I spent three days grinding concrete on a job last month just so the floor wouldn’t click like a castanet. That job taught me that if you do not respect the physics of the substrate, the finish material will fail. This is especially true when you are working with modern metal profiles. Most homeowners think tile is just about picking a color. They see a magazine photo and want that zero-threshold look. But they do not see the three days of prep. They do not see the chemistry of the thin-set. If you want a floor that lasts forty years, you stop looking at the surface and start looking at the structure. This is the reality of professional installation. It is dirty, it is loud, and it requires a level of precision that most DIYers simply are not prepared for. We are talking about fractions of an inch. We are talking about the difference between a clean line and a jagged edge that catches every time you walk past it.
The metal profile that saves your edges
Installing Schluter edging correctly requires embedding the perforated anchoring leg into a fresh bed of thin-set before the tile is set. This ensures a mechanical bond between the substrate and the tile edge. It prevents chipping, hides the raw edge of the porcelain, and creates a clean transition. When we talk about these profiles, we are looking at the mechanical engineering of a transition. The Schluter-SCHIENE or Schluter-JOLLY profiles are not just decorative trim. They are structural components. The anchoring leg is designed with trapezoid-shaped perforations. These are not just for weight reduction. They allow the mortar to squeeze through and lock the profile to the substrate. If you just butter the back of the metal, it will pop. I have seen it a hundred times. You need to apply the thin-set to the floor or wall first using a notched trowel. Then you press the profile into that mortar. You have to ensure that the mortar comes through those holes. That is the only way to get a bond that resists the lateral forces of foot traffic or the vertical pressure of a heavy glass shower door. We are dealing with metallurgy here. Aluminum profiles react differently than stainless steel. If you are working in a coastal environment, you better be using stainless or you will see pitting within two years. This is why I tell people that showers that wow modern designs for 2025 always start with the right metal choice. It is not just about the tile. It is about how that tile ends.
“A floor is only as good as the subfloor beneath it; deflection is the enemy of every joint.” – Master Flooring Axiom
Why bullnose is a relic of the past
Modern aesthetics demand clean lines and sharp transitions that traditional ceramic bullnose tiles cannot provide. Metal edging profiles allow for a flush finish between the tile and the adjacent wall surface. This eliminates the bulky rounded edge of yesterday and provides a superior impact resistance for fragile porcelain corners. I remember when every job was finished with two-by-six bullnose pieces. They were thick, they were ugly, and the glaze never quite matched the field tile. Now, we use the metal. But the metal is less forgiving. If your wall is bowed, the metal will show it. You cannot hide a bad framing job with a Schluter profile. You have to fix the wall first. I have spent hours shimming studs just so the Jolly profile would sit dead level. People ask about tile cleaning tips for a sparkling bathroom in 2025 and I tell them that it starts with the install. If you have a clean metal edge, there is no place for mold to grow. If you have a bulky bullnose with a huge grout joint, you are just inviting trouble. The metal profile provides a 90-degree stop for the tile. This protects the glazed edge of the tile from impact. Porcelain is hard but it is brittle. One hit from a vacuum cleaner on an unprotected edge and you have a chip that you cannot fix. The metal takes that hit. It is the sacrificial lamb for your expensive Italian porcelain.
The physics of the bond
The chemical bond between the thin-set mortar and the aluminum profile is secondary to the mechanical lock created by the anchoring leg. Installers must use a modified thin-set that meets ANSI A118.11 standards to ensure adhesion to the metal surface. Proper trowel technique is the only way to prevent air pockets behind the profile. You cannot just slap some glue on the back of a piece of metal and call it a day. I use a 1/4 inch by 1/4 inch square-notched trowel. I create a consistent bed of mortar. When I press that profile in, I use a margin trowel to scrape away the excess that squeezed through. You need a 1/8 inch gap between the tile and the vertical leg of the metal. This is the expansion joint. Everything moves. The house moves, the tile expands with heat, and the metal expands at a different rate. If you push the tile tight against the metal, the tile will crack. It is a mathematical certainty. You need that grout joint to act as a shock absorber. This is even more important when you are doing grout restoration secrets for long-lasting results because a failed joint usually means the installer didn’t leave enough room for movement. I see guys jam the tile in there all the time. It looks good for a month. Then the seasons change, the humidity drops, and the tile pops. It is basic thermodynamics.
| Profile Material | Best Use Case | Corrosion Resistance | Expansion Rate |
|---|---|---|---|
| Anodized Aluminum | Dry walls and residential floors | Moderate | High |
| Stainless Steel 304 | Showers and commercial kitchens | High | Moderate |
| Stainless Steel 316 | Pools and coastal exterior | Extreme | Moderate |
| PVC / Plastic | Budget bathrooms and low traffic | Low | Very High |
The geometry of the corner
Achieving a perfect 45-degree miter on a metal profile requires a high-speed chop saw with a non-ferrous metal blade. Hand snips or hacksaws will distort the metal and ruin the finish. The intersection of three profiles in a corner requires a dedicated corner piece or a complex three-way miter cut. I don’t care how good you think you are with a hacksaw. You will ruin the piece. I use a 10-inch sliding compound miter saw with a blade specifically for aluminum. If the blade has too few teeth, it will grab the metal and throw it across the room. I have seen guys lose fingers trying to hold a small piece of Jolly against a wood blade. You need a high tooth count, at least 80 teeth, and you need to cut slow. If you overheat the metal, the anodized finish will discolor. It turns a nasty yellow color that you cannot scrub off. For outside corners in showers with a style trendy ideas for small bathrooms, I always suggest using the pre-made corner pieces. They cost ten bucks each but they save an hour of frustration. They ensure the corner is perfectly square and blunt, which is safer for bare skin in a tight shower space.
Choosing the right profile height
The height of the metal profile must be exactly the same as the thickness of the tile or one size larger to account for the thin-set bed. A 3/8 inch tile usually requires a 3/8 inch or 10mm profile. If the profile is too low, the tile edge will be exposed and liable to chip. Most people forget the thin-set. They measure the tile at 10mm and they buy a 10mm profile. But once you put a bed of mortar down, that tile is sitting at 12mm. Now the metal is buried. It looks terrible. I always tell my clients to bring a piece of the actual tile to the shop. We set it on a flat surface and we slide the profile next to it. If the metal is just a hair taller, we can build up the mortar to match. But if the metal is shorter, we are in trouble. This is why I distrust big-box retailers. They stock one size and tell you it fits everything. It doesn’t. You need the right tool for the job. Precision is the difference between a floor that looks like an architect designed it and a floor that looks like a weekend project gone wrong. If you are looking at chic baseboard designs that transform rooms in 2025, you have to consider how those baseboards will terminate against your tile. If the tile edge is messy, the baseboard will never sit flush.
“Consistency in thin-set coverage is the only way to avoid hollow spots under heavy-duty metal transitions.” – Tile Council of North America Guidelines
How baseboards meet the metal
Transitioning from a tiled wall to a baseboard requires a clean termination point provided by a vertical metal profile. This prevents the need for messy caulk lines and creates a definitive stop for the paint and the wood. The metal acts as a border that defines the spatial geometry of the room. I hate seeing a baseboard just slapped over the end of a tile run. It leaves a gap that collects dust and hair. I prefer to run the metal all the way to the floor. Then the baseboard butts up against the side of the metal. It is a much cleaner look. If you are doing a baseboards makeover ideas to elevate your space, you need to think about these transitions. Most guys are lazy. They just run the baseboard over the tile and fill the gap with a gallon of caulk. It looks like garbage in six months when the caulk shrinks. If you use a Schluter profile, the transition is permanent. It is crisp. It is professional. It shows that you actually gave a damn about the details. I see this a lot in high-end renovations. The architect wants the floor to look like a single plane. You can only get that with metal edging.
The shower niche challenge
Waterproofing a shower niche requires the metal profile to be integrated into the Kerdi membrane or liquid waterproofing layer. The profile must be sloped slightly toward the shower floor to prevent standing water on the metal surface. Failure to pitch the niche will lead to calcium buildup and grout failure. This is where I see the most failures. Guys install the niche, then they put the metal on, and they leave a lip. That lip holds water. Water sits there and eats the grout. If you are looking for how to refresh grout without replacing it, the answer is usually to fix the drainage problem first. You have to back-butter the metal in a niche. You have to make sure there are no voids. If water gets behind that metal, it will rot the wall from the inside out. I don’t care how much