
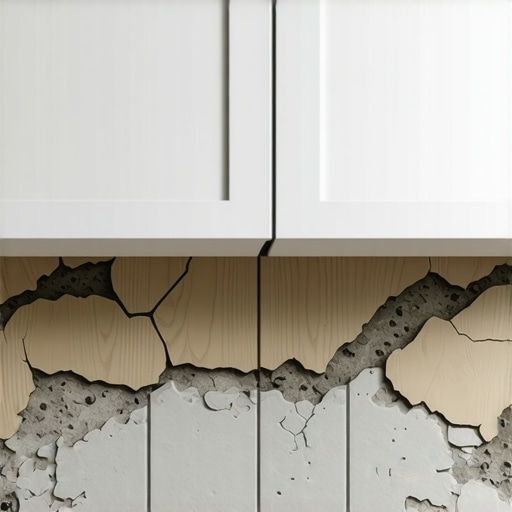
Most guys skip the leveling compound. They think the underlayment will hide the dip. It won’t. I spent three days grinding concrete on a job last month just so the floor wouldn’t click like a castanet. When you see your vanity or your kitchen stack moving away from the drywall, you are not looking at a cabinet problem. You are looking at a structural failure. I have been on my knees for twenty-five years with a moisture meter and a straight edge. I have seen the same mistakes repeated from Phoenix to the swamps of Houston. It is never the screw. It is always the slab or the subfloor. A bathroom is a chemical and physical war zone. You have high humidity, shifting temperatures, and the weight of stone or water all fighting for dominance. If your foundation is not dead flat and dry, the house wins every time. You can hide a lot of sins with paint, but physics does not care about your paint color.
The structural lie of the subfloor
Your bathroom cabinets pull away because the subfloor is sinking or the joists are undersized for the weight of the tile and stone. When the floor deflects more than the L 360 standard, the vertical wall planes and horizontal floor planes lose their ninety-degree relationship, causing the cabinets to tilt and separate from the wall. People think a floor is solid. It is not. It is a living, breathing assembly. If you are using heavy marble or 24 by 48 porcelain tiles, you are adding thousands of pounds to a room. If the joists are spaced sixteen inches on center but only have a two by eight depth over a long span, they will flex. This flex creates a hinge effect at the wall. I always check the deflection before I ever lay a single tile. If I see a bounce, I am adding a layer of 3/4 inch exterior grade plywood or sistering those joists. You cannot fix a sagging floor with more grout. In fact, if your grout is already failing, you might want to look at grout restoration secrets for long lasting results to see if the damage is surface level or structural. Most of the time, the gap behind the cabinet is the first warning sign that your house is literally bending under its own weight.
“A floor is only as good as the subfloor beneath it; deflection is the enemy of every joint.” – Master Flooring Axiom
The chemistry of moisture migration and adhesive failure
Moisture migration through the concrete slab or wooden subfloor destroys the chemical bond between the floor and the cabinet base. High hydrostatic pressure in concrete pushing upwards or high relative humidity in a crawlspace causes wood to swell and twist, effectively prying the cabinet fasteners out of the wall studs. I keep a calcium chloride test kit in my truck for a reason. Concrete is a sponge. It looks dry, but it is constantly exhaling water vapor. If you did not put a vapor retarder down before you installed that vanity, that moisture is hitting the bottom of your particle board cabinet box. It swells. It grows like a mushroom. As it expands, it pushes the top of the cabinet away from the wall. You also have the issue of the adhesive. If you used a cheap construction adhesive to help the screws, the moisture will emulsify it. It turns back into a slurry. I only use high solids, moisture cured urethanes if I am bonding anything in a bathroom. You need to keep the area clean, so check out tile cleaning tips for a sparkling bathroom in 2025 to ensure you are not adding to the moisture problem with soaked mops.
The ghost in the expansion gap
The lack of a proper expansion gap at the perimeter of the room causes the floor to push against the base of the cabinet. Without the mandated 1/4 inch or 1/2 inch space, the entire floor acts as a hydraulic ram during high humidity, forcing the cabinet to shift horizontally or tilt vertically. This is the mistake I see most often with luxury vinyl plank or laminate. People think waterproof means it does not move. That is a lie. The core might be waterproof, but the physics of thermal expansion still apply. If you ran that floor tight against the cabinet legs, when the summer humidity hits, that floor has nowhere to go but up or out. It will shove the vanity right off the wall. I always leave a gap and cover it with baseboards. If you are looking to update that look, baseboards makeover ideas to elevate your space can show you how to hide those vital expansion zones with style. Do not let a trim carpenter nail the baseboard into the floor. It must be nailed to the wall only. If you nail it to the floor, you have just locked the floor in place and guaranteed a buckle.
The humidity tax in modern showers
High humidity from modern showers penetrates the drywall and the subfloor if the waterproofing envelope is broken. This moisture weakens the wood fibers in the wall studs and floor joists, allowing the heavy cabinet screws to pull through the softened lumber as the house naturally settles. We are building showers today that are basically steam rooms. If you did not use a topical waterproofing membrane like Kerdi or Wedi, you are asking for trouble. Steam is smaller than a liquid water molecule. It gets behind the tile, hits the studs, and turns them into mush. If your shower is leaking even a tiny amount, that water is traveling along the plate of the wall right to your cabinets. You need showers that wow modern designs for 2025 but they must be built with a sealed system. A pretty shower that leaks is just an expensive way to rot your house from the inside out. I have seen studs so soft I could poke a screwdriver through them. No screw is going to hold a heavy quartz countertop against a rotten stud. If you have a smaller space, consider showers with a style trendy ideas for small bathrooms that prioritize proper drainage and ventilation.
| Material | Expansion Coefficient | Janka Hardness | Deflection Limit |
|---|---|---|---|
| Solid White Oak | High | 1360 | L/360 |
| Engineered Maple | Medium | 1450 | L/480 |
| Porcelain Tile | Low | N/A | L/720 |
| Luxury Vinyl (SPC) | Very Low | N/A | L/360 |
The 1/8 inch that ruins everything
A subfloor that is out of level by more than 1/8 inch over ten feet creates a void under the cabinet. As the cabinet is loaded with heavy sinks and stone tops, it sinks into that void, pulling the top of the unit away from the wall and snapping the caulking seal. I don’t care how much you spent on the cabinets. If the floor is a roller coaster, the cabinets will look like junk. You have to use a self leveling underlayment. People hate the cost. They hate the prep. But they hate a 1/2 inch gap behind their backsplash even more. I use a laser level to find the high spot of the room. Everything else gets brought up to that level. If you are trying to fix an old floor, you might think about how to refresh grout without replacing it, but remember that if the floor is moving, the new grout will pop out in a week. Leveling is a religion. If you don’t practice it, you will be punished. Even with eco friendly tile solutions for sustainable homes in 2025, the substrate requirements remain the same. Physics does not change just because the material is green.
“Deflection in the substrate shall not exceed L/360 under a live or dead load for ceramic tile installations.” – TCNA Handbook
The checklist for a permanent installation
Before you set a single cabinet or lay a single tile, you must verify the structural integrity of the entire room assembly. Failure to perform these checks leads to mechanical separation at the wall and floor junctions within the first twenty-four months of occupancy.
- Test the moisture content of the wood subfloor; it must be within 2 percent of the flooring material.
- Check the concrete slab for moisture vapor emission rates using a relative humidity probe.
- Verify that the floor is flat to 1/8 inch in a 10 foot radius with no sudden dips.
- Ensure all cabinets are screwed into studs with at least two inches of thread penetration.
- Install a perimeter expansion gap and cover it with chic baseboard designs that transform rooms in 2025.
- Use a flexible 100 percent silicone sealant at the floor to cabinet transition, never hard grout.
If you follow these steps, your cabinets will stay where you put them. If you take shortcuts, you will be calling me in three years to tear it all out. It is cheaper to do it right once than to do it twice. If you have questions about your specific site conditions, you should contact us for a professional evaluation. I have spent too many years fixing the mistakes of others. Don’t be the person who thinks a tube of caulk can fix a structural dip. It won’t. The gap will return. The house always moves. Your job is to build a floor that can move with it without breaking the bond. For more info on our privacy practices, see our privacy policy.