
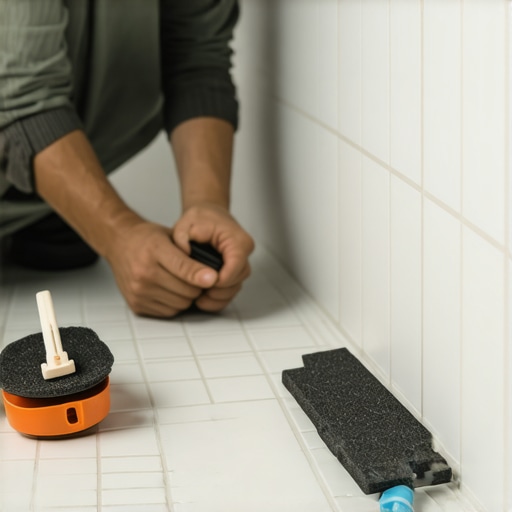
I spent three days grinding concrete on a job last month just so the floor wouldn’t show the slightest hump or dip. Most guys skip the leveling compound. They think the underlayment or the tile will hide the dip. It won’t. When you are dealing with something as unforgiving as penny tile, every fraction of a millimeter in the subfloor translates directly into a visible flaw in the finish. I have seen fifteen thousand dollar bathroom remodels look like cheap DIY projects because the installer did not understand the physics of the grid. Penny tiles are small, round, and notoriously difficult because they are mounted on mesh sheets. If those sheets are not merged perfectly, you end up with a ‘grid pattern’ that screams amateur hour. I have been on my knees for twenty-five years with a moisture meter and a level, and I can tell you that a floor is a performance surface, not just a decoration. If you treat it like a painting, it will fail. You have to treat it like a structural engineering project.
The microscopic geometry of a flat substrate
Subfloor preparation for penny tile requires a surface variation of less than 1/8 inch over 10 feet to ensure the mesh sheets do not follow humps and create visible seams. High-quality self-leveling underlayment and cementitious backer units are essential for creating a flat plane that prevents the thin-set mortar from pooling. In high-moisture areas like showers, using a liquid-applied waterproofing membrane ensures the bond coat remains stable and the substrate stays rigid under the weight of the installer. You cannot fix a bad floor with grout. You fix it with a grinder and a straight edge before a single sheet of tile touches the ground.
“A floor is only as good as the subfloor beneath it; deflection is the enemy of every joint.” – Master Flooring Axiom
The chemistry of the adhesive is where most people fail. You see them using a 1/4 inch notched trowel like they are laying large format porcelain. That is a disaster waiting to happen. For penny tile, you need a 3/16 inch V-notch trowel. If the notches are too deep, the thin-set will squeeze up through the tiny gaps between the pennies. Now you have mortar in your grout lines. You spend the next four hours picking out gray cement with a utility knife while your knees scream. You want a modified thin-set with high polymer content. This allows for a bit of flexibility without sacrificing the shear strength. The goal is to achieve 95 percent coverage on the back of the tile without the adhesive becoming an obstacle for the grout.
The staggered layout strategy for invisible transitions
Aligning penny tile sheets requires a staggered or interlocking placement rather than a straight stack to break the visual continuity of the mesh edges. By offsetting the sheets and occasionally removing individual pennies along the seam, the installer can interlock the circles to create a homogenous surface. This technique prevents the human eye from detecting the repeating rectangular pattern of the factory-made sheets, especially in modern shower designs where lighting often highlights surface imperfections and grout inconsistencies.
When you lay the sheets down, do not just press them with your hands. Use a grout float. Press the float firmly across the surface to bed the tiles into the mortar. This ensures every single penny is at the exact same height. If one penny is a hair higher than the rest, the light will catch it. We call that shadowing. It makes the floor look like a topographical map instead of a smooth surface. In regions with high humidity like Houston or Miami, the open time of your mortar is cut in half. You cannot spread out five sheets worth of thin-set and expect it to stay tacky. It skins over. Then you get a false bond. The tile stays for a week, then it pops. You need to work in small sections, no more than two sheets at a time, to maintain that chemical bond.
Technical Comparison of Installation Materials
| Material Property | Standard Thin-set | Polymer-Modified Mortar | Epoxy Grout |
|---|---|---|---|
| Bond Strength | Low | High | Extreme |
| Flexibility | None | Moderate | High |
| Water Resistance | Porous | Semi-Porous | Impermeable |
| Open Time | 30 mins | 50 mins | 20 mins |
If you are working on showers that wow modern designs for 2025, you probably want to use a high-contrast grout. This is where the alignment becomes even more critical. A dark grout with white penny tiles will show every single mistake. If the gap between two sheets is 1/32 of an inch wider than the gap between the tiles on the sheet, you will see a line. It will look like a tic-tac-toe board. To prevent this, I always pull a few tiles off the edge of the mesh. I set them by hand. It takes longer. It is tedious. But it is the only way to ensure the spacing is identical across the entire room. You have to be a stickler for the details because the floor does not lie.
The 1/8 inch that ruins everything
Expansion gaps at the perimeter of a tile installation must be maintained at a minimum of 1/8 inch to allow for the natural movement of the structure. Filling this perimeter joint with 100 percent silicone caulk instead of rigid grout prevents stress fractures and tented tiles. Properly installed chic baseboard designs that transform rooms in 2025 will cover this movement joint, providing a professional finish that hides the structural necessity of the gap while protecting the tile edges from impact.
The physics of the room also dictate how you handle the transition to the walls. People always ask me about the baseboards. They think you just smash the tile against the wall and nail the wood over it. No. You need that expansion gap. Buildings breathe. In the winter, the wood framing shrinks. In the summer, it expands. If your tile is tight against the studs, it has nowhere to go. It will buckle. I have seen entire bathroom floors lift off the substrate because some guy forgot to leave a gap. Use spacers at the wall. When the tile is set, pull the spacers and fill the gap with a color-matched sealant. Then install your baseboards makeover ideas to elevate your space to hide the joint. It is a system. Every part relies on the other.
- Check subfloor levelness with a 10-foot straight edge before starting.
- Use a 3/16-inch V-notch trowel to prevent mortar squeeze-through.
- Stagger the sheets to avoid vertical and horizontal grid lines.
- Bed the tiles using a flat grout float to ensure a level surface.
- Maintain a 1/8-inch expansion gap at all vertical obstructions.
- Wait 24 hours before grouting to allow the moisture in the thin-set to evaporate.
Grout is the next hurdle. For penny tiles, you are using a lot of grout. The surface area of the joints is massive compared to a 12×24 tile. This means the grout choice is structural. I recommend high-performance cement grout or epoxy if the client has the budget. Epoxy grout is a nightmare to spread. It is sticky and the clock is ticking the moment you mix it. But it is waterproof and stain-proof. For a shower floor, it is the gold standard. If the client wants something easier to maintain, I point them toward tile cleaning tips for a sparkling bathroom in 2025 to ensure they know how to handle the porous nature of standard cement grout. If the grout starts to look dingy after a year, you can look into how to refresh grout without replacing it rather than tearing out the whole floor. Proper maintenance starts with the installation. If the grout is packed tight into the joints, it won’t crack or flake out.
“Cementitious grout requires a specific water-to-powder ratio; excess water during the cleaning phase will weaken the polymer bonds and lead to efflorescence.” – TCNA Handbook Reference
Why your subfloor is lying to you
Subfloor deflection refers to the vertical movement of the floor system under load, and it must be limited to L/360 for ceramic and stone installations. Using a moisture meter to verify that plywood subfloors are within 2 percent of the joist moisture content prevents warping after the tile assembly is bonded. In renovation projects, adding a second layer of underlayment grade plywood or a fiber-cement board is often the only way to achieve the stiffness required for small-format penny tiles.
I have seen guys try to lay penny tile over old linoleum or peel-and-stick vinyl. It will fail. The bond is only as strong as the weakest layer. If that old glue lets go, your expensive tile is going in the trash. Scrape it down to the bare wood or concrete. If it is concrete, check for cracks. If there is a crack in the slab, that crack will telegraph right through your tile. Use a crack isolation membrane. It is an extra step. It costs more money. But it is cheaper than coming back in two years to fix a split floor. I tell my clients that I am not just a tile guy. I am a structural doctor for their house. If the bones are bad, the skin will look terrible. If you follow these steps, your penny tile will look like a single, continuous sheet of stone. No lines. No grids. Just a perfect, professional finish. For long-term durability, you can also explore grout restoration secrets for long-lasting results to keep the installation looking new for decades.