The geometry of a failed mosaic
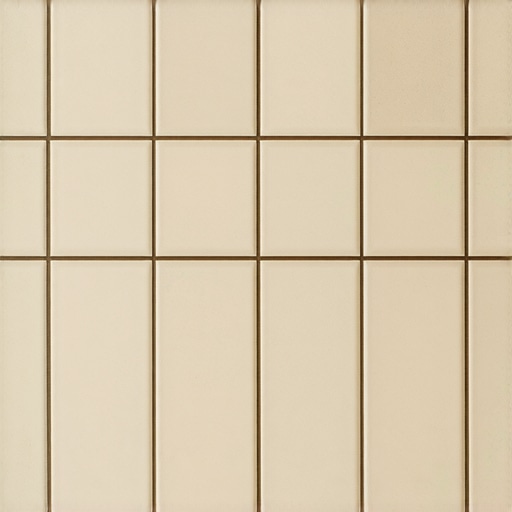
A grid pattern in penny tile occurs when the square edges of the mosaic sheets align perfectly. This happens because the installer failed to stagger the sheets or trim the overhanging tiles. Proper grout spacing requires a randomized layout to hide the sheet lines effectively and clearly.
I spent three days grinding concrete on a job last month just so the floor wouldn’t click like a castanet. Most guys skip the leveling compound. They think the underlayment will hide the dip. It won’t. When you are dealing with penny tiles, every fraction of an inch matters. I remember a job in a high-rise where the subfloor had a subtle wave. The installer laid the penny tiles straight over it. Within a week, the grout started cracking because the tiles were bridging a gap in the concrete. You cannot hide a bad subfloor with small tiles. Small tiles actually telegraph the imperfections more than a large-format plank. If your subfloor is not dead flat, those penny tiles will follow every hump and valley. This leads to the dreaded grid look. The sheets are square. The pennies are round. If you do not interlock the sheets like a puzzle, you see a square line of grout that is wider than the rest. It looks like a cheap grid from a big-box store. I don’t care how much you paid for the tile. If the layout is lazy, the result is ugly. Penny tiles require a level of patience that most modern crews simply do not possess. You have to hand-place individual tiles at the seams to break up the pattern. If you don’t, you might as well have used a sheet of linoleum. It is about the physics of the bond and the visual continuity of the surface.
The hidden physics of subfloor deflection
Subfloor deflection refers to the vertical movement of a floor system under a live load. For penny tiles and grout, the TCNA standards require a maximum deflection of L/360. If the joists flex too much, the grout joints will crack and disintegrate over time and usage.
When we talk about the structural integrity of a floor, we are talking about the stiffness of the assembly. Penny tiles are unique because they have a high ratio of grout to tile. In a standard square foot of penny tile, you might have hundreds of linear inches of grout. Each of those joints is a potential failure point. If the plywood or OSB beneath the tile flexes when you walk on it, the grout has nowhere to go but out. It turns into powder. This is why I always insist on a double-layered subfloor or a high-quality uncoupling membrane. The uncoupling membrane allows the tile assembly to move independently of the subfloor. This is basic engineering. It is not a suggestion. It is a requirement for a floor that lasts thirty years. I have seen too many showers with a style that looked great for a month and then turned into a swamp because the subfloor flexed and broke the waterproof seal. You also have to consider the moisture content of the wood. If you install over wet plywood, that wood will shrink as it dries. That shrinkage puts tension on the adhesive bond. The chemistry of the thin-set is designed to hold, but it cannot fight the laws of physics. Use a moisture meter. If the subfloor is above 12 percent moisture, you wait. You don’t start the job until the site is acclimated.
“A floor is only as good as the subfloor beneath it; deflection is the enemy of every joint.” – Master Flooring Axiom
The chemistry of the grout bond
Grout chemistry involves the hydration process where portland cement crystals grow and interlock with the tile edges. For penny tiles, using high-performance grout with polymer additives is essential to ensure stain resistance and structural density in the narrow joints across the entire bathroom floor.
The choice of grout is where most people fail. They pick the color and ignore the chemistry. For penny tiles, I always recommend an epoxy or a high-performance cementitious grout. Standard sanded grout is too coarse for the tiny gaps between pennies. If the sand particles are too large, they won’t pack into the joint. This leaves air pockets. Air pockets lead to mold and structural failure. On the other hand, un-sanded grout is prone to shrinking. As the water evaporates during the curing process, the grout pulls away from the tile. This creates microscopic cracks. This is why the grid lines become so visible. The light hits the shadows in those cracks and highlights the square shape of the sheets. If you want a floor that looks like a single, continuous surface, you need a grout that stays where you put it. You also need to be careful with the water. If the guy cleaning the tile uses too much water on his sponge, he washes out the pigment and the binder. Now you have splotchy grout that is weak. It is a precise science. You need to follow the manufacturer’s mixing instructions to the gram. I use a digital scale on my jobs. It sounds like overkill until you see a floor that is perfectly uniform in color and texture. For long-term maintenance, you should look into grout restoration secrets for long-lasting results to keep those lines clean.
Grout Performance Comparison
| Grout Type | Polymer Content | Cure Time | Water Resistance |
|---|---|---|---|
| Sanded | Low | 24 Hours | Moderate |
| Un-sanded | Low | 24 Hours | Low |
| High-Performance | High | 12 Hours | High |
| Epoxy | 100% | 8 Hours | Absolute |
The ghost in the expansion gap
Expansion gaps are the perimeter spaces left between the tile edge and the wall to allow for thermal expansion. Without a flexible sealant at the baseboards, the tile assembly will tent or crack as the building settles and the temperature changes throughout the seasons.
I see this mistake in almost every DIY job. People run the tile right up against the drywall or the plate. They think it looks cleaner. In reality, houses breathe. They expand in the summer and contract in the winter. If the tile is locked tight against the walls, that energy has to go somewhere. Usually, it goes into the grout lines in the middle of the room. This causes the tile to pop or the grout to crumble. You must leave a quarter-inch gap around the entire perimeter. This gap is hidden by your chic baseboard designs. The baseboard is not just a decorative element. It is a functional cover for the expansion joint. I always use a 100 percent silicone caulk in the corners and at the baseboard line. Silicone is flexible. Grout is rigid. If you put grout in a change of plane, it will crack. It is a guaranteed failure. You need that movement joint to handle the stress of the building. In places like Houston where the humidity is constant, the wood framing moves even more. You cannot fight nature. You have to design for it. This is why I spend so much time on the prep. If the perimeter is locked, the floor is doomed. I have seen entire floors lift off the slab because there was no expansion gap. It sounded like a gunshot when it happened. That is a lot of pressure building up in the ceramic and the adhesive.
The 1/8 inch that ruins everything
Surface flatness is measured by straightedge tolerances where a 1/8 inch deviation over 10 feet is the maximum allowed for mosaic tile. Even a minor dip in the subfloor will cause lippage, where one tile edge sits higher than the next, creating shadows and trip hazards.
With penny tiles, lippage is your worst enemy. Because the tiles are so small, you can’t use a leveling clip system like you would with a 12×24 plank. You are relying entirely on the flatness of the substrate and the consistency of your trowel notch. I use a 3/16 inch V-notch trowel for pennies. If you use a square notch that is too deep, the thin-set will ooze up between the tiles and fill the grout joint. Then you have to spend hours picking out dried cement before you can grout. It is a nightmare. I have seen guys try to use a thicker bed of thin-set to level the floor as they go. That is a amateur move. Thin-set is an adhesive, not a leveler. It shrinks as it dries. If one area has a quarter inch of mud and another has an eighth, they will shrink at different rates. This pulls the tiles down unevenly. You end up with a floor that feels like a cobblestone street. It is uncomfortable on the feet and impossible to clean. You should check out tile cleaning tips for a sparkling bathroom to see how hard it is to maintain a floor with bad lippage. The mop just catches on every edge. It is a mess.
Penny Tile Installation Checklist
- Check subfloor for 1/8 inch deviation over 10 feet.
- Prime the substrate for moisture control and better bonding.
- Dry-lay sheets to ensure the pattern is randomized and staggers are set.
- Use a 3/16 inch V-notch trowel to prevent thin-set squeeze-through.
- Beat the tiles into the mud using a rubber grout float and a scrap of wood.
- Stagger sheet joints and hand-set pennies at the seams.
- Use 100% silicone at all changes of plane and wall transitions.
Why your subfloor is lying to you
Concrete slabs often look flat but contain alkalinity issues and moisture vapor that can delaminate thin-set. Testing the relative humidity with in-situ probes is the only way to verify if the substrate is ready for a permanent tile installation without future efflorescence.
Don’t trust your eyes. A slab can look dry as a bone and still be pumping out moisture vapor. That vapor carries minerals to the surface. It is called efflorescence. It looks like white powder coming out of your grout. It is not a grout problem. It is a moisture problem. If you don’t seal the slab or use a moisture-stable thin-set, those penny tiles will eventually pop off. I have seen it happen in basements and on ground-level slabs across the country. The pressure of the moisture vapor is enough to break the bond of the cement. You also have to watch out for high pH levels in the concrete. If the concrete is too alkaline, it will literally eat the adhesive. It turns the thin-set into a chalky mess. This is why I always carry a pH testing kit. It takes five minutes and saves a ten-thousand-dollar floor. If the pH is above 9, you need a primer. These are the details that the big-box installers ignore. They want to get in and out in a day. I want the floor to be there when the house is torn down. You have to respect the chemistry of the building materials. If you are looking to refresh an existing mess, you might want to read about how to refresh grout without replacing it, but remember that the best fix is doing it right the first time.
The truth about waterproof claims
Waterproof tile is a misnomer because while the ceramic or porcelain is impervious, the grout and thin-set are porous. A true waterproof system requires a sealed membrane or liquid-applied barrier beneath the tile to prevent rot in the wooden structure below.
Homeowners see “waterproof” on a box of tile and think they can just thin-set it to the plywood. That is a disaster waiting to happen. Grout is like a hard sponge. Water goes through it. If you don’t have a waterproofing system like Schluter or a liquid membrane like RedGard, you are just feeding water to your joists. Over time, that wood will rot. The floor will get bouncy. The grout will crack. It is a slow-motion wreck. In showers, this is even more critical. You need a pre-sloped pan and a perfectly integrated drain. Penny tiles are actually great for shower floors because they conform to the slope of the drain easily. However, they also mean you have more grout lines to keep clean. You have to be diligent. If the water sits in the grout lines because the slope is wrong, you will get mold. It doesn’t matter how many showers that wow you see on the internet. If the plumbing and the slope aren’t right, it is a failure. You have to think like a plumber and an engineer. The tile is just the skin. The waterproofing is the internal organ. If the heart isn’t beating, the skin doesn’t matter. Always use a high-quality modified thin-set for wet areas. The polymers help block some of the water, but the membrane is your primary defense. Final technical summary of the process involves verifying every layer of the assembly before a single tile is set in the mud. Proper planning prevents the grid lines and the structural failures that plague amateur installations.
Comments
One response to “The Truth About Penny Tiles: Why Your Grout Lines Look Like a Grid”
This post nails many of the technical pitfalls that can ruin a penny tile project, especially the importance of proper subfloor preparation and understanding the behavior of grout. I once installed penny tiles in a small bathroom, and I was surprised how much attention to detail was needed to avoid that grid pattern. I agree wholeheartedly about the need for a level subfloor and an uncoupling membrane—these are often overlooked but critical for long-term durability. I was curious about your thoughts on the latest self-leveling products—have you found any that work well over existing uneven surfaces without adding too much height? I’ve had mixed results and wonder if you have recommendations. Also, the expansion gaps are something I’ve seen many homeowners skip, thinking it’s a waste of space, but I totally agree it’s essential to prevent cracks over time. What’s your preferred method for sealing those gaps—the silicone or another material? Thanks for sharing your extensive insights—definitely looking forward to applying these principles on my next project.