
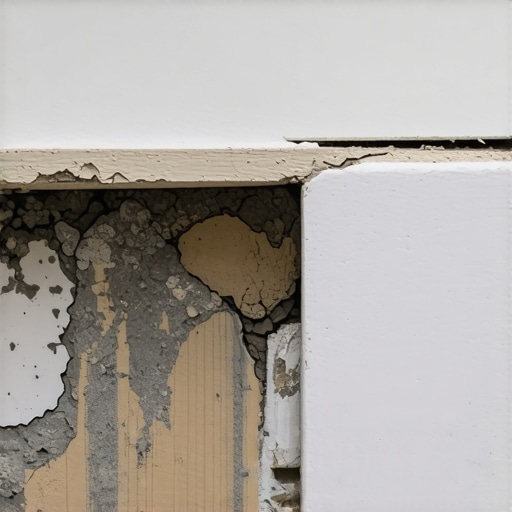
I have spent twenty five years on my knees with a moisture meter and a level. My hands are permanently stained with oak dust and I smell like WD-40 most days. I have seen the same tragedy play out in a thousand bathrooms. A homeowner spends five thousand dollars on beautiful porcelain tile and another three thousand on high end showers only to watch their baseboards turn into black mush within eighteen months. Homeowners always ask why their waterproof vinyl or tile is failing at the edges. Usually, it is because they locked moisture under a heavy vanity or behind the trim, killing the ability of the wood to breathe. It is not the water you see that ruins your home. It is the microscopic vapor trapped in the dark that does the damage. This is a structural engineering failure, not a cosmetic one.
The ghost in the expansion gap
Baseboard rot occurs when moisture vapor migrates through porous grout lines and becomes trapped behind the trim material by capillary action. This process is accelerated by poor subfloor preparation and the use of medium density fiberboard (MDF) in high humidity environments. When the relative humidity in a bathroom exceeds sixty percent, the wood fibers begin to absorb airborne water molecules. If those fibers cannot dry out, they undergo a cellular breakdown. You might think your floors are solid, but a subfloor that is not level or a grout line that is not sealed creates a highway for rot. I spent three days grinding concrete on a job last month just so the floor would not click like a castanet, because even a 1/8 inch dip can collect enough condensation to rot a wall from the bottom up.
The chemistry of a failed seal
Most installers use cheap acrylic caulk at the transition where the floor meets the wall. This is a mistake. Acrylic caulk is porous and eventually shrinks, creating a hairline fracture. Water from your shower or a wet bath mat is drawn into that crack by surface tension. Once the water gets behind the baseboard, it hits the unpainted backside of the wood or MDF. This is the raw underbelly of your trim. Without a finish to protect it, the wood acts like a sponge. The urea-formaldehyde binders in MDF react with water, causing the material to swell and flake. This is why you see that characteristic bubbling at the base of your bathroom walls. If you want to avoid this, you need to look at tile cleaning tips for a sparkling bathroom in 2025 to understand how chemicals interact with your seals.
“A floor is only as good as the subfloor beneath it; deflection is the enemy of every joint.” – Master Flooring Axiom
The 1/8 inch that ruins everything
Precision is the difference between a floor that lasts forty years and one that lasts four. If your installer left no expansion gap, the baseboard is likely pinned tight against the tile. When the house settles or the temperature changes, that pressure creates micro-fissures in the grout. These fissures are invisible to the eye but are massive to a water molecule. You need a consistent gap that is properly filled with 100% silicone, not grout. Grout is essentially a hard sponge. It is a cementitious product that breathes. While breathing is good for the subfloor, it is bad for the back of your baseboards. For those looking to upgrade their trim to something more resilient, checking out chic baseboard designs that transform rooms in 2025 is a good starting point for material selection.
Why your subfloor is lying to you
Subfloors often hide high moisture levels that stay undetected until the baseboards begin to discolor or the grout turns black. Concrete slabs can look dry on the surface while holding a ninety percent relative humidity deep within the core. This is known as hydrostatic pressure. As the moisture tries to escape, it moves upward. If you have installed a non-porous tile over a wet slab, the only place for that vapor to go is sideways toward the walls. This is why I always insist on a calcium chloride test or an in-situ probe before any thin-set hits the ground. If your grout is already looking rough from this moisture, you might need how to refresh grout without replacing it to stabilize the situation before the rot spreads further.
| Material Type | Moisture Resistance | Common Failure Point |
|---|---|---|
| MDF | Very Low | Swelling at the floor contact point |
| Finger-Jointed Pine | Medium | Tannin bleed and joint separation |
| Solid PVC | High | Thermal expansion gaps |
| Red Oak | Low | Warping and black mold stains |
The molecular reality of bathroom humidity
Let us talk about the physics of a shower. When you take a hot shower, the air pressure in the bathroom increases. The steam is forced into every crack. If your grout is not sealed with a high quality penetrant, the water molecules penetrate the grout matrix. This moisture then settles on the bottom plate of your wall framing. Over time, this leads to structural rot. Many people focus on the aesthetic of showers that wow modern designs for 2025 but forget that the plumbing and the waterproofing behind the wall are what actually matter. If the shower pan is not sloped correctly, water will wick up the cement board and into the baseboards via the wall cavity.
“Moisture moves from areas of high concentration to areas of low concentration, always finding the path of least resistance.” – NWFA Field Manual
The checklist for a rot proof bathroom
Preventing baseboard rot requires a multi-layered defense strategy that starts at the subfloor and ends with the final bead of silicone. You cannot rely on a single product to save your trim. It is about the system. If you are planning a renovation, you should investigate eco-friendly tile solutions for sustainable homes in 2025 that offer better vapor management. Follow this checklist to ensure your bathroom stays dry from the inside out.
- Check subfloor moisture with a pin meter to ensure it is under 12 percent.
- Verify levelness using a 10 foot straightedge to prevent water pooling.
- Seal all grout lines using a solvent-based sealer before installing trim.
- Leave a 1/4 inch expansion gap between the tile and the wall studs.
- Use 100% silicone for the floor to wall transition instead of grout or caulk.
- Back-prime your wood baseboards with an oil-based primer before installation.
[IMAGE_PLACEHOLDER]
The structural mechanics of moisture wicking
Wicking occurs when the end grain of wood trim touches a damp surface, pulling water up into the board like a straw. This is why I always tell my apprentices to never let the baseboard touch the actual floor. I like to leave a shim’s width of space. You can hide this gap with a small bead of color-matched silicone, but that physical break is what stops the rot. If you are dealing with a small space, look at showers with a style trendy ideas for small bathrooms to see how professional designers handle transitions in tight quarters. If you find your grout is already failing, you should look into grout restoration secrets for long-lasting results to stop the moisture migration at the source. If you have questions about your specific subfloor, you can always contact us for a technical consultation. For more information on how we handle your data, please see our privacy policy. Taking care of your baseboards is just one part of a larger plan, so consider baseboards makeover ideas to elevate your space once you have the moisture under control.