Why Your New Shower Grout is Drying Blotchy
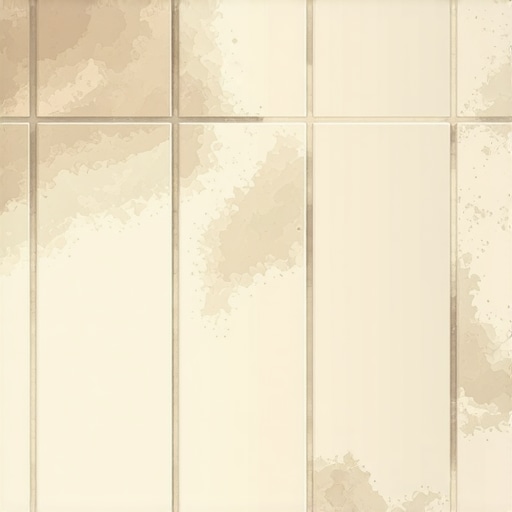
Most guys skip the leveling compound. They think the underlayment will hide the dip. It won’t. I spent three days grinding concrete on a job last month just so the floor wouldn’t click like a castanet. This lack of preparation is exactly why shower grout fails. I have spent twenty five years on my knees with a sponge and a level, and I can tell you that a blotchy grout joint is never just a cosmetic fluke. It is a forensic map of every mistake made during the installation process. When you see light and dark patches in your shower, you are looking at the physics of uneven hydration. I once walked into a luxury master suite where the homeowner spent forty thousand dollars on Carrara marble, only to have the grout look like a Dalmatian. The installer blamed the product, but the moisture meter told a different story. The substrate was soaking wet before the first bag of thin-set was even opened.
The phantom of efflorescence and hydration
Grout discoloration occurs when Portland cement hydrates unevenly due to excess moisture, improper mixing ratios, or efflorescence. These pigment variations often stem from alkaline salts rising to the surface during the evaporation process. Using distilled water and following ANSI A118.6 standards prevents mottled appearances in high-moisture environments like showers and bathrooms. When water travels through the cementitious matrix, it carries minerals with it. If one area dries faster than the next, the minerals concentrate in different densities. This creates the blotchy look that drives homeowners crazy. It is not just about the grout. It is about the chemistry of the water you used to mix it.
“A floor is only as good as the subfloor beneath it; deflection is the enemy of every joint.” – Master Flooring Axiom
The chemistry of the sponge and the bucket
Water-to-powder ratios dictate the final structural integrity and color consistency of cementitious grout. Adding too much water during the mixing phase or the cleaning phase dilutes the pigment particles and creates soft joints. Professionals must use a moist sponge rather than a saturating wash to ensure color uniformity across tile installations. If you see a guy with a dripping sponge, fire him. He is literally washing the color out of your joints. The pigment in grout is a fine powder that sits between the sand grains. If you introduce a flood of water during the cleanup, you float that pigment right out of the joint. What remains is a washed-out, pale version of the color you actually bought.
| Grout Type | Porosity Level | Color Stability | Best Use Case |
|---|---|---|---|
| Sanded Portland | High | Moderate | Joints wider than 1/8 inch |
| Unsanded Portland | High | Low | Narrow wall joints |
| High Performance | Low | High | Large format porcelain |
| Epoxy Grout | Zero | Maximum | Steam showers and kitchens |
Why your thin-set is telegraphing through the joints
Thin-set mortar that is not raked out of the grout lines creates depth variations that cause uneven drying. If the mortar bed is too close to the tile surface, it prevents the grout from reaching its full depth. This results in shadowing and blotchy patches where the thin-set color bleeds through the grout matrix. You need to ensure that at least two thirds of the tile depth is available for the grout. If you leave chunks of grey mortar in the joints and try to cover them with white grout, you are going to see grey spots. It is basic math. The thinner the grout layer, the faster it dries. Fast drying means light colors. Deep drying means dark colors. That is the recipe for a blotchy mess.
- Inspect every joint for thin-set squeeze-through before starting.
- Measure water with a graduated cylinder, not a coffee cup.
- Wait at least 24 to 48 hours for the thin-set to cure fully.
- Wring out the sponge until no water can be squeezed out by hand.
- Mix the entire bag at once to ensure pigment distribution.
The trap of the additive and polymer pigments
Grout additives and polymer modifiers are designed to increase flexibility and reduce absorption in wet areas. However, if these chemicals are not agitated properly, they create streaks and glossy spots within the cured grout. Professional tile contractors must follow slaking instructions to allow chemical bonds to form before final application. Slaking is the process where you let the grout sit for ten minutes after the initial mix. This allows the polymers to fully hydrate. If you skip this, the grout will be brittle and the color will be inconsistent. I have seen guys rush this and end up with grout that looks like marble cake. It is a sign of an amateur who is more worried about the clock than the quality of the finish.
“Ensure that the tile is fully bonded to the substrate to prevent movement that fractures the grout matrix.” – TCNA Handbook Standards
Regional moisture levels and cure times
Atmospheric humidity in regions like the Pacific Northwest or the Gulf Coast significantly slows evaporation during grout curing. High ambient moisture can trap hydration salts on the surface of the grout, leading to a white haze or mottled finish. In dry climates, the evaporation happens too fast, which can starve the cement of the water it needs to harden. You have to play the weather. If you are in a swampy area, you might need a fan to keep the air moving. If you are in the desert, you might need to damp-cure the joints with a mist of water so they do not turn to dust. Understanding grout restoration secrets for long lasting results is about more than just cleaning; it is about managing the environment from day one.
Fixing the aesthetic disaster
Grout colorant is the only reliable solution for severely blotchy grout once the curing process is complete. These epoxy-based stains penetrate the porous cement to provide a uniform appearance and an impermeable seal. This is often the only way to save a shower installation without grinding out all the joints and starting over. If the blotchiness is mild, sometimes a deep clean with an alkaline cleaner can lift the efflorescence. You can find more tile cleaning tips for a sparkling bathroom in 2025 that address surface minerals. But if the problem is deep in the chemistry of the mix, you are looking at a colorant or a complete redo. Do not let anyone tell you that it will just even out over time. Grout does not get better with age. It only gets dirtier. If you need help with a failing installation, you should contact us before you make it worse with the wrong chemicals.
The hidden danger of baseboards and moisture
Baseboard transitions in bathrooms often hide moisture traps that contribute to grout failure at the floor-to-wall joint. If the waterproofing membrane is not integrated with the baseboard assembly, water can wick into the drywall and cause efflorescence to bleed into the perimeter grout lines. This is why modern designs often use tile baseboards rather than wood. Check out these chic baseboard designs that transform rooms in 2025 for ideas on how to handle these wet areas properly. A wood baseboard in a wet room is a sponge. It pulls water from the floor and holds it against the wall. That moisture eventually finds its way back into the grout, bringing tannins and salts with it. It is a recipe for a yellowed, blotchy mess at the edges of your beautiful new shower. Take the time to do the prep. Use a moisture meter. Measure your water. If you do not have the patience for the chemistry, you have no business doing the tile.
Comments
One response to “Why Your New Shower Grout is Drying Blotchy”
This article hits the nail on the head about the importance of proper prep work and understanding the chemistry behind grout installation. I recall a project where I neglected to check the moisture levels of the substrate, and the grout ended up with blotchy patches that looked terrible even after finishing. It’s fascinating how much the environment and mixing ratios influence the final outcome, often more than the material quality itself. I’ve started taking extra steps like using a moisture meter and ensuring even hydration, which has significantly improved my results. Has anyone experimented with different curing techniques tailored to their climate? For example, in dry desert areas or humid regions, what specific strategies have worked best to prevent discoloration and blotchiness? It seems mastering the environment plays a huge role, and I’d love to hear more approaches from fellow installers that have successfully mitigated these issues.