
The invisible rot hiding under your shower pan
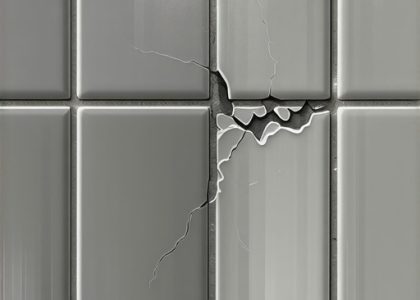
Waterproof shower leaks originate when the subfloor deflection exceeds the L/360 industry standard, which causes capillary action to pull moisture through micro-fractures in the cementitious grout. Fixing these leaks requires establishing a chemical bond between the tile assembly and the waterproofing membrane beneath the surface. I spent three days grinding concrete on a job last month just so the floor wouldn’t click like a castanet. Most guys skip the leveling compound. They think the underlayment will hide the dip. It won’t. I smelled the damp rot the second I pulled the first tile. The homeowner thought it was just a loose grout line. It was actually a failing subfloor that had turned into a sponge because the installer didn’t understand how water moves through a substrate. We are talking about physics, not aesthetics. If your subfloor moves by even a fraction of an inch, your grout is going to crack. It is inevitable. When grout cracks, gravity does the rest, pulling soap scum and hard water into your joists. You can try to refresh grout without replacing it, but if the structural integrity is gone, you are just putting a bandage on a broken leg.
“A floor is only as good as the subfloor beneath it; deflection is the enemy of every joint.” – Master Flooring Axiom
The epoxy resin solution for permanent moisture barriers
Epoxy grout technology utilizes a two-part resin system that creates a non-porous surface with a compressive strength exceeding 8,000 psi. Unlike traditional cement grout, epoxy does not require sealing and is impermeable to water, making it the superior choice for wet area restoration in 2026. The chemistry here is fascinating. You are mixing a resin with a hardener. This creates a cross-linked polymer chain that water molecules simply cannot penetrate. I have seen guys try to use cheap big-box store grout in high-moisture showers. It is a disaster waiting to happen. Cement grout is basically a hard sponge. It has tiny holes that allow water to seep through via vapor transmission. Epoxy changes the game. It is sticky, hard to work with, and requires a fast hand, but once it cures, it is like stone. If you want grout restoration secrets for long lasting results, you start by digging out that old, sandy junk and replacing it with a high-grade epoxy. It smells like a chemical plant for a few hours, but it will outlast the house itself.
| Grout Type | Porosity Level | Compressive Strength | Cure Time |
|---|---|---|---|
| Standard Cement | High (10-15%) | 3,000 psi | 72 Hours |
| Modified Polymer | Medium (5%) | 5,000 psi | 48 Hours |
| High-Performance Epoxy | Zero (0.01%) | 8,000+ psi | 24 Hours |
The movement joint that saves your subfloor
Movement joints are essential flexible transitions placed at the change of plane where walls meet floors to accommodate thermal expansion and structural shifting. Using 100 percent silicone sealant instead of hard grout in these corners prevents stress fractures that lead to catastrophic leakage paths. Think about the physics of a house. It moves. It breathes. When the humidity hits 80 percent in the summer, your wood framing swells. When the heater kicks on in the winter, it shrinks. If you have hard grout in your corners, something has to give. That something is usually the bond between the grout and the tile. That tiny crack is all a leak needs. I always tell clients to look at their chic baseboard designs near the shower. If you see the paint peeling or the wood swelling, your corner joints have failed. You need a color-matched 100 percent silicone. Do not use caulk labeled as siliconized acrylic. It is garbage. You need the pure stuff that stays flexible forever. It acts as a shock absorber for your tile assembly.
The precise steps for a leak proof shower floor
Shower floor repair involves the mechanical removal of failed grout followed by a deep decontamination of the tile interstices using isopropyl alcohol. A 2026-grade repair requires vacuuming the channels to ensure no residual dust interferes with the molecular bond of the new sealant. Here is your checklist for the job. Do not skip any of these steps if you want it to last.
- Remove at least 2/3 of the depth of the old grout using a diamond-grit hand tool.
- Vacuum the joints with a HEPA-filtered shop vac to remove every speck of silica dust.
- Wipe the tile edges with 90 percent isopropyl alcohol to remove soap film and body oils.
- Check the moisture content of the subfloor using a pinless meter; it must be below 12 percent.
- Apply the epoxy grout in small sections, cleaning as you go to avoid resin haze.
- Use a closed-cell grout float to force the material to the bottom of the joint.
- Finish the perimeter with a high-movement silicone bead.
“Waterproof membranes are the primary line of defense, but the grout is the shield that protects the system from hydrostatic pressure.” – Tile Council of North America Guidelines
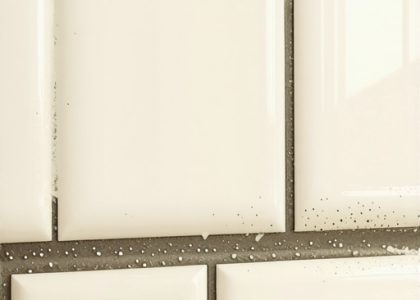
Why baseboards are the first victims of a bad drain
Baseboard water damage serves as a primary indicator of a failing shower pan or a compromised grout system that is allowing wicking action to occur. When water gets behind the tile, it travels along the waterproofing flange and finds the easiest exit, which is usually the drywall-to-floor transition. This is where baseboards makeover ideas become more than just a cosmetic upgrade. They become a diagnostic tool. If you see a dark stain at the bottom of your trim, stop. Do not just paint over it. The water is telling you that your shower floor is failing. We often see this in showers with a style that focuses on small mosaics. Mosaics have more grout lines. More grout lines mean more potential points of failure. In 2026, we are seeing a shift toward larger format tiles to reduce these risks, but regardless of tile size, the perimeter must be sealed perfectly. Using tile cleaning tips that involve harsh acids can actually eat away at your grout over time, leading to these very leaks. Use a pH-neutral cleaner to keep your repairs intact for the long haul.
![Shower Tile Rattling? 3 Grout Fixes That Actually Work [2026]](https://elegantfloorz.com/wp-content/uploads/2026/04/Shower-Tile-Rattling-3-Grout-Fixes-That-Actually-Work-2026-420x300.jpeg)

This article highlights some critical points I’ve seen overlooked often in shower repair projects. The emphasis on testing subfloor moisture content below 12 percent is so important, yet many skip this step and end up with recurring issues. I particularly agree with the use of epoxy grout; its durability in high-moisture environments really can’t be beat. I’ve had success replacing traditional grout with epoxy in my recent bathroom renovations, and the longevity has been remarkable. The part about movement joints resonated with me too—flexibility in those joints prevents stress fractures that lead to leaks long-term. I’m curious, has anyone experimented with different silicone brands in this context? I’ve noticed some silicones last longer and stay flexible better than others. Would love to hear others’ experiences on what sealant brands have worked well over years of use. Also, do you think the industry standards for subfloor deflection are being consistently enforced in residential projects today? Would be great to get more insights on that.