Most guys skip the leveling compound. They think the underlayment will hide the dip. It won’t. I spent three days grinding concrete on a job last month just so the floor wouldn’t click like a castanet. That job was for a client who demanded the 2026 minimalist look where the tile meets the wall with zero overlap. No chunky baseboards to hide my mistakes. No quarter round to cover a lazy cut. When you are working with flush transitions, the subfloor is the only thing that matters. If that slab is out by even an eighth of an inch over ten feet, your shadow line will look like a mountain range. I live for these details. I want the lines to be so clean they look like they were rendered in a computer program, but achieving that in the physical world requires a deep understanding of structural engineering and adhesive chemistry.
The shadow gap revolution
The shadow gap transition utilizes a recessed aluminum profile to create a visual break between the floor tile and the wall, eliminating the need for traditional baseboards. This method relies on Z-profile reglets, anodized aluminum finishes, and precise drywall termination to achieve a floating wall effect. It requires a perfectly level substrate to maintain a consistent 1/2-inch reveal throughout the entire perimeter of the room. This is not a project for a weekend warrior. It requires the drywallers and the tile setters to be in perfect sync. The wallboard must be held up exactly to the height of the reglet, and the tile must be set with a thin-set mortar that has zero slump. If the tile sinks during the curing process, the shadow gap will be uneven, ruining the architectural intent. I prefer using a high-bond, polymer-modified thin-set that meets ANSI A118.15 standards for these installations because it provides the structural integrity needed to support large format tiles without shifting.
“A floor is only as good as the subfloor beneath it; deflection is the enemy of every joint.” – Master Flooring Axiom
Recessed baseboards for architectural depth
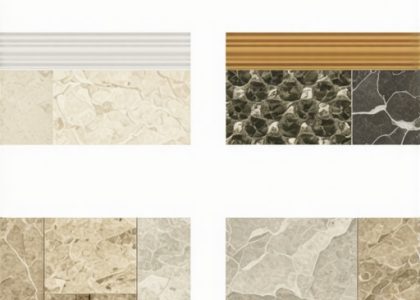
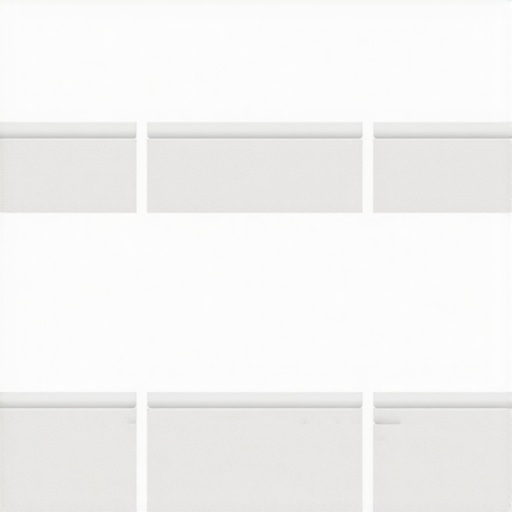
Recessed baseboards involve installing a baseboard material so that it sits flush with the surface of the finished wall, creating a single continuous plane from floor to ceiling. This transition uses aluminum base-shoe profiles, moisture-resistant MDF or hardwood inserts, and shadow-line beads to bridge the gap between the tile and the vertical surface. To execute this properly, the framing must be blocked out before the drywall is even hung. You are essentially carving a notch into the bottom of the wall for the baseboard to live in. For homeowners looking to upgrade their space, exploring baseboards makeover ideas to elevate your space can provide inspiration for these integrated systems. The technical challenge here is the expansion gap. You cannot simply butt the tile against the recessed base. You need a 1/16-inch silicone joint that matches the grout color to allow for the natural movement of the structure.
Transition Material Comparison
| Transition Type | Required Clearance | Installation Difficulty | Structural Impact |
|---|---|---|---|
| Shadow Gap Reglet | 1/2 Inch | High | High (Drywall Mod) |
| Recessed Base | Zero (Flush) | Expert | Framing Prep Needed |
| Kerf-Cut Wood | 1/8 Inch | Moderate | Minimal |
| Metal L-Angle | 1/16 Inch | Moderate | Low |
Why your subfloor is lying to you
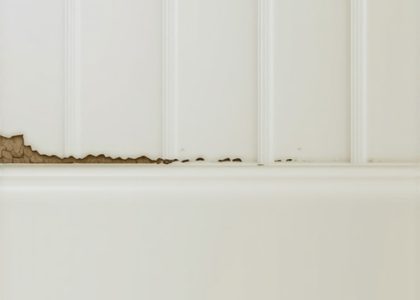
Subfloor flatness is the most ignored variable in modern flooring, yet it determines the success of every flush tile-to-baseboard transition. A subfloor must meet ASTM F710 standards, requiring no more than 1/8 inch of variation over 10 feet for large format tiles. If your concrete slab has a high spot, the tile will teeter. If there is a low spot, the tile will bridge, creating a hollow sound and eventually cracking under load. I spend more time with a 10-foot straightedge and a grinder than I do with a trowel. We have to look at the moisture vapor transmission rate (MVTR) as well. If you seal a floor that has too much internal moisture, that moisture will move to the perimeter. In a flush transition, that moisture can wick up into the drywall or the recessed baseboard, causing mold or swelling. This is why I always use a moisture barrier even if the tile is considered waterproof.
The precision of metal reglets
Metal reglets are specialized architectural profiles designed to create a clean termination point for both the wall material and the floor tile. These profiles are often made from 6063-T5 aluminum and serve as a straight-edge guide for both the tile installer and the taper. When we talk about 2026 trends, these metal lines are becoming the standard for high-end residential work. They provide a crisp, industrial edge that traditional wood trim cannot match. When installing these in a bathroom, I make sure the reglet is integrated with the waterproofing membrane. For those designing modern wet rooms, showers that wow often feature these same metal profiles to maintain a consistent visual language. The chemical bond between the aluminum and the thin-set is also a factor. I always wipe down the profiles with denatured alcohol to remove any factory oils that might interfere with adhesion.
“The tile installation shall not exceed a maximum allowable deflection of L/360 under all live and dead loads.” – TCNA Handbook
The chemistry of the bond
The success of a flush transition depends on the chemical properties of the grout and adhesive used at the junction point. High-performance epoxy grouts or polyurethane sealants are preferred over standard cementitious grout because they offer flexural strength and stain resistance. Standard grout is brittle. If the house settles, the grout at the flush transition will crack. I use a 100% silicone sealant for the final perimeter joint. It remains flexible forever. This is vital in climates like the desert Southwest where high heat causes materials to expand significantly, or in the humid Southeast where wood framing swells. If you do not account for this expansion, the force of the floor moving can actually pop the tile off the thin-set bed. Keeping these lines clean is also a maintenance task. I recommend following tile cleaning tips for a sparkling bathroom to prevent soap scum from building up in the shadow gap, which can be difficult to scrub out.
Zero threshold challenges in wet areas
Creating a zero-threshold transition from a bathroom floor into a shower requires a perfect pitch and a flush baseboard alignment to prevent water migration. This involves pre-sloped mortar beds, liquid-applied membranes, and linear drainage systems. The baseboard in a wet area should ideally be a continuation of the floor tile, ripped down to a 2-inch height and recessed into the wall. This prevents water from sitting on a ledge. If the grout in these areas starts to fail, it can lead to subfloor rot. You can learn about grout restoration secrets for long lasting results to understand how to keep these critical joints sealed over time. I always double-waterproof the wall-to-floor junction using a fabric-reinforced tape embedded in the membrane. It is the only way to sleep at night when you are doing flush work.
Pre-Installation Checklist
- Verify subfloor flatness within 1/8 inch over 10 feet.
- Check moisture levels in the slab using calcium chloride tests.
- Ensure drywall is hung with a consistent gap for reglet insertion.
- Confirm tile batch consistency to avoid thickness variations.
- Test thin-set bond strength on the specific substrate.
- Vacuum all expansion joints to remove debris before sealing.
Maintaining the invisible line
A flush transition remains effective only if the junction is maintained and the materials are protected from structural shifts. Over time, the house will move. This is a fact of physics. You must inspect the perimeter joints every few years. If the silicone has pulled away from the tile or the wall, it needs to be replaced immediately to prevent moisture from entering the wall cavity. This is especially true for modern minimalist homes where there is no trim to hide a small gap. The purity of the design is its greatest strength and its greatest weakness. One crack ruins the whole effect. I tell my clients that a minimalist floor is a high-maintenance choice. It is like owning a high-performance sports car. It looks incredible, but you have to keep it tuned. For those interested in the longevity of their floors, using chic baseboard designs that utilize these flush metal profiles is the best way to ensure a timeless look that doesn’t feel dated by 2030. Quality materials and structural integrity will always outlast cheap trends.