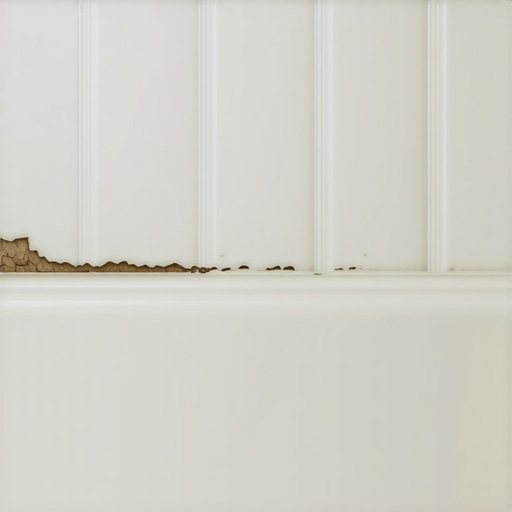
The shadow gap in a modern bathroom is a silent killer of drywall and health. Most installers think it is just a visual line for aesthetic depth. It is actually a highway for spores and moisture. I spent three days grinding concrete on a job last month just so the floor would not click like a castanet and the baseboards would sit flush. I once pulled up a forty dollar per linear foot marble baseboard in a high rise where the installer skipped the self leveling underlayment. Because the floor dipped a quarter inch over four feet, the baseboard had a shadow gap they tried to fill with cheap latex caulk. The humidity from the shower turned that caulk into a petri dish. When I pried it off, the drywall behind it was mush. This is why we focus on the physics of the installation rather than just the paint color.
The physics of the shower shadow gap
Shadow gap mold occurs when hydrostatic pressure and capillary action pull moisture into the unsealed voids between the tile floor and the baseboard trim. This micro climate is fueled by high humidity and poor ventilation, leading to fungal growth within the wall cavity and drywall substrate. Most guys skip the leveling compound. They think the underlayment will hide the dip. It will not. When you have a gap, you have a pocket of air that cools faster than the rest of the room. This cooling causes condensation. That condensation has nowhere to go because it is trapped behind a piece of decorative wood or PVC. Over time, the moisture wicks into the bottom of the gypsum board. You will not see it until the black spots start blooming near the floor. We are talking about molecular level saturation. The water molecules find their way into the tiniest pores of your grout and sit there.
“A floor is only as good as the subfloor beneath it; deflection is the enemy of every joint.” – Master Flooring Axiom
Why your subfloor is lying to you
Subfloor flatness is the primary reason for baseboard gaps and structural mold in modern bathrooms. According to TCNA standards, a subfloor must be flat within one eighth inch over a ten foot radius to prevent baseboard separation and moisture accumulation. I have seen slabs that look like the rolling hills of Kentucky. If you slap a rigid baseboard on a wavy floor, you are inviting disaster. You need to use a mechanical grinder to knock down the high spots. Use a high flow self leveling underlayment for the low spots. If the floor is not dead flat, the baseboard will hover. That hover is the shadow gap. You might think you can just caulk it away. You are wrong. Caulk is a bridge, not a structural fix. When the house shifts or the temperature changes, that bridge breaks. For more ideas on how to handle these transitions, look at chic baseboard designs that transform rooms in 2025 to see how pros handle the visual aspect while I handle the structural side.
The chemical reality of shower grade adhesives
Advanced MS Polymers and one hundred percent silicone are the only adhesives capable of resisting mold growth in high moisture zones like showers. These chemical bonds provide hydrophobic properties that prevent water penetration into the baseboard gap while maintaining elasticity for thermal expansion. If you are using standard construction adhesive in a bathroom, you are failing your client. Those adhesives are often organic based. Mold loves organic bases. It is literally food for the spores. You need a polymer that does not break down when exposed to constant steam. Think about the mil thickness of your adhesive layer. Too thin and it cracks. Too thick and it never fully cures in the center. I prefer a modified silane polyether. It cures with moisture from the air and creates a bond that is stronger than the materials it is joining.
The five hidden baseboard fixes for 2026
PVC baseboards, aluminum profiles, and integrated gaskets represent the five hidden fixes for eliminating shadow gap mold. By utilizing non porous materials and mechanical sealing, you can create a waterproof barrier that protects the wall assembly from vapor drive and liquid water. First, stop using pine baseboards in wet areas. I do not care how well you paint them. They are sponges. Second, use a backer rod in any gap larger than three sixteenths of an inch. This gives the caulk two points of contact instead of three, allowing it to stretch. Third, consider a recessed baseboard profile. This moves the joint away from the floor level where water pools. Fourth, apply a bead of silicone to the back of the baseboard, not just the top edge. This creates a secondary gasket. Fifth, use grout restoration techniques if the floor to wall joint is already failing. Check out grout restoration secrets for long lasting results to understand how to fix a failing seal before the mold takes over.
| Material | Moisture Resistance | Expansion Rate | Installation Difficulty |
|---|---|---|---|
| Solid Pine | Low | High | Easy |
| Cellular PVC | Maximum | Moderate | Medium |
| Anodized Aluminum | Maximum | Low | High |
| MDF | Zero | Extreme | Very Easy |
The 2026 standard for moisture barriers
Waterproof membranes and liquid applied barriers must extend at least six inches up the wall studs before baseboard installation. This flashing technique ensures that any wicked moisture stays within the wet zone and does not rot the structural framing of the home. In the old days, we just slapped some tar paper down and hoped for the best. Now, we have vapor retarders with a perm rating of less than zero point one. In humid regions like Florida or the Gulf Coast, this is a legal necessity. The air is so heavy with water that it will find its way through your paint. If you do not have a continuous barrier from the floor to the wall, you are just building a moisture trap. I have seen guys install showers that wow modern designs for 2025 but forget the basic flashing at the floor. The result is a beautiful shower that has to be ripped out in three years.
The maintenance of the structural seal
Regular inspection and non abrasive cleaning are vital for maintaining the integrity of the baseboard seal. You must avoid harsh chemicals that degrade silicone bonds or grout structures, as chemical erosion leads to micro fractures where mold colonies establish root systems. If you see a crack, fix it immediately. Do not wait for the bathroom to smell like a damp basement. You can learn how to refresh grout without replacing it to keep those joints tight. A quick wipe down after a shower helps, but the real work is done by the ventilation system. If your fan is not pulling at least fifty cubic feet per minute, your baseboards are in danger.
- Verify subfloor flatness within 1/8 inch over 10 feet.
- Select cellular PVC or metal baseboards for wet zones.
- Use 100 percent silicone or MS Polymer adhesives.
- Install a continuous vapor barrier behind the trim.
- Ensure the bathroom fan is rated for the square footage.
“Subsurface flatness for large format tile must not exceed 1/8 inch in 10 feet from the required plane.” – TCNA Handbook for Ceramic, Glass, and Stone Tile Installation
While most people want the thickest underlayment, too much cushion actually causes the locking mechanisms on LVP or the grout lines on tile to snap under pressure. This creates new gaps for moisture to enter. You want stability, not a marshmallow under your feet. The 2026 standard is all about rigidity and chemical resistance. Stop treating your bathroom like a bedroom. It is a wet room. Treat it like the engineering challenge it is.